Archive for the 'Uncategorized' Category

Plum Sauce

August 16, 2013

DSC_2750

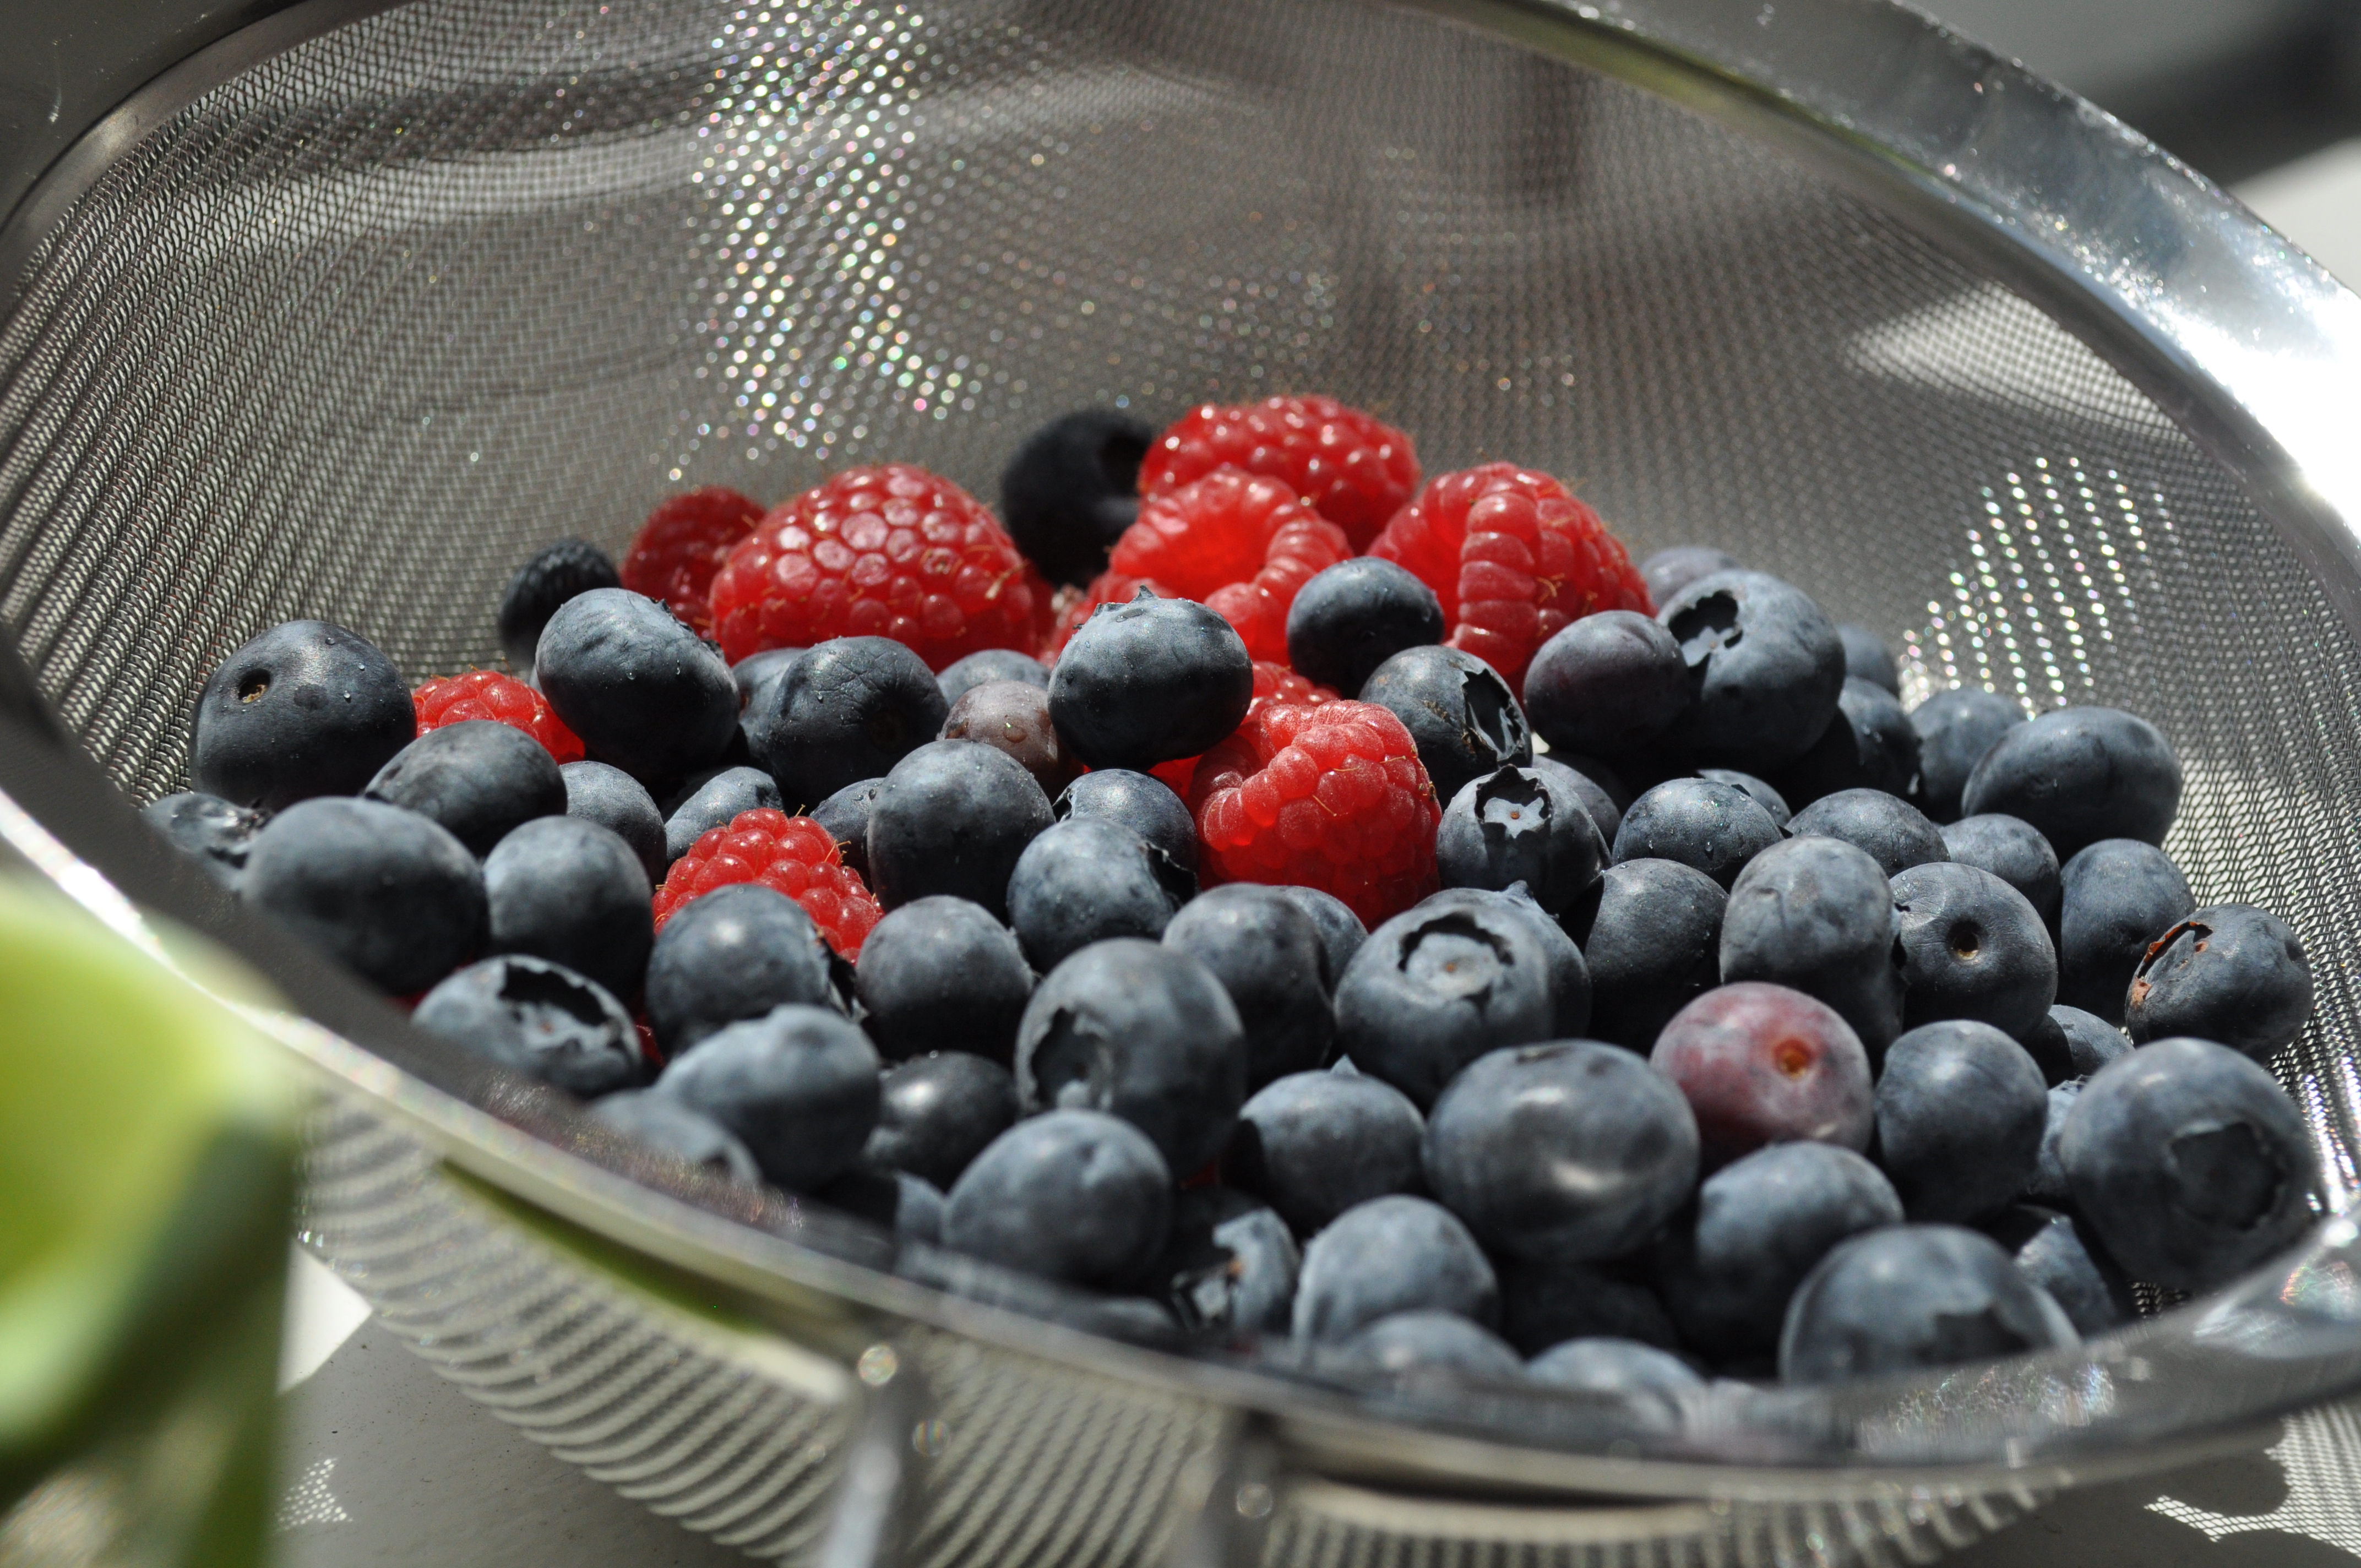
I don’t think I knew how to make a proper sundae at home until, at least, I was in middle school.  I lived off of McDonald’s hot fudge sundaes, of course, but never really believed that this could be made at home.  This was all until my sister went to a birthday party one year where, instead of a cake, they only had a sundae bar.  We immediately recreated it at home with ice cream, chocolate and caramel store-bought sauces, crushed cookies, sprinkles, whipped cream, and nuts (the kind that are stored in syrup – we do it right).  It was brilliant – filled with so much goodness!  I loved every single bite.

DSC_2731

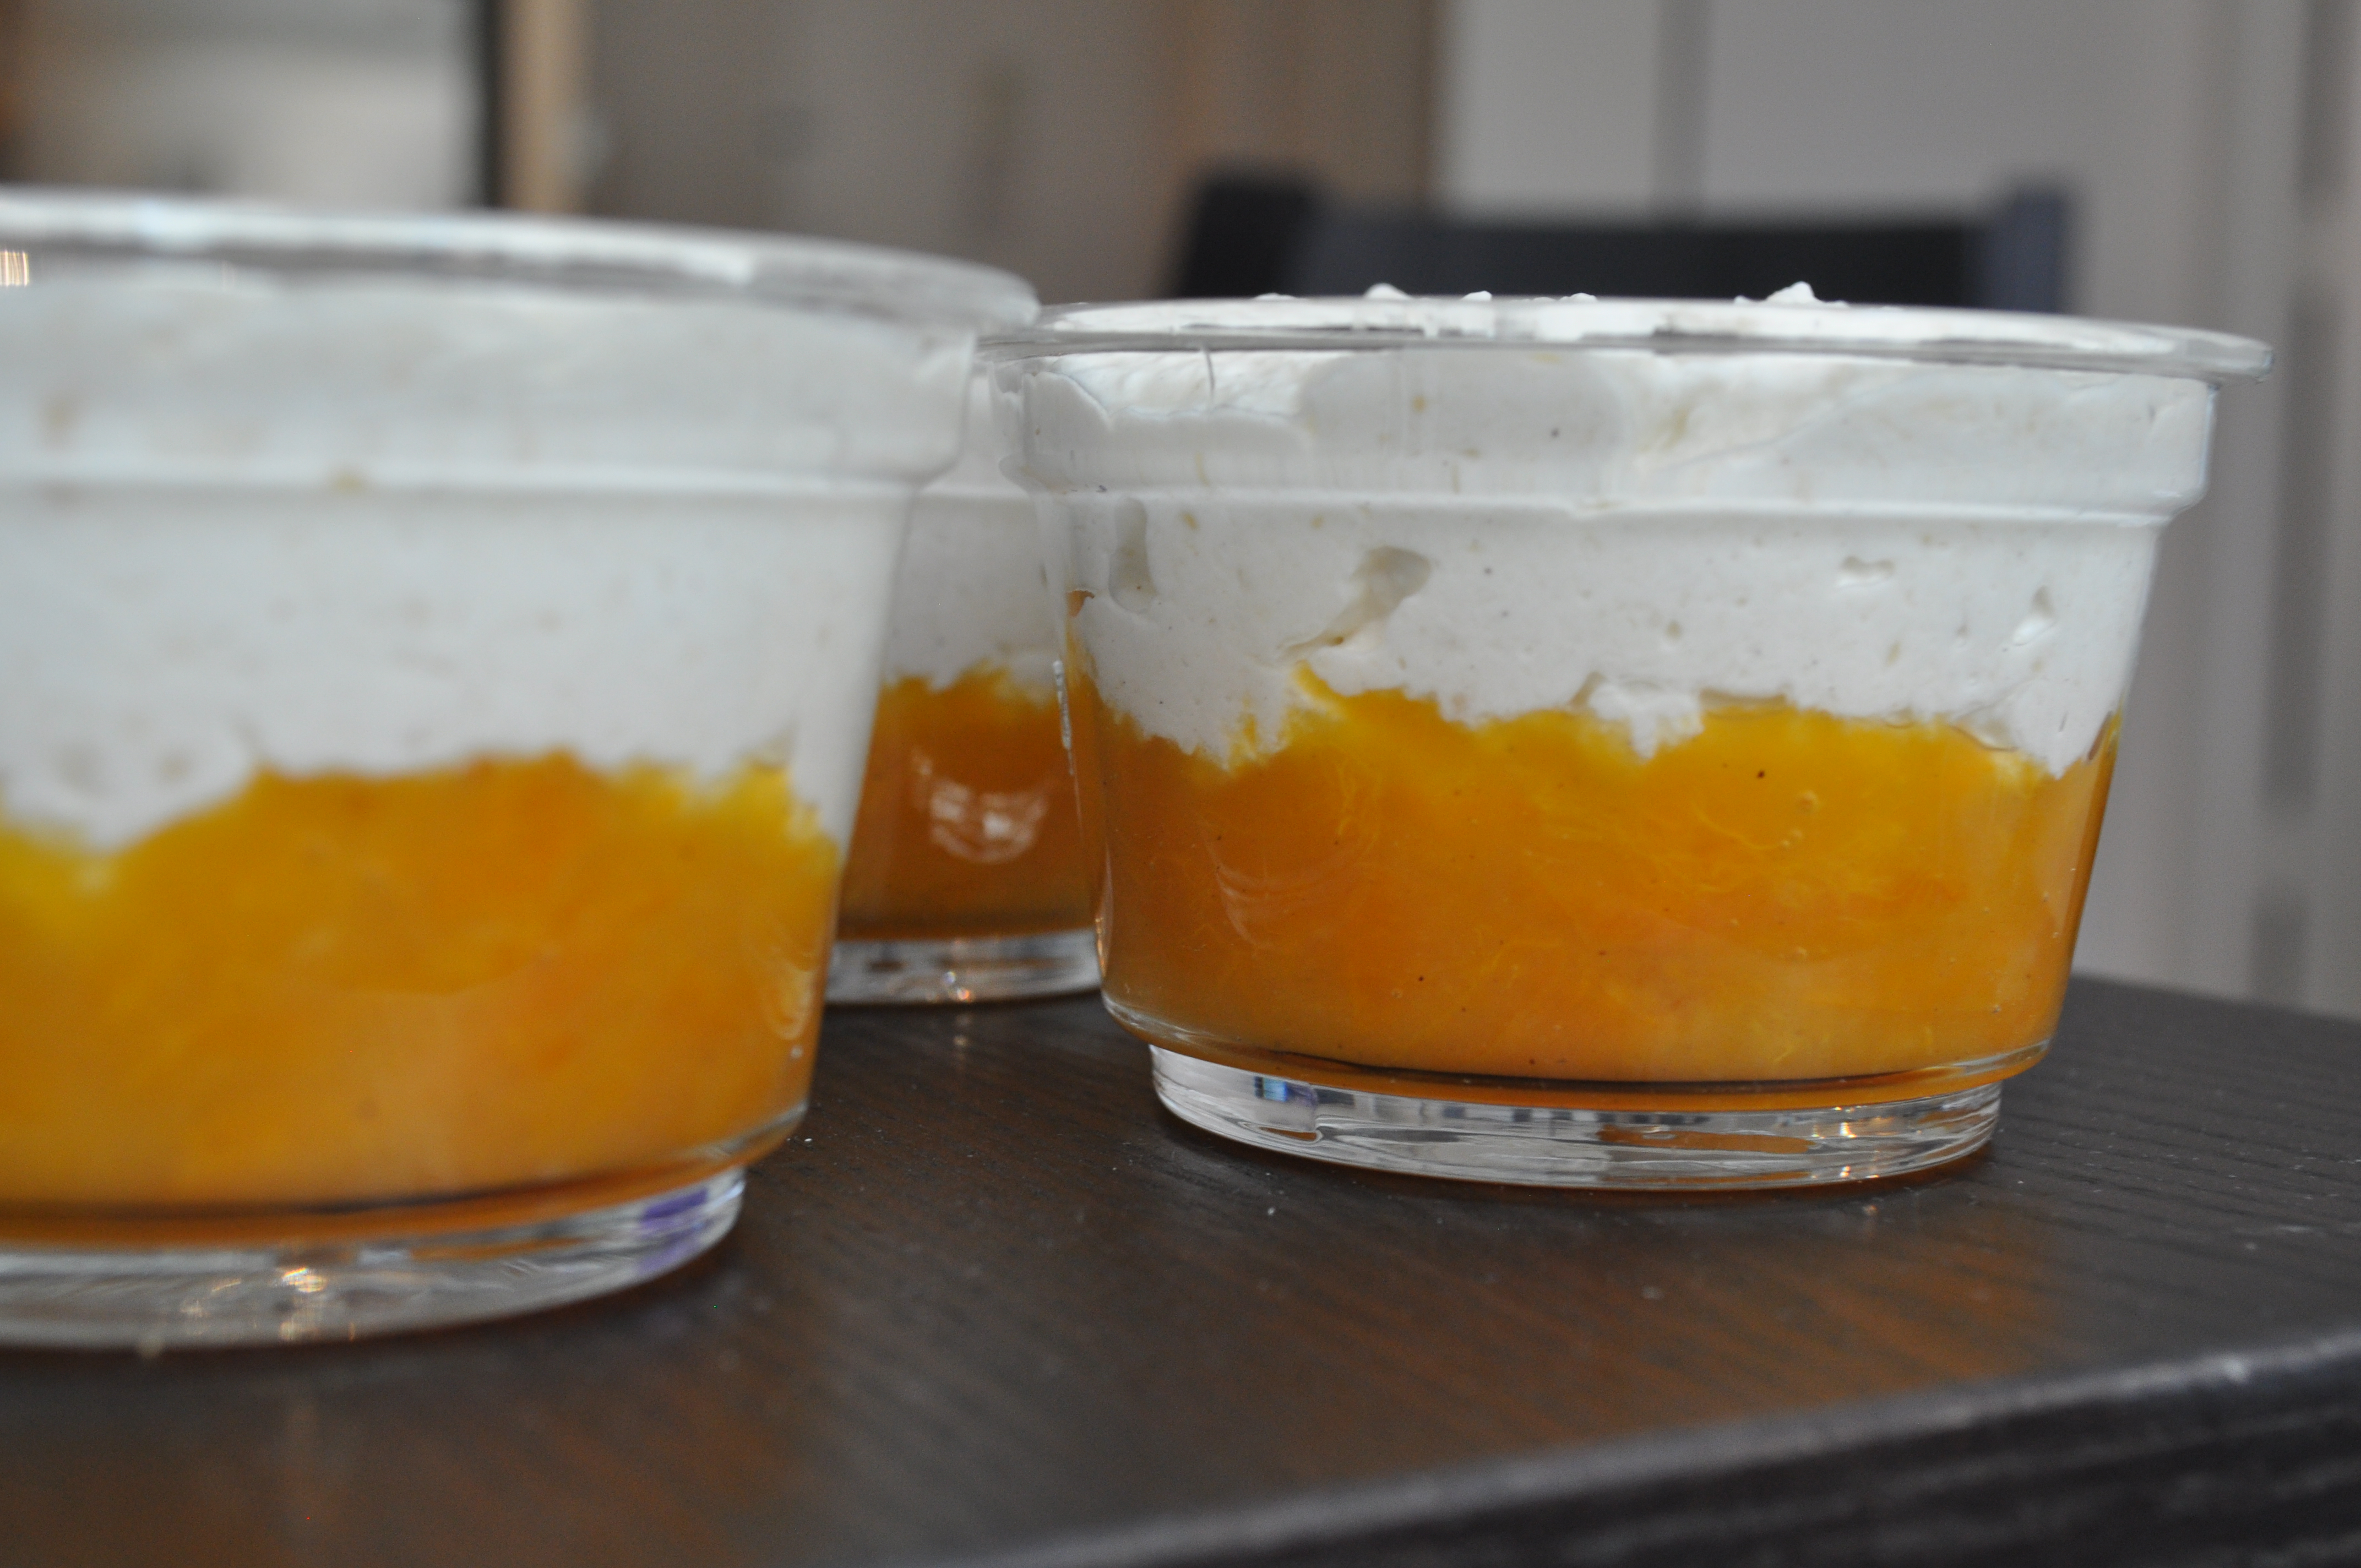
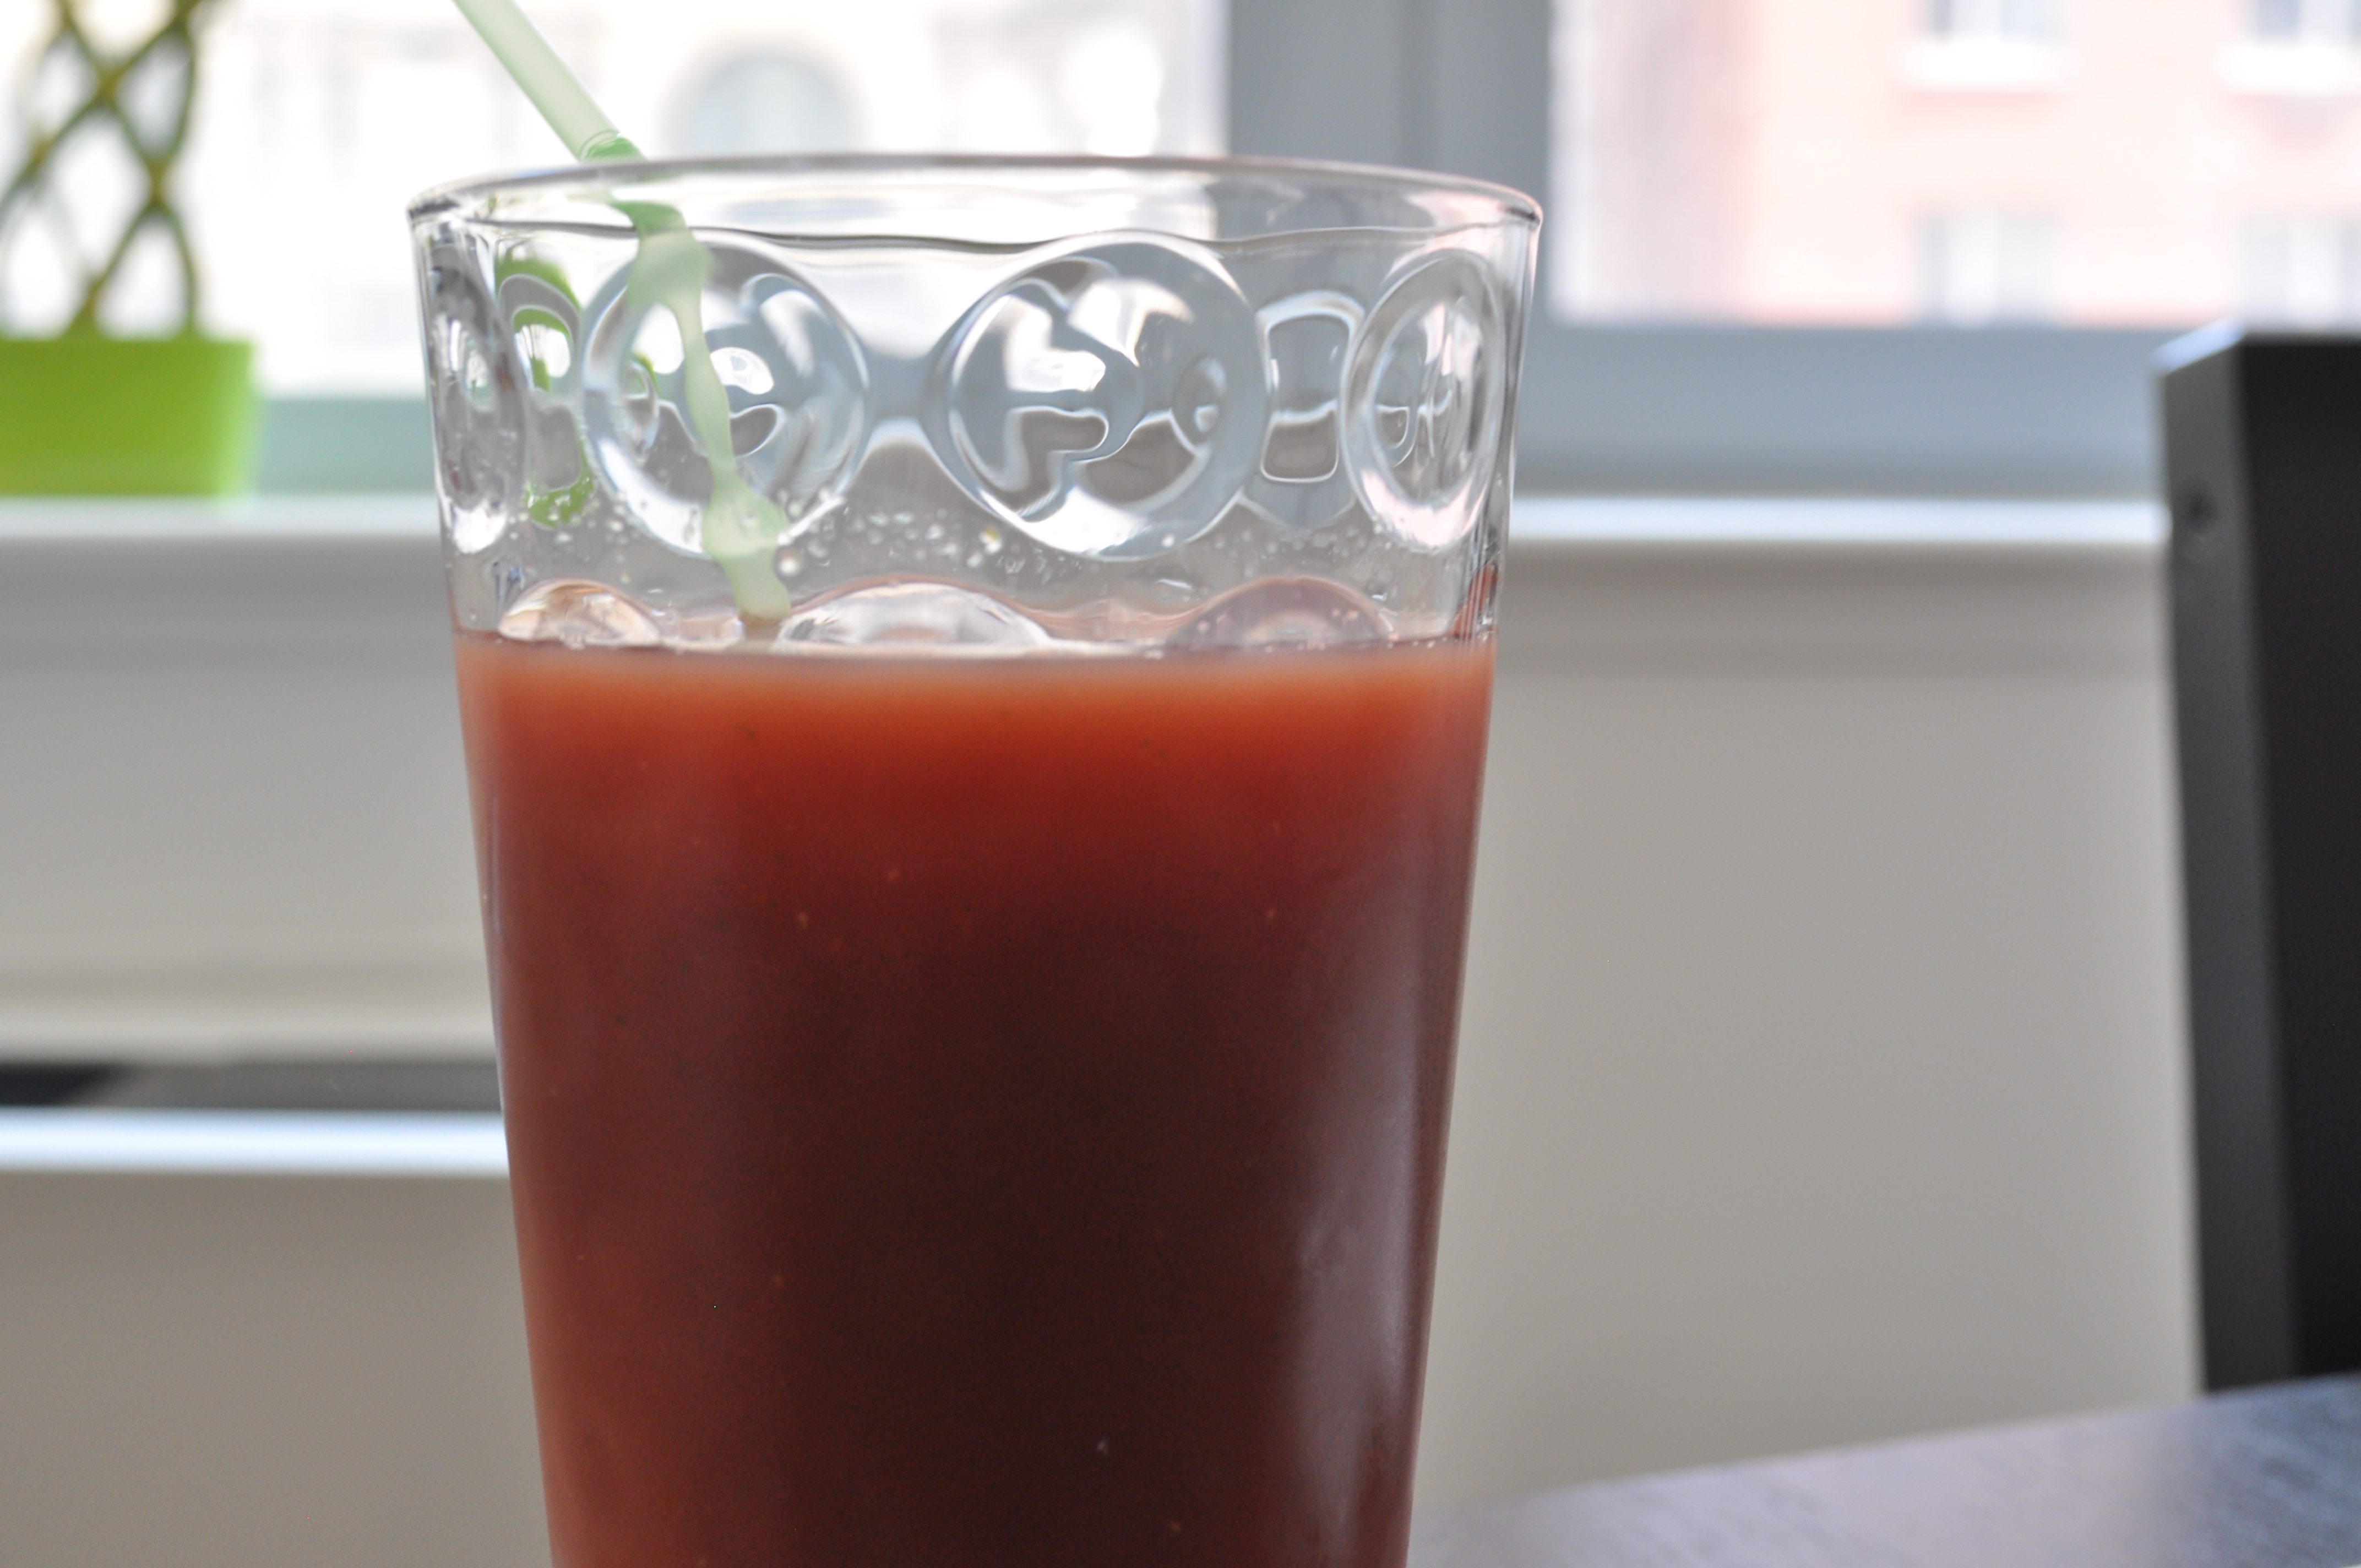
The reason I say this is because the one “topping” we ever had with our ice cream in the summer was plum sauce.  This, I may argue, is even more brilliant than any sundae bar.  But the reason I never equated this to any ice cream treat is because, my friends, we called this plum juice at home.  Oh yeah, it was as thick as a sauce.  And we definitely only had it with vanilla ice cream.  But, in our house, this was a juice.  And as a result, not an official ice cream topping to turn into a sundae.

DSC_2734

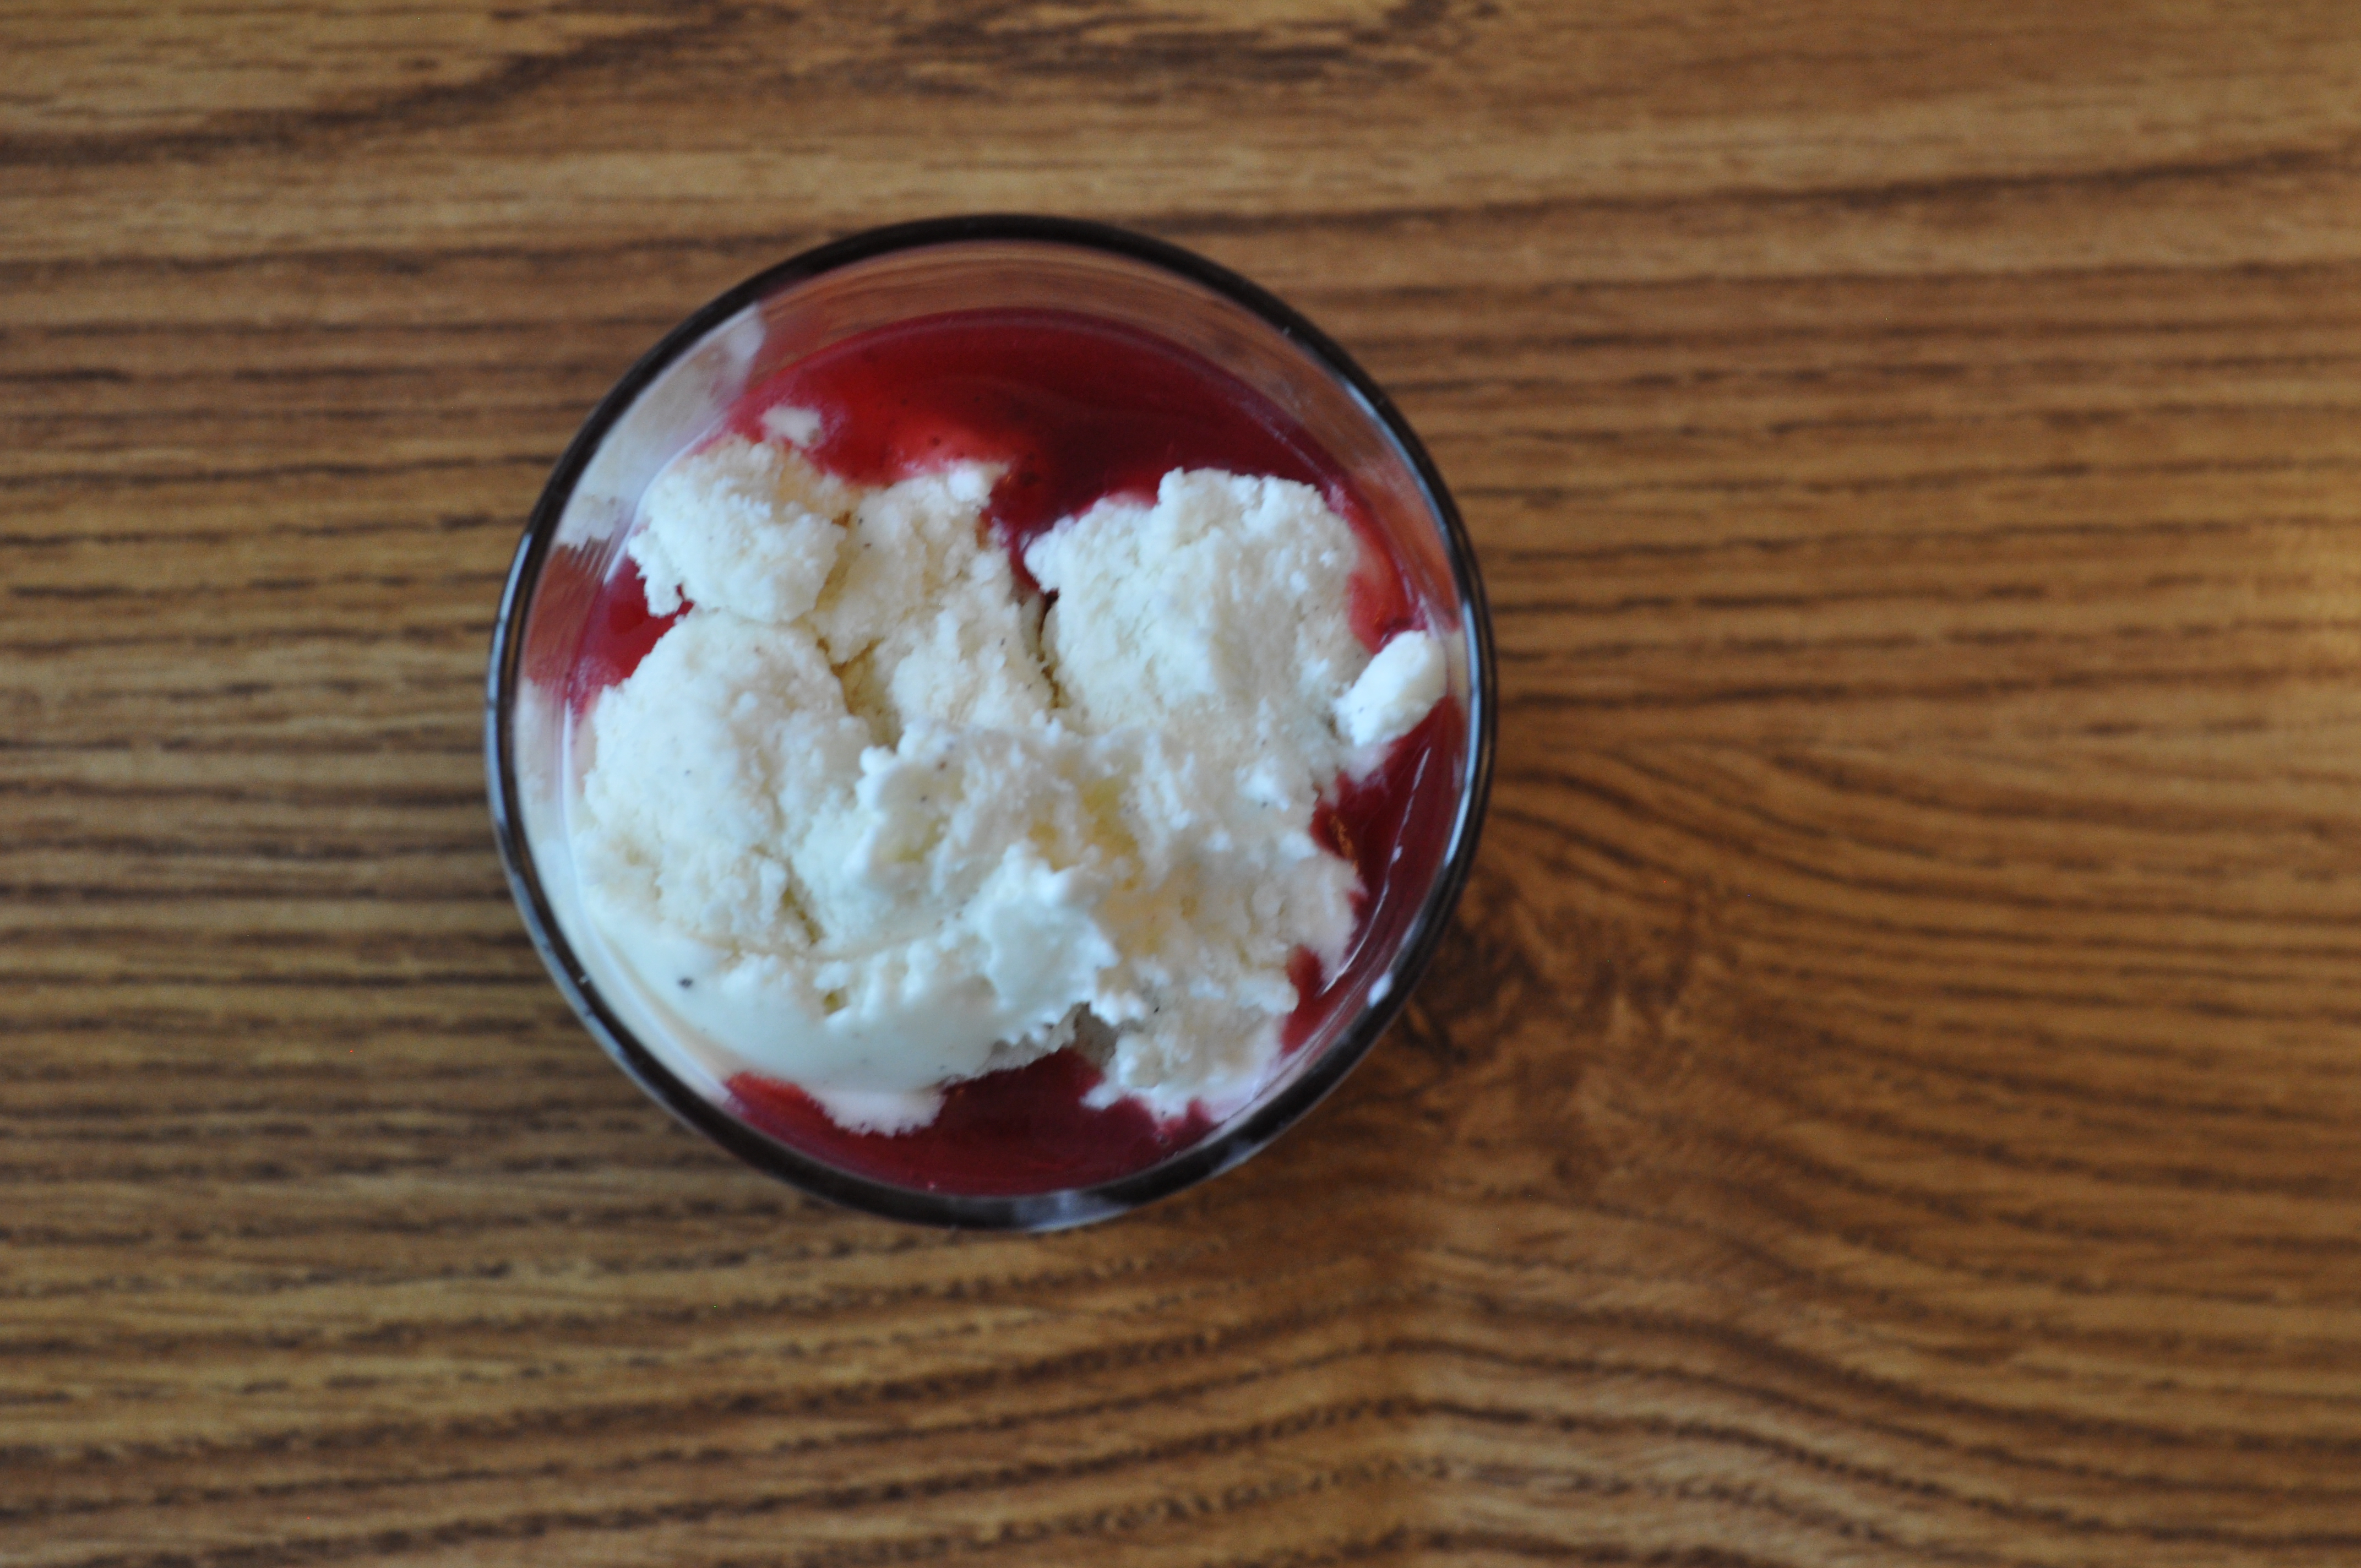
And why not, I say.  It’s made with fresh summer fruit.  And, well, that’s where the similarities end.  But good thing.  My mom’s flavorful sauce is tangy from the plums, flavored with sweet and salty, and finished with smoky Indian spices, that can only be cooled off with smooth vanilla ice cream.  I mean, this is some good stuff.  It basically needs no other toppings.  I’ll just have them with my hot fudge sundaes instead.

DSC_2742

Plum Sauce

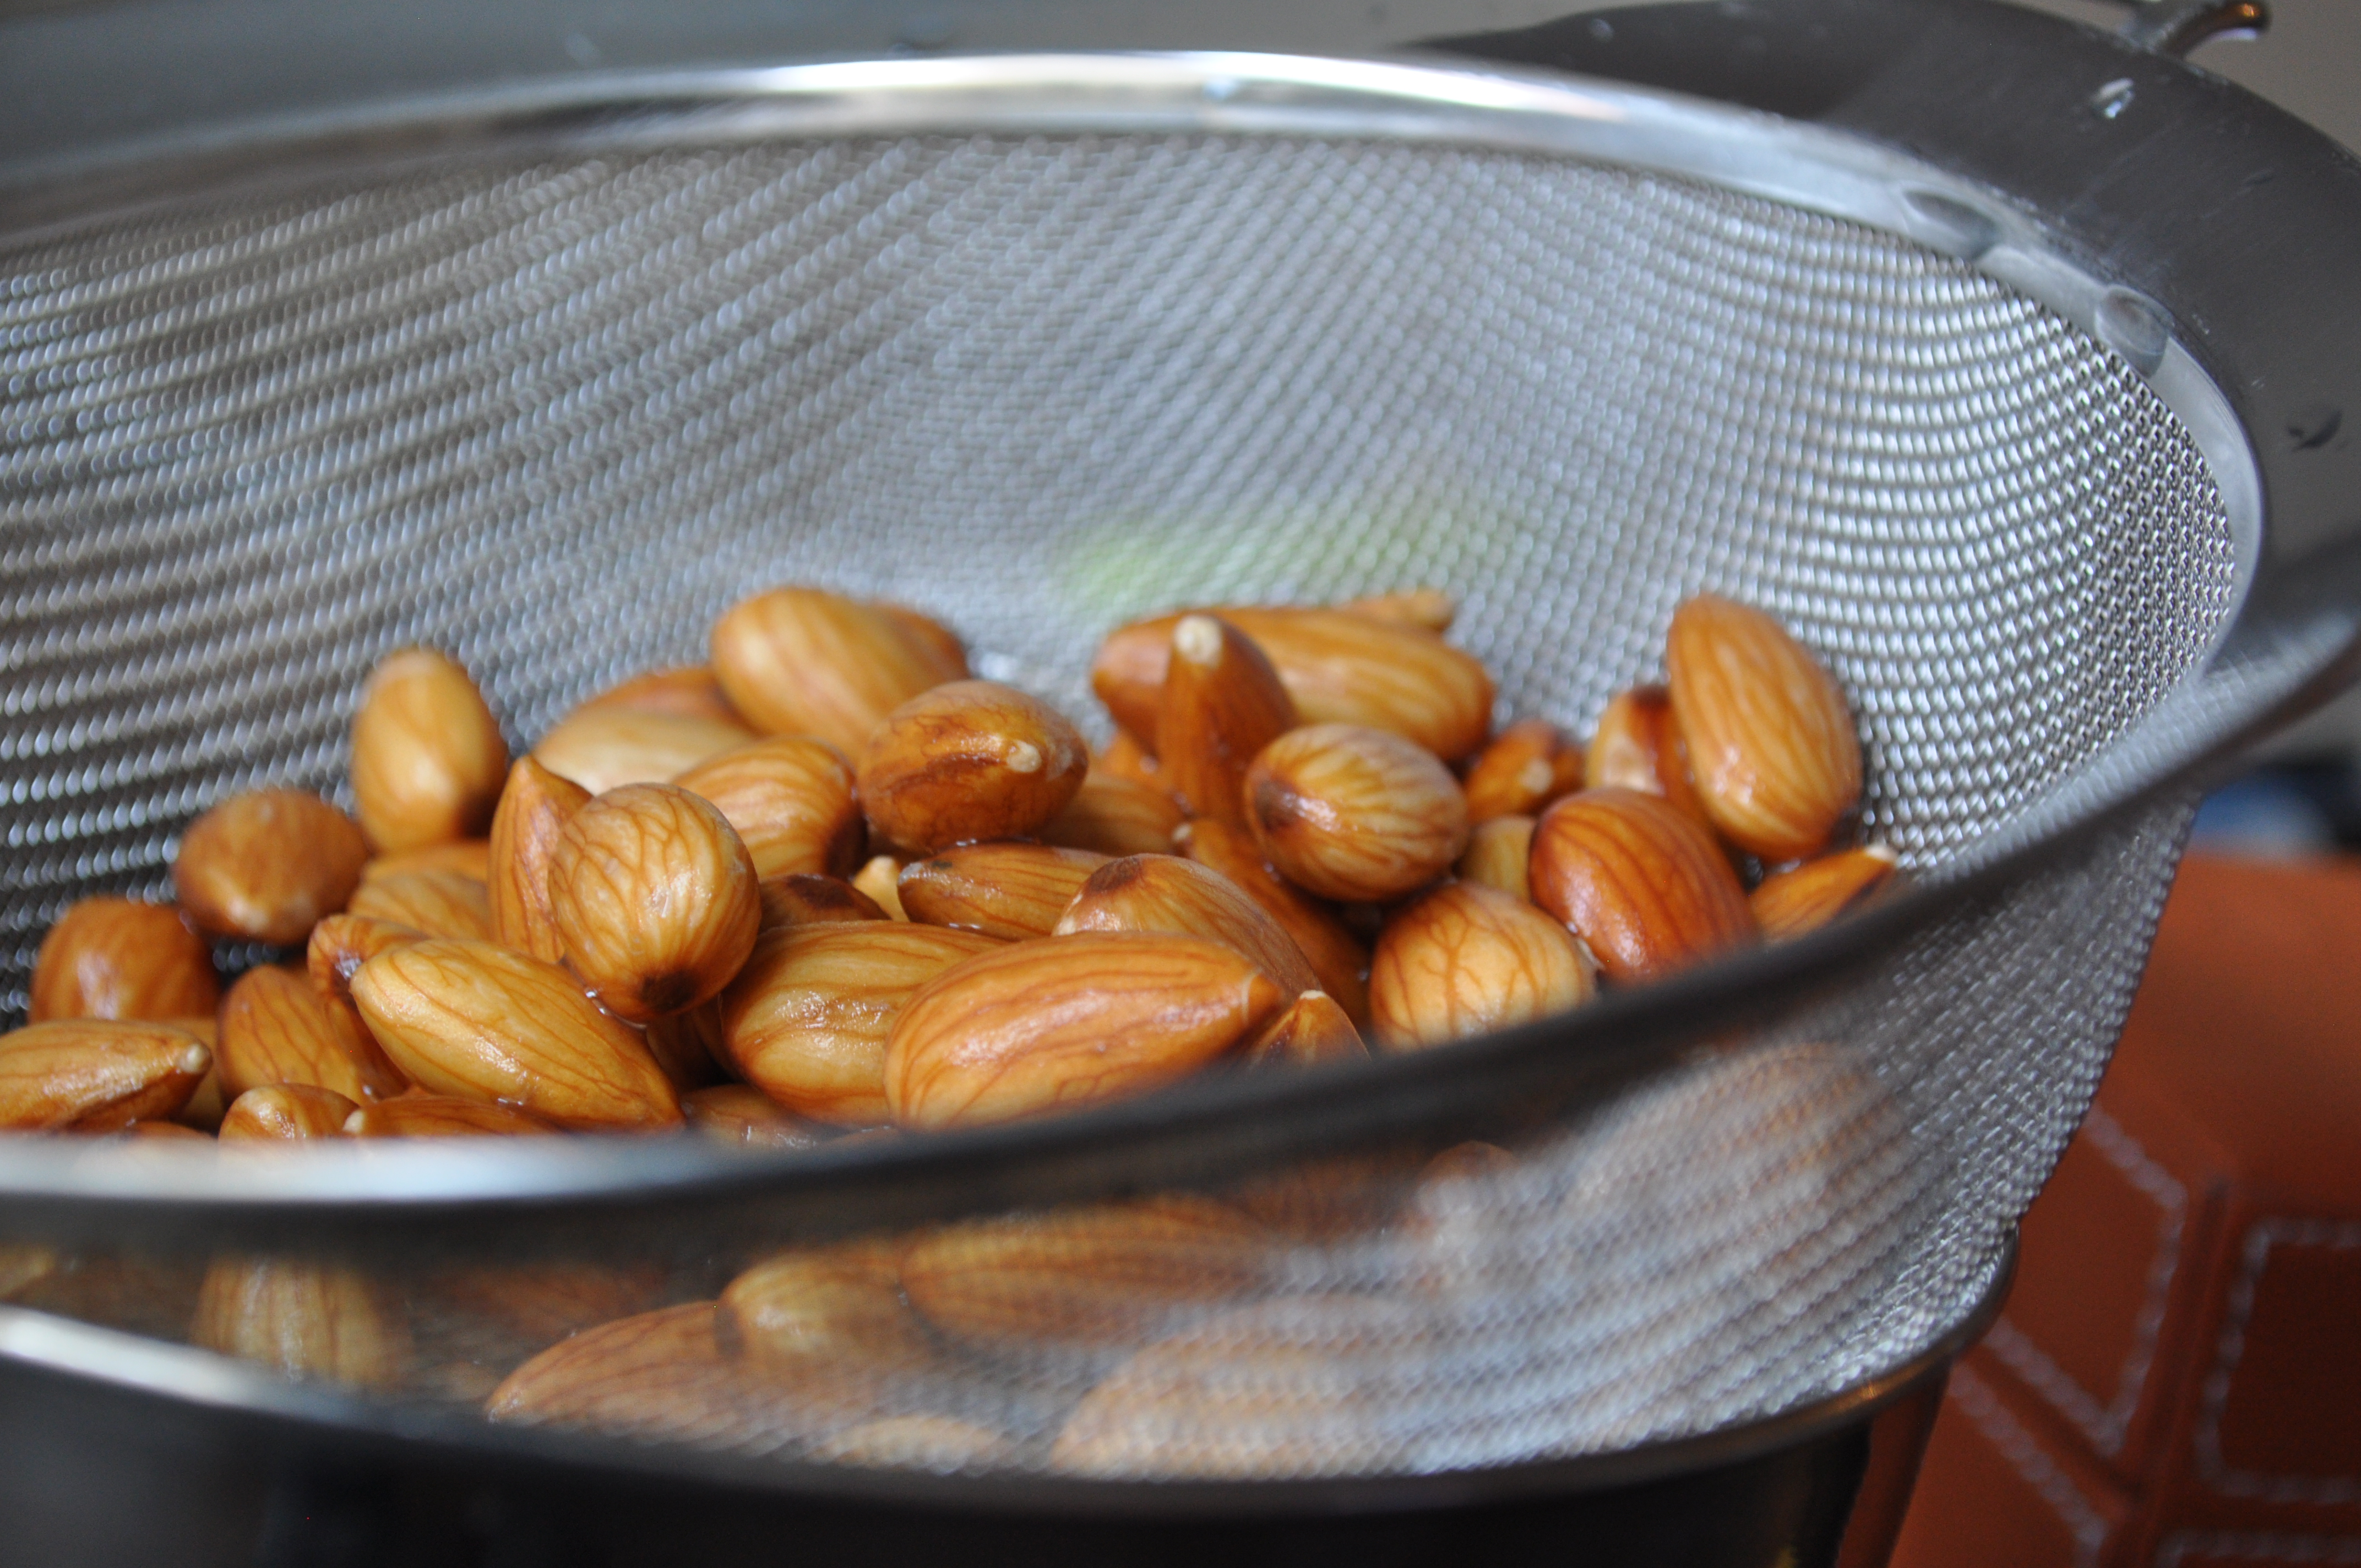
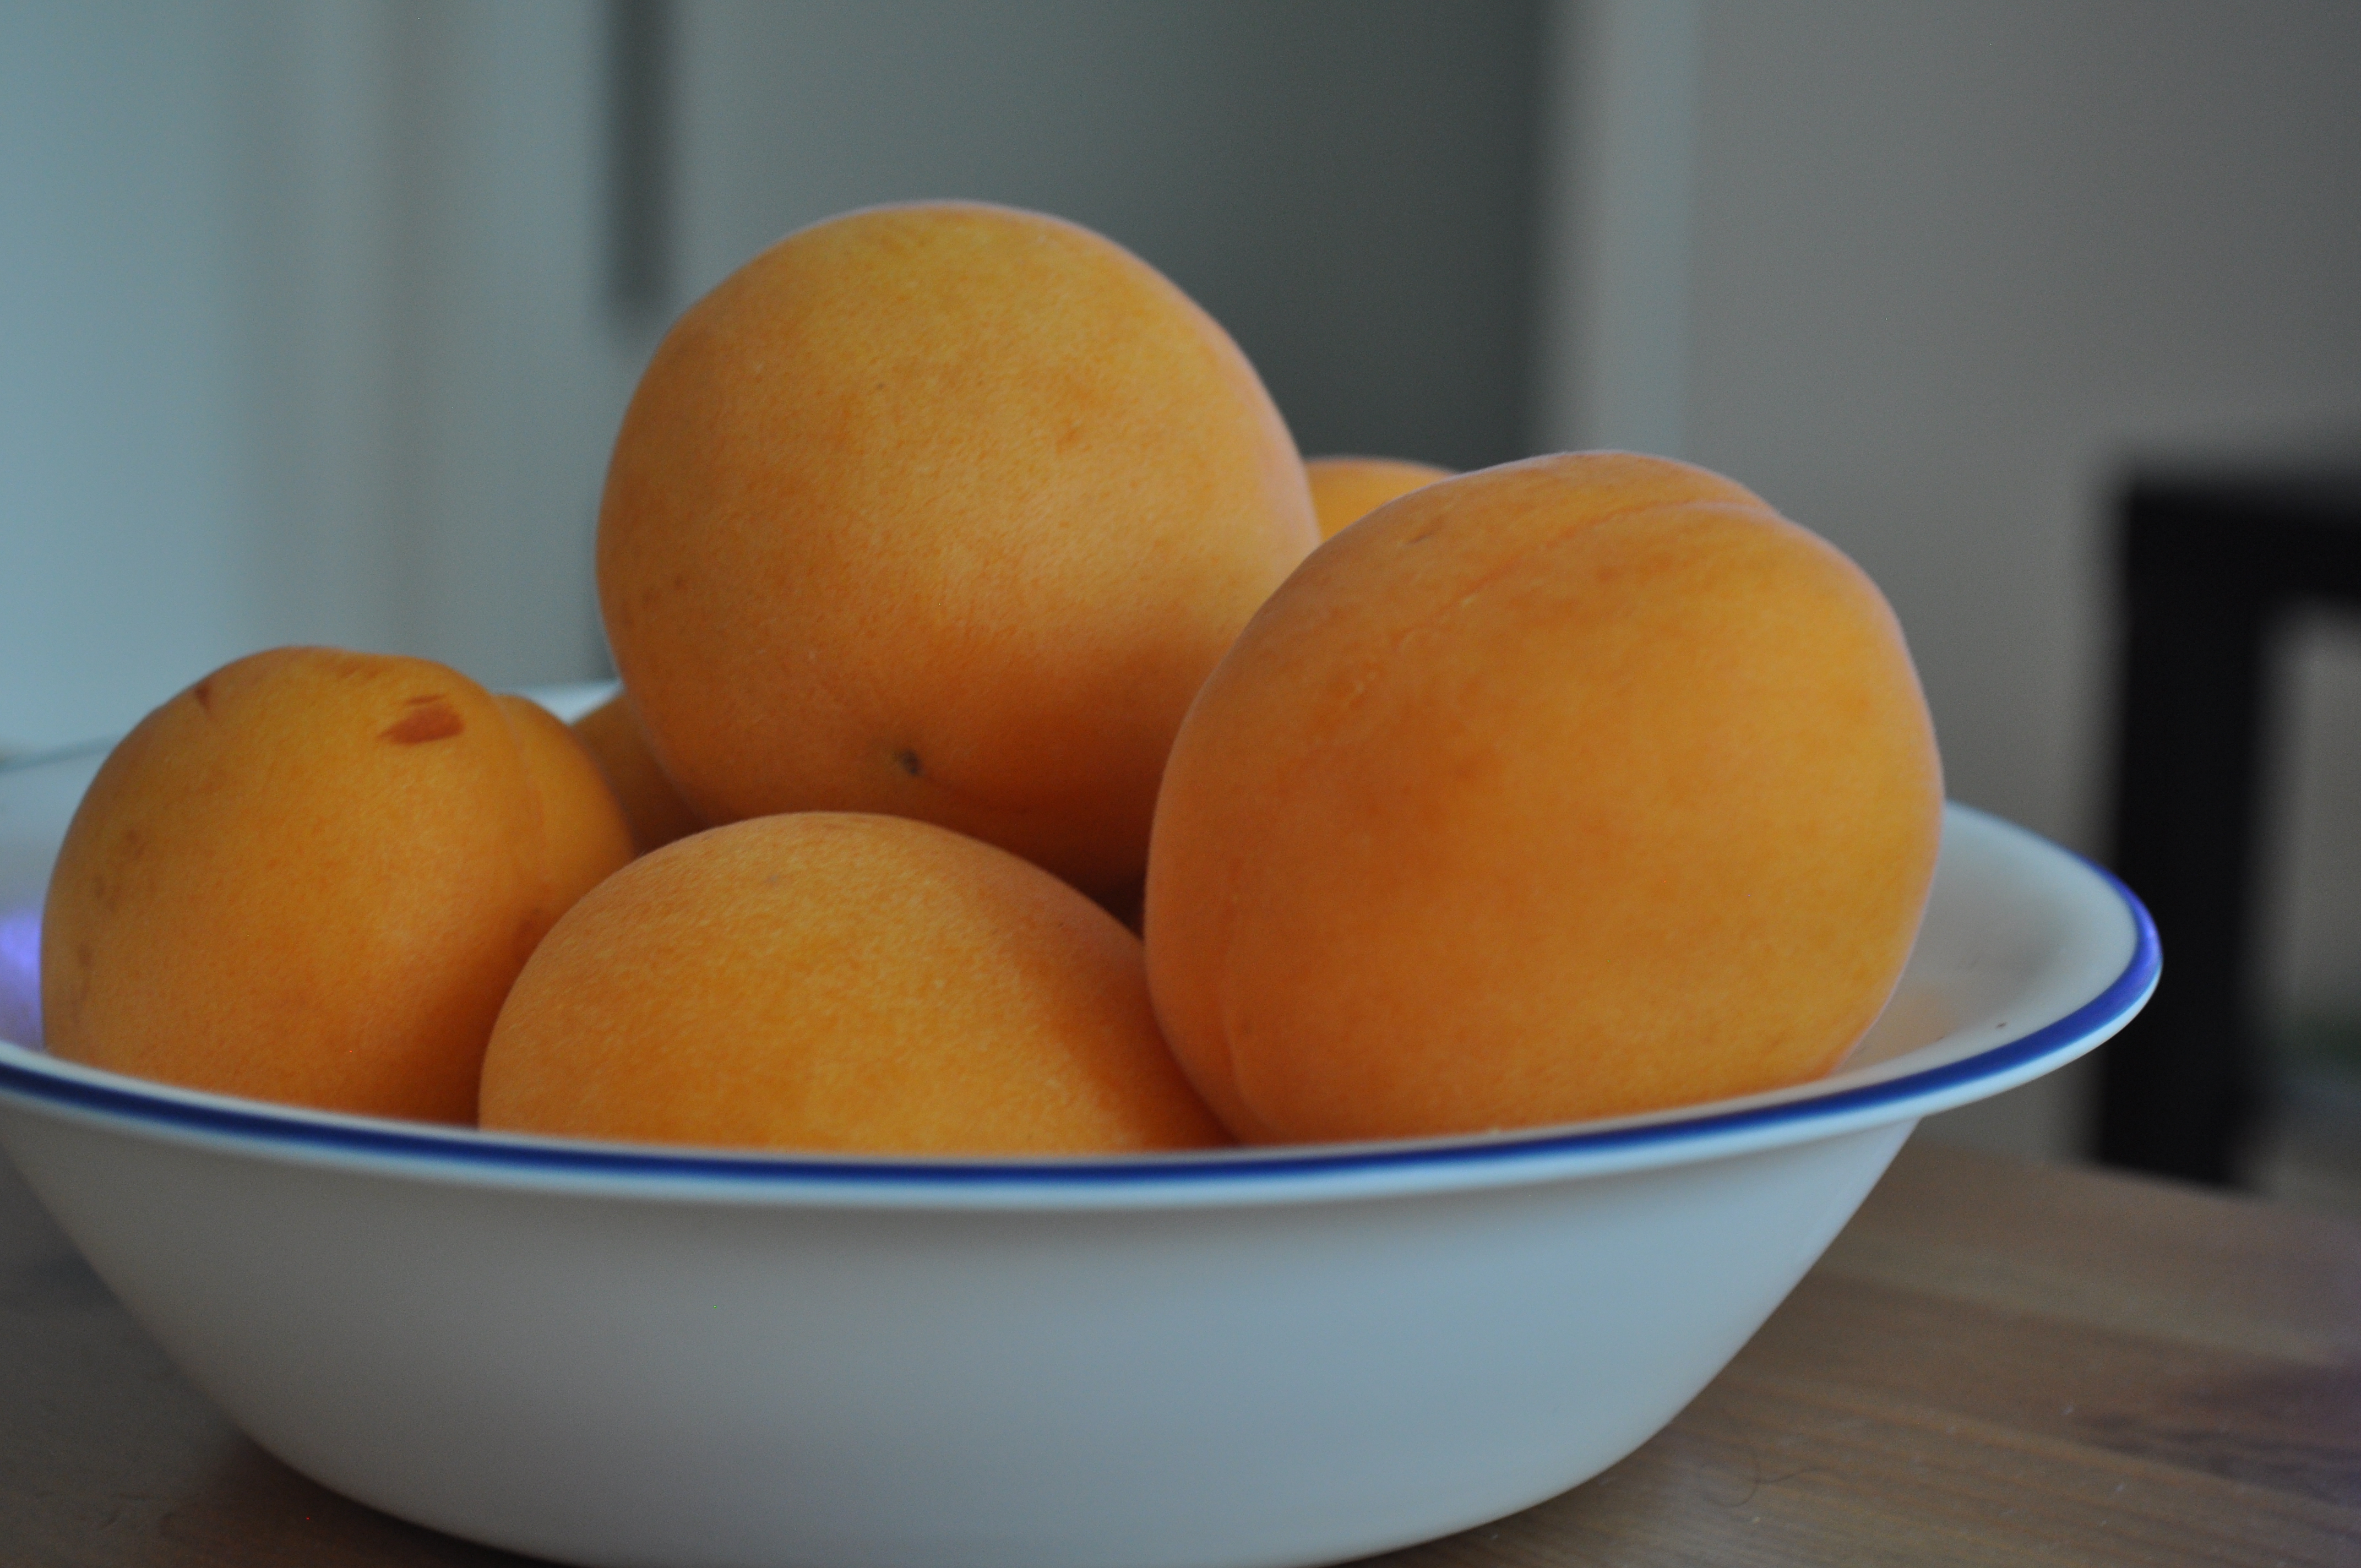
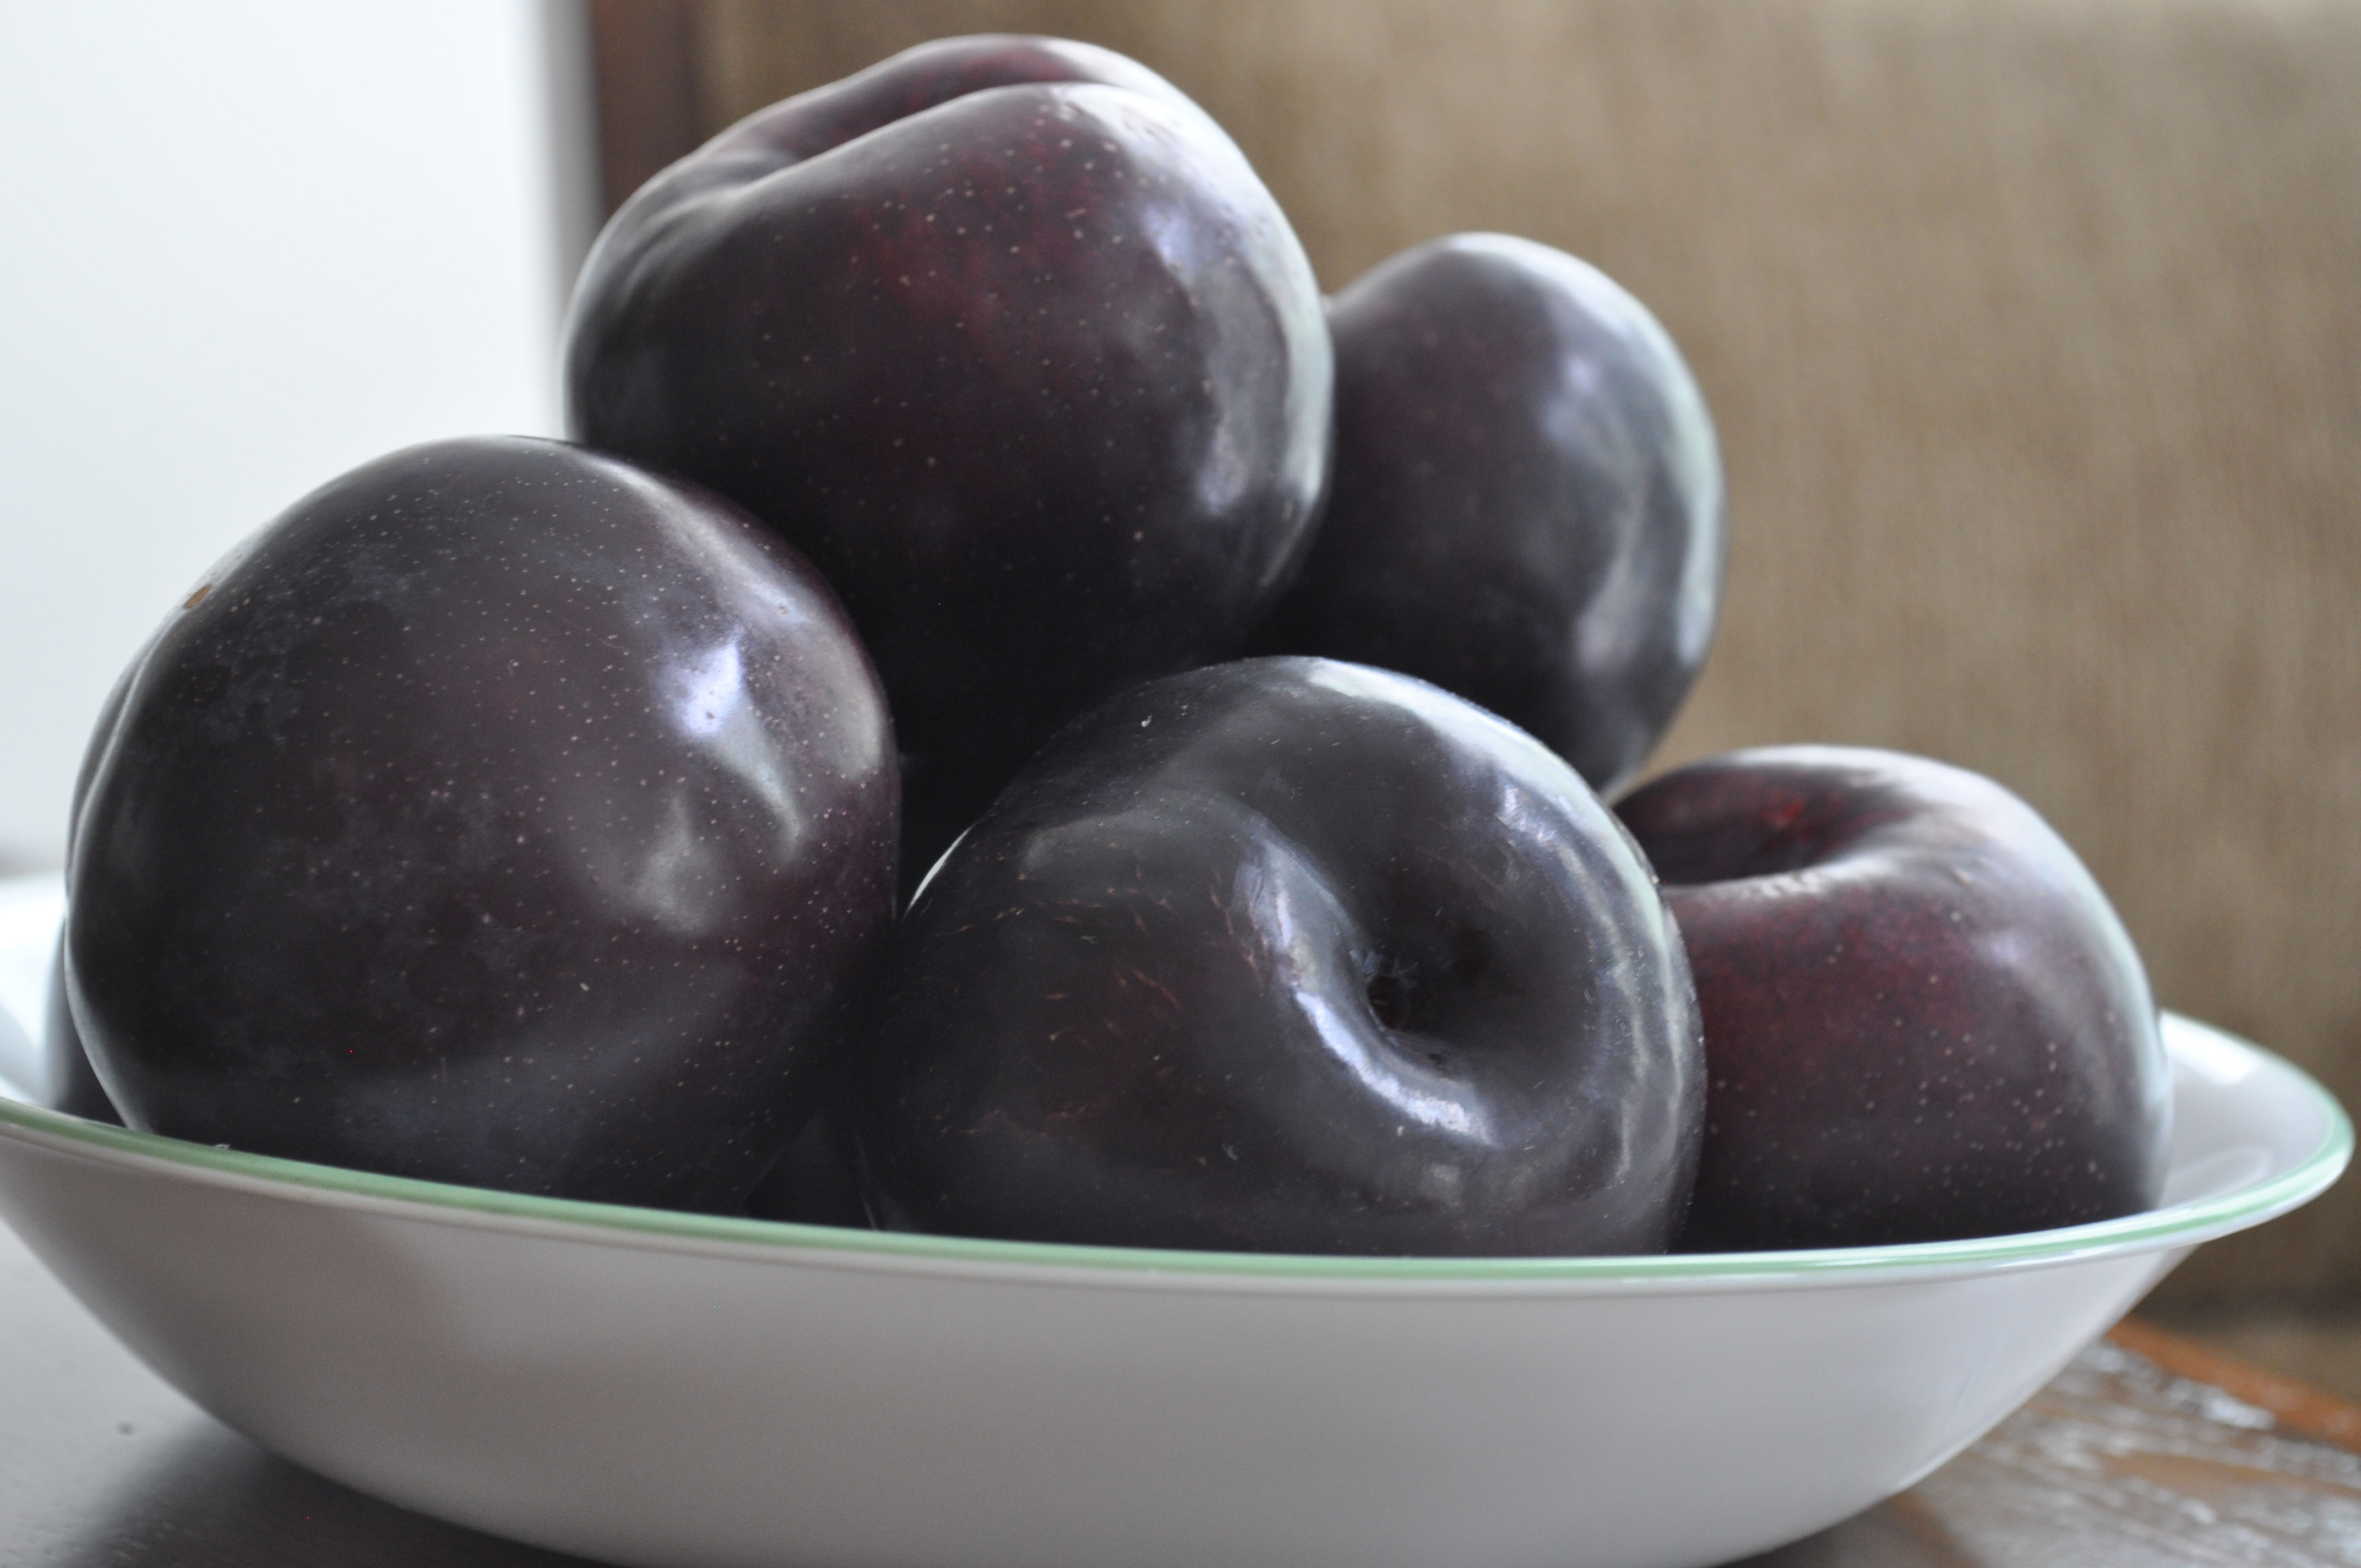
8-9 ripe, but still firm, black plums

1 1/2 cups sugar

2 tsp. salt

2 tsp. jiralu powder, note follows

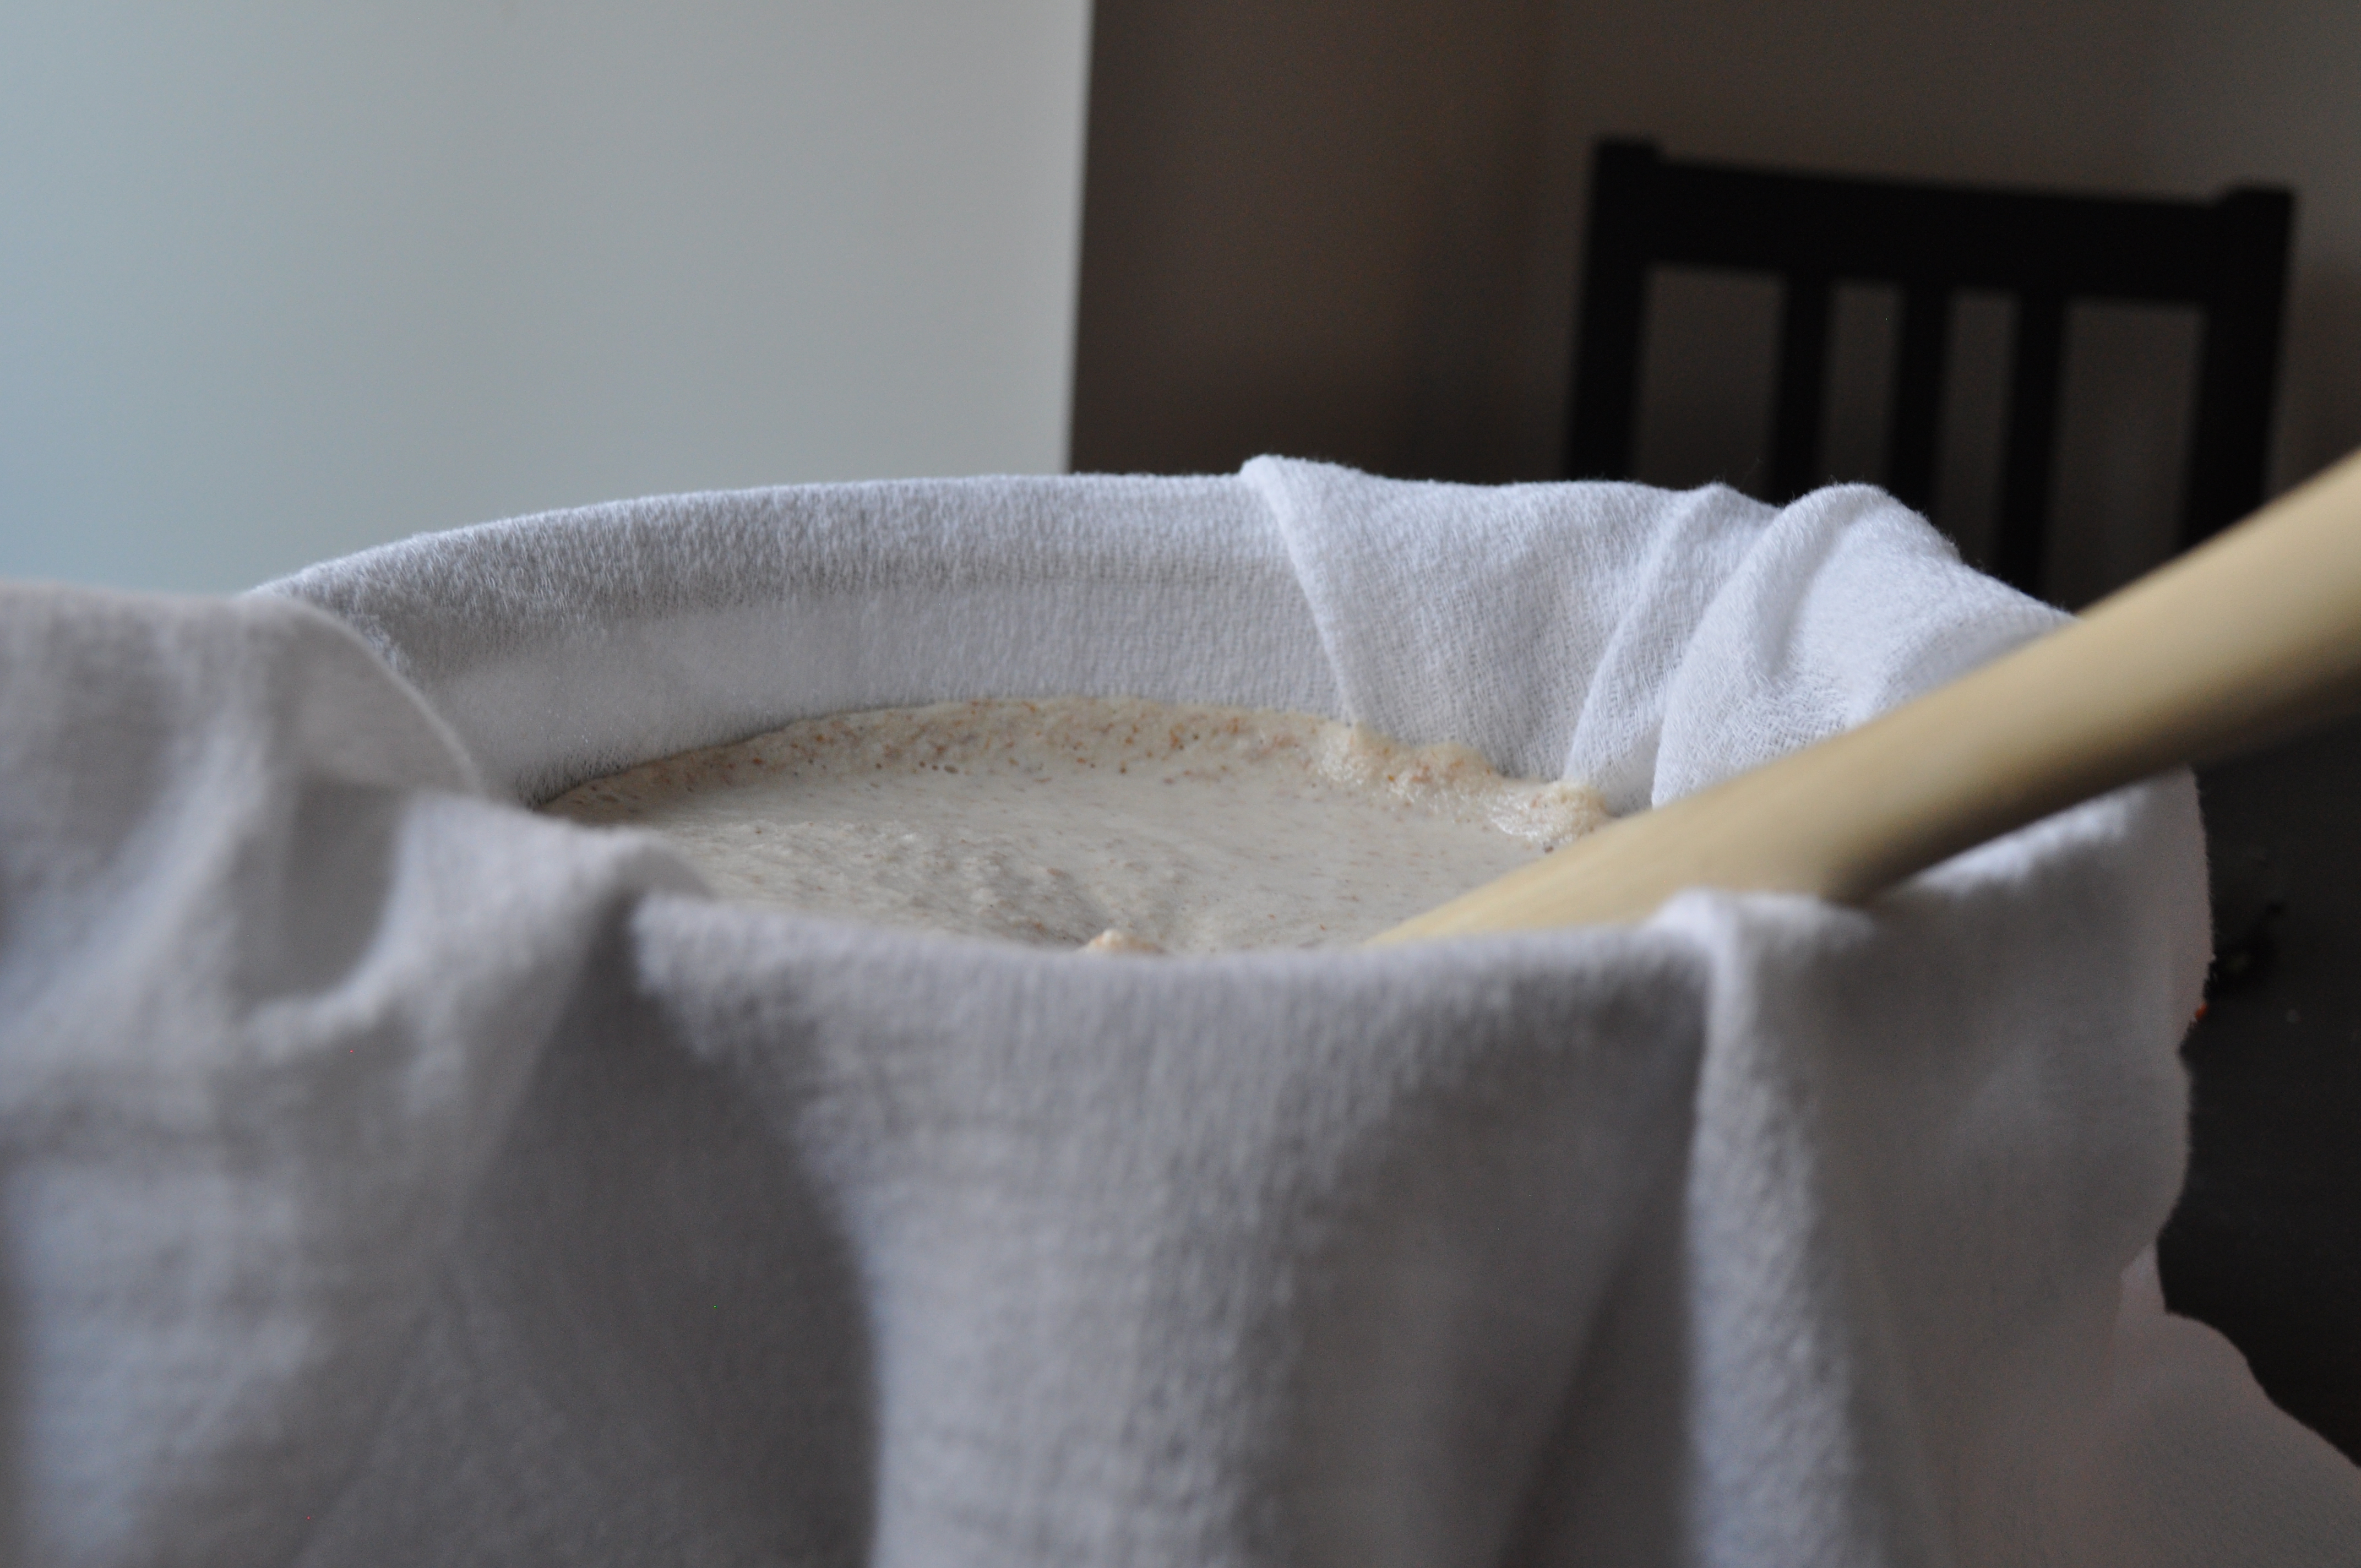
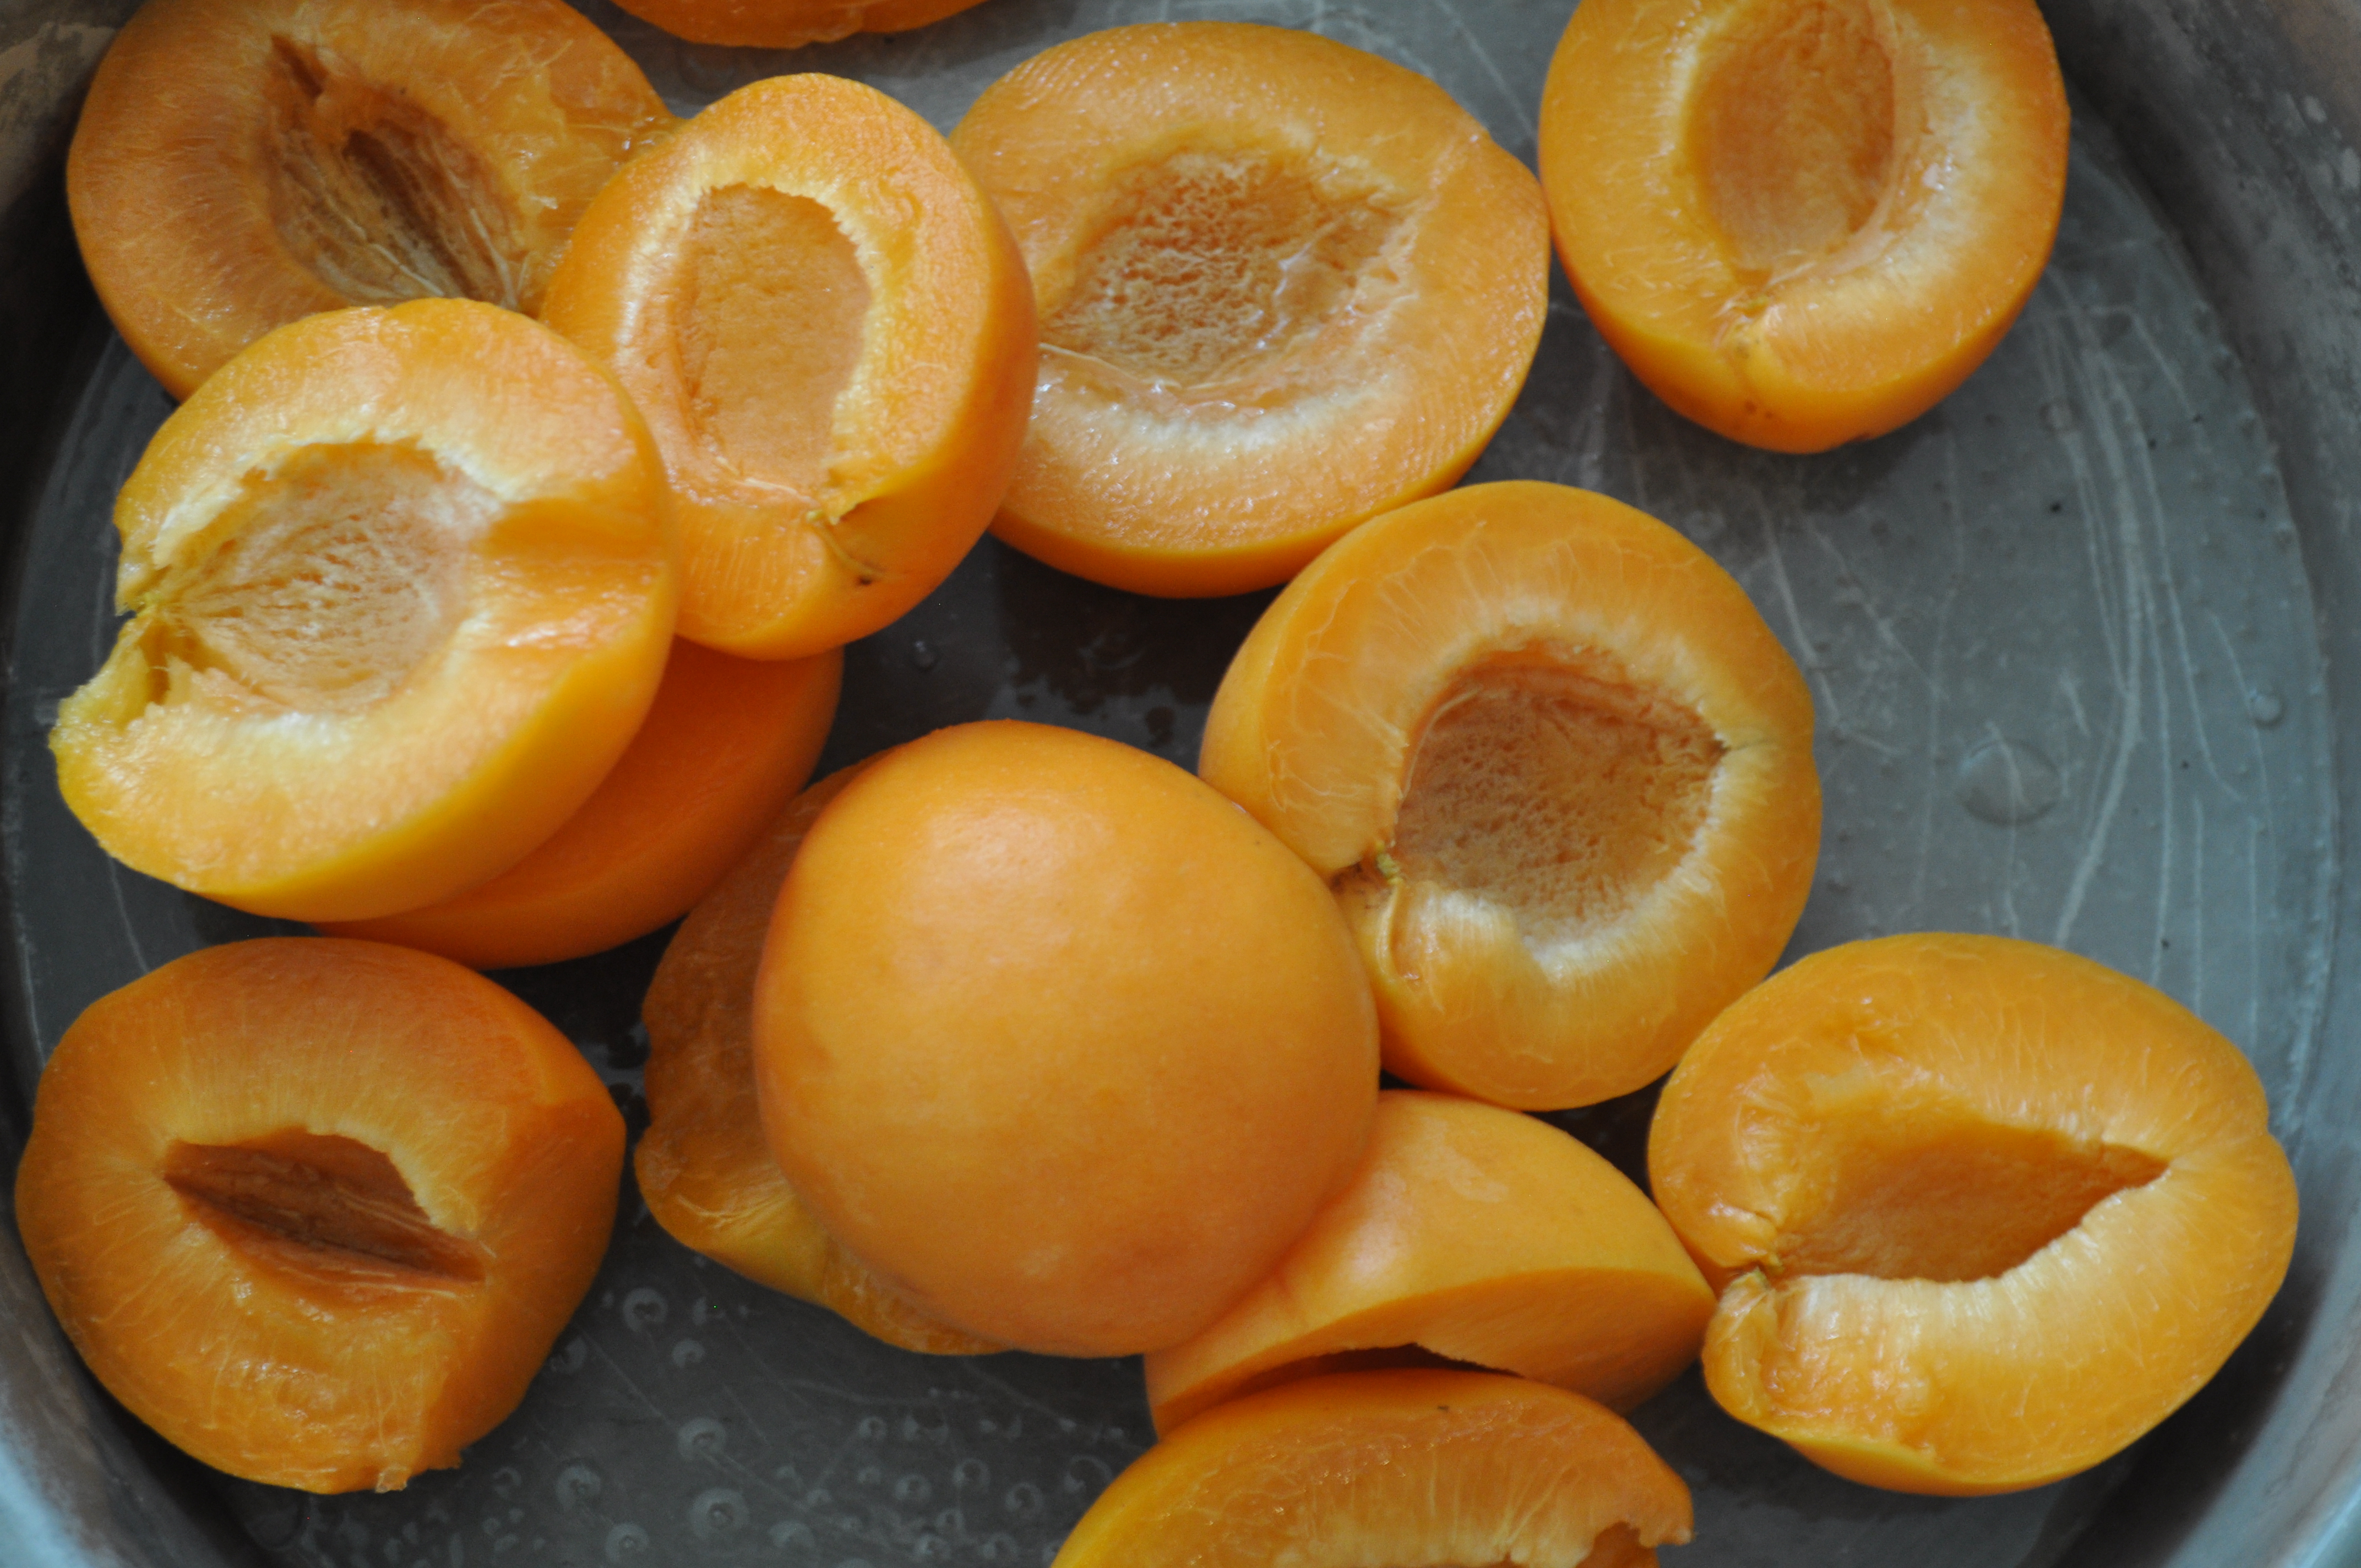
Half and pit all of the plums.  Boil with just 1/2 – 3/4 cup water until fork tender and they are falling apart.  Blend the plums, with the water, until completely pureed.  Strain to discard the skins.

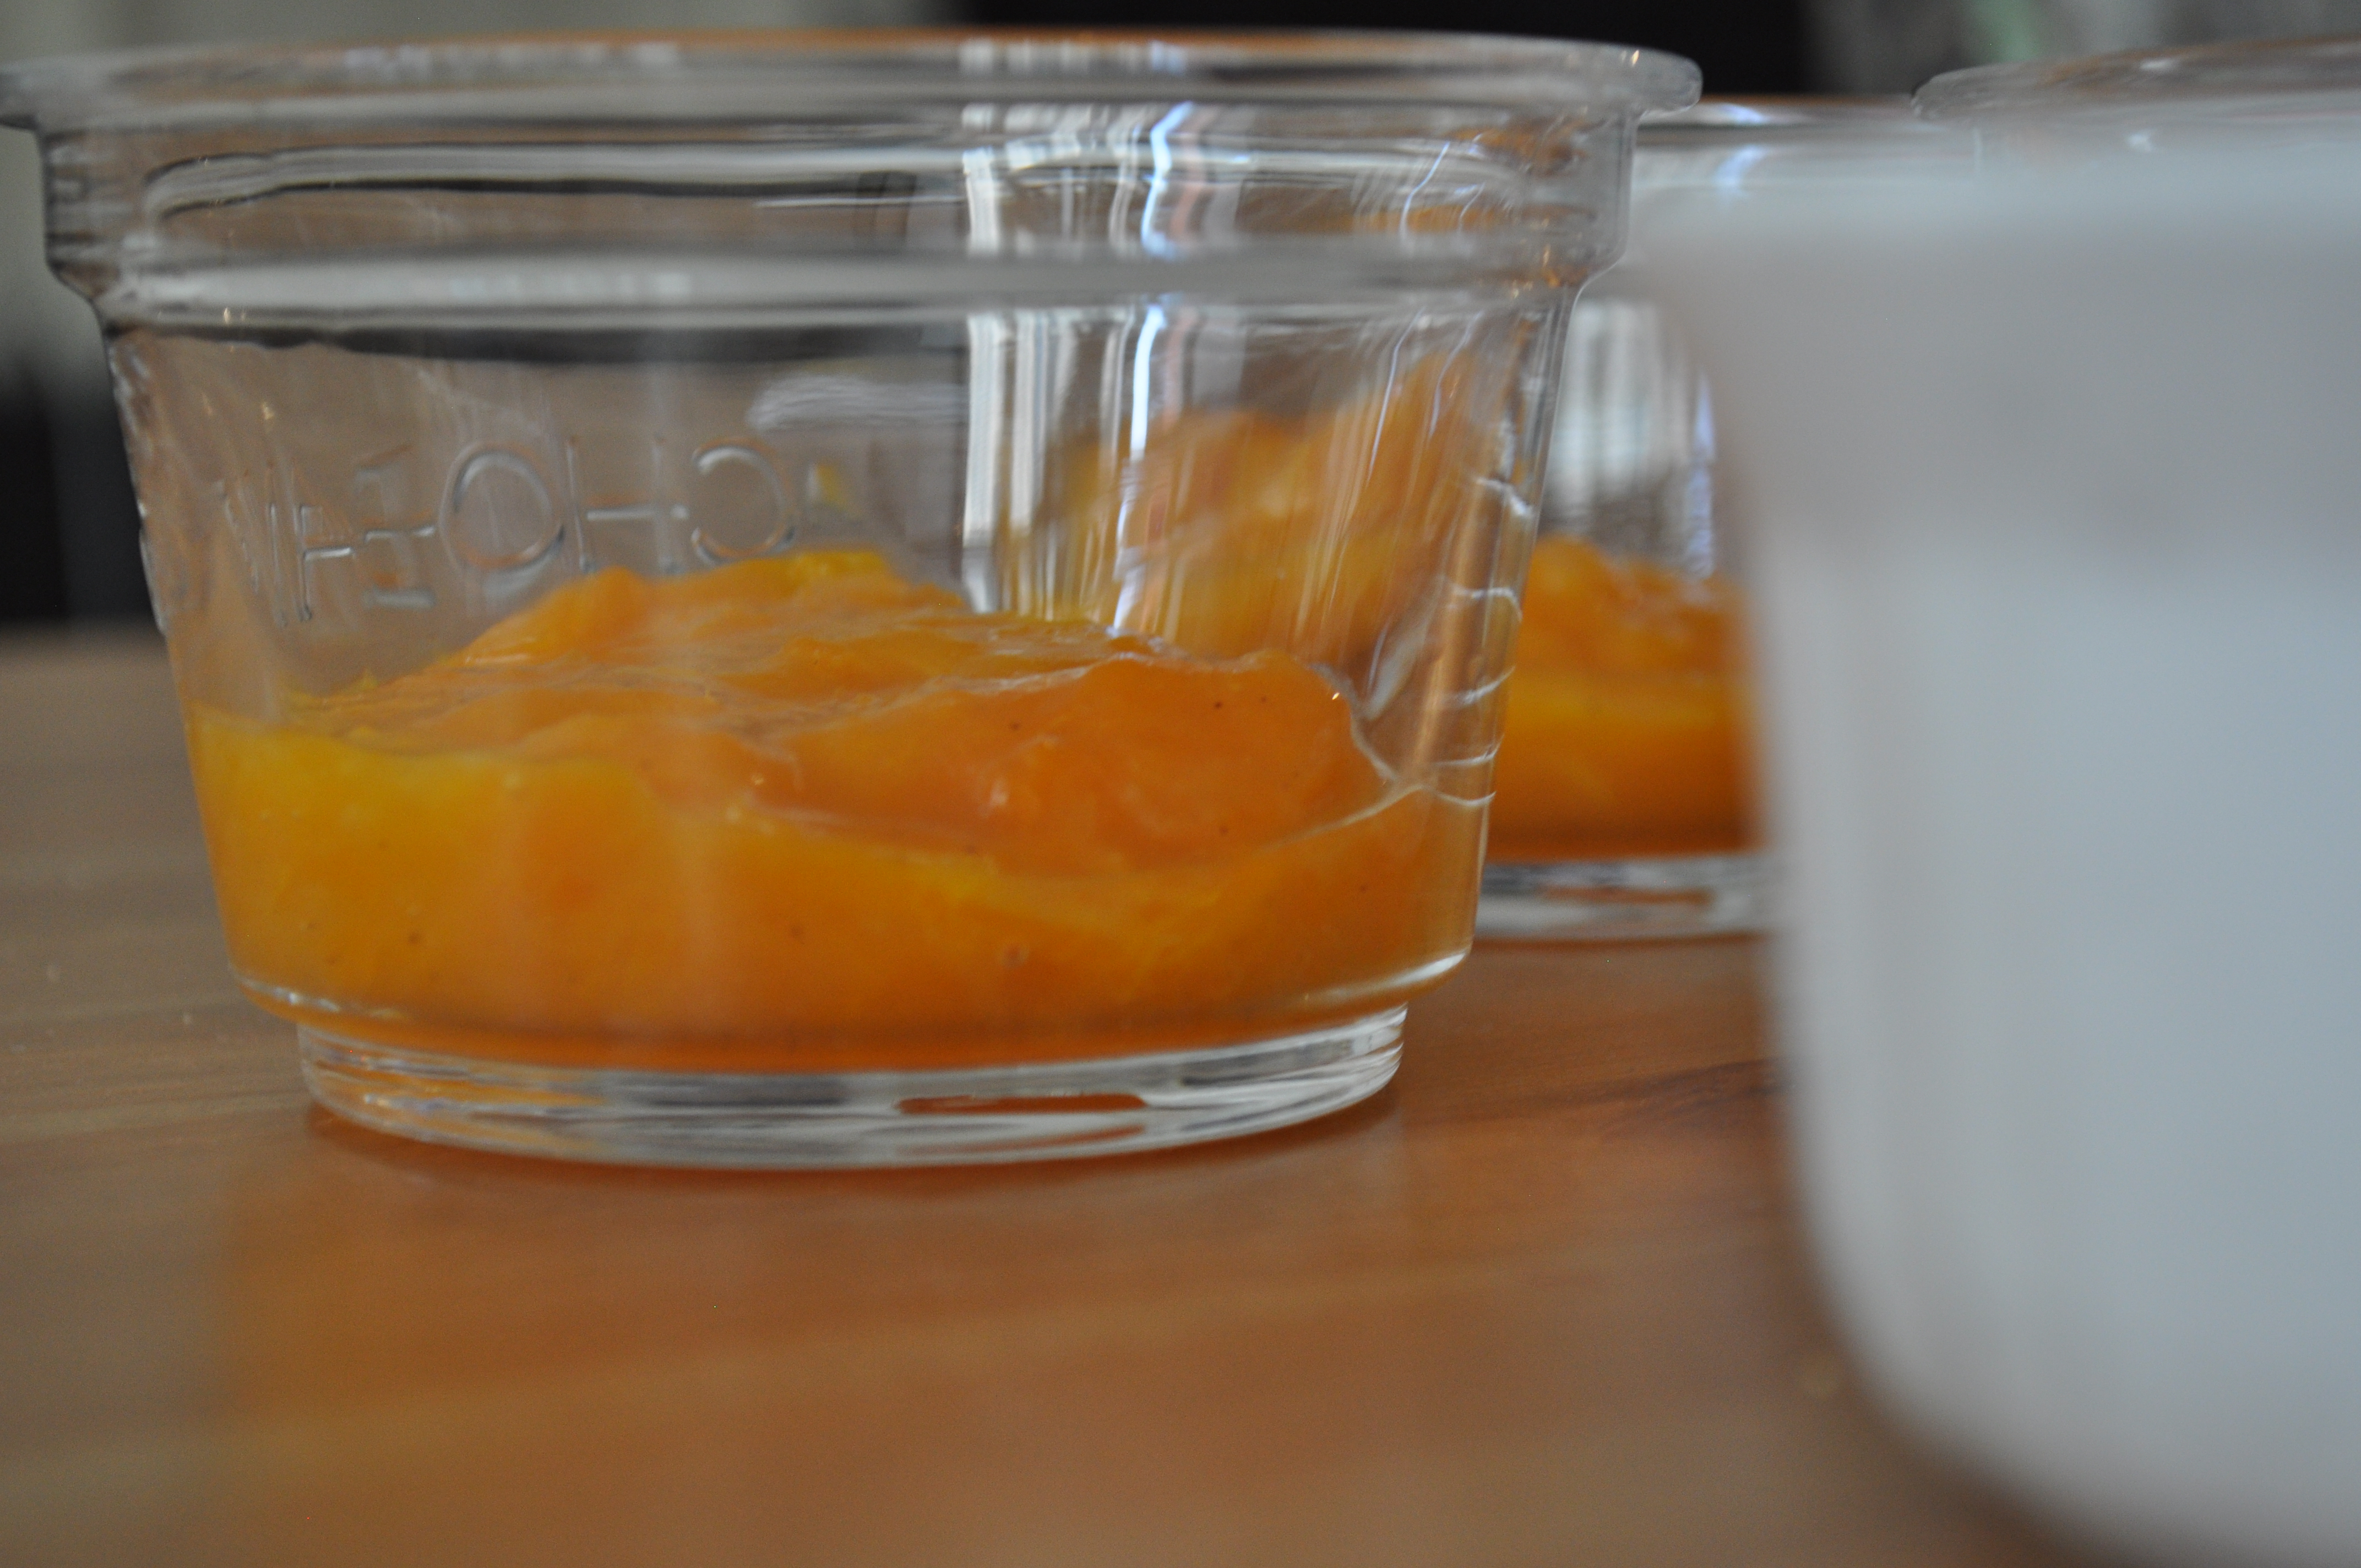
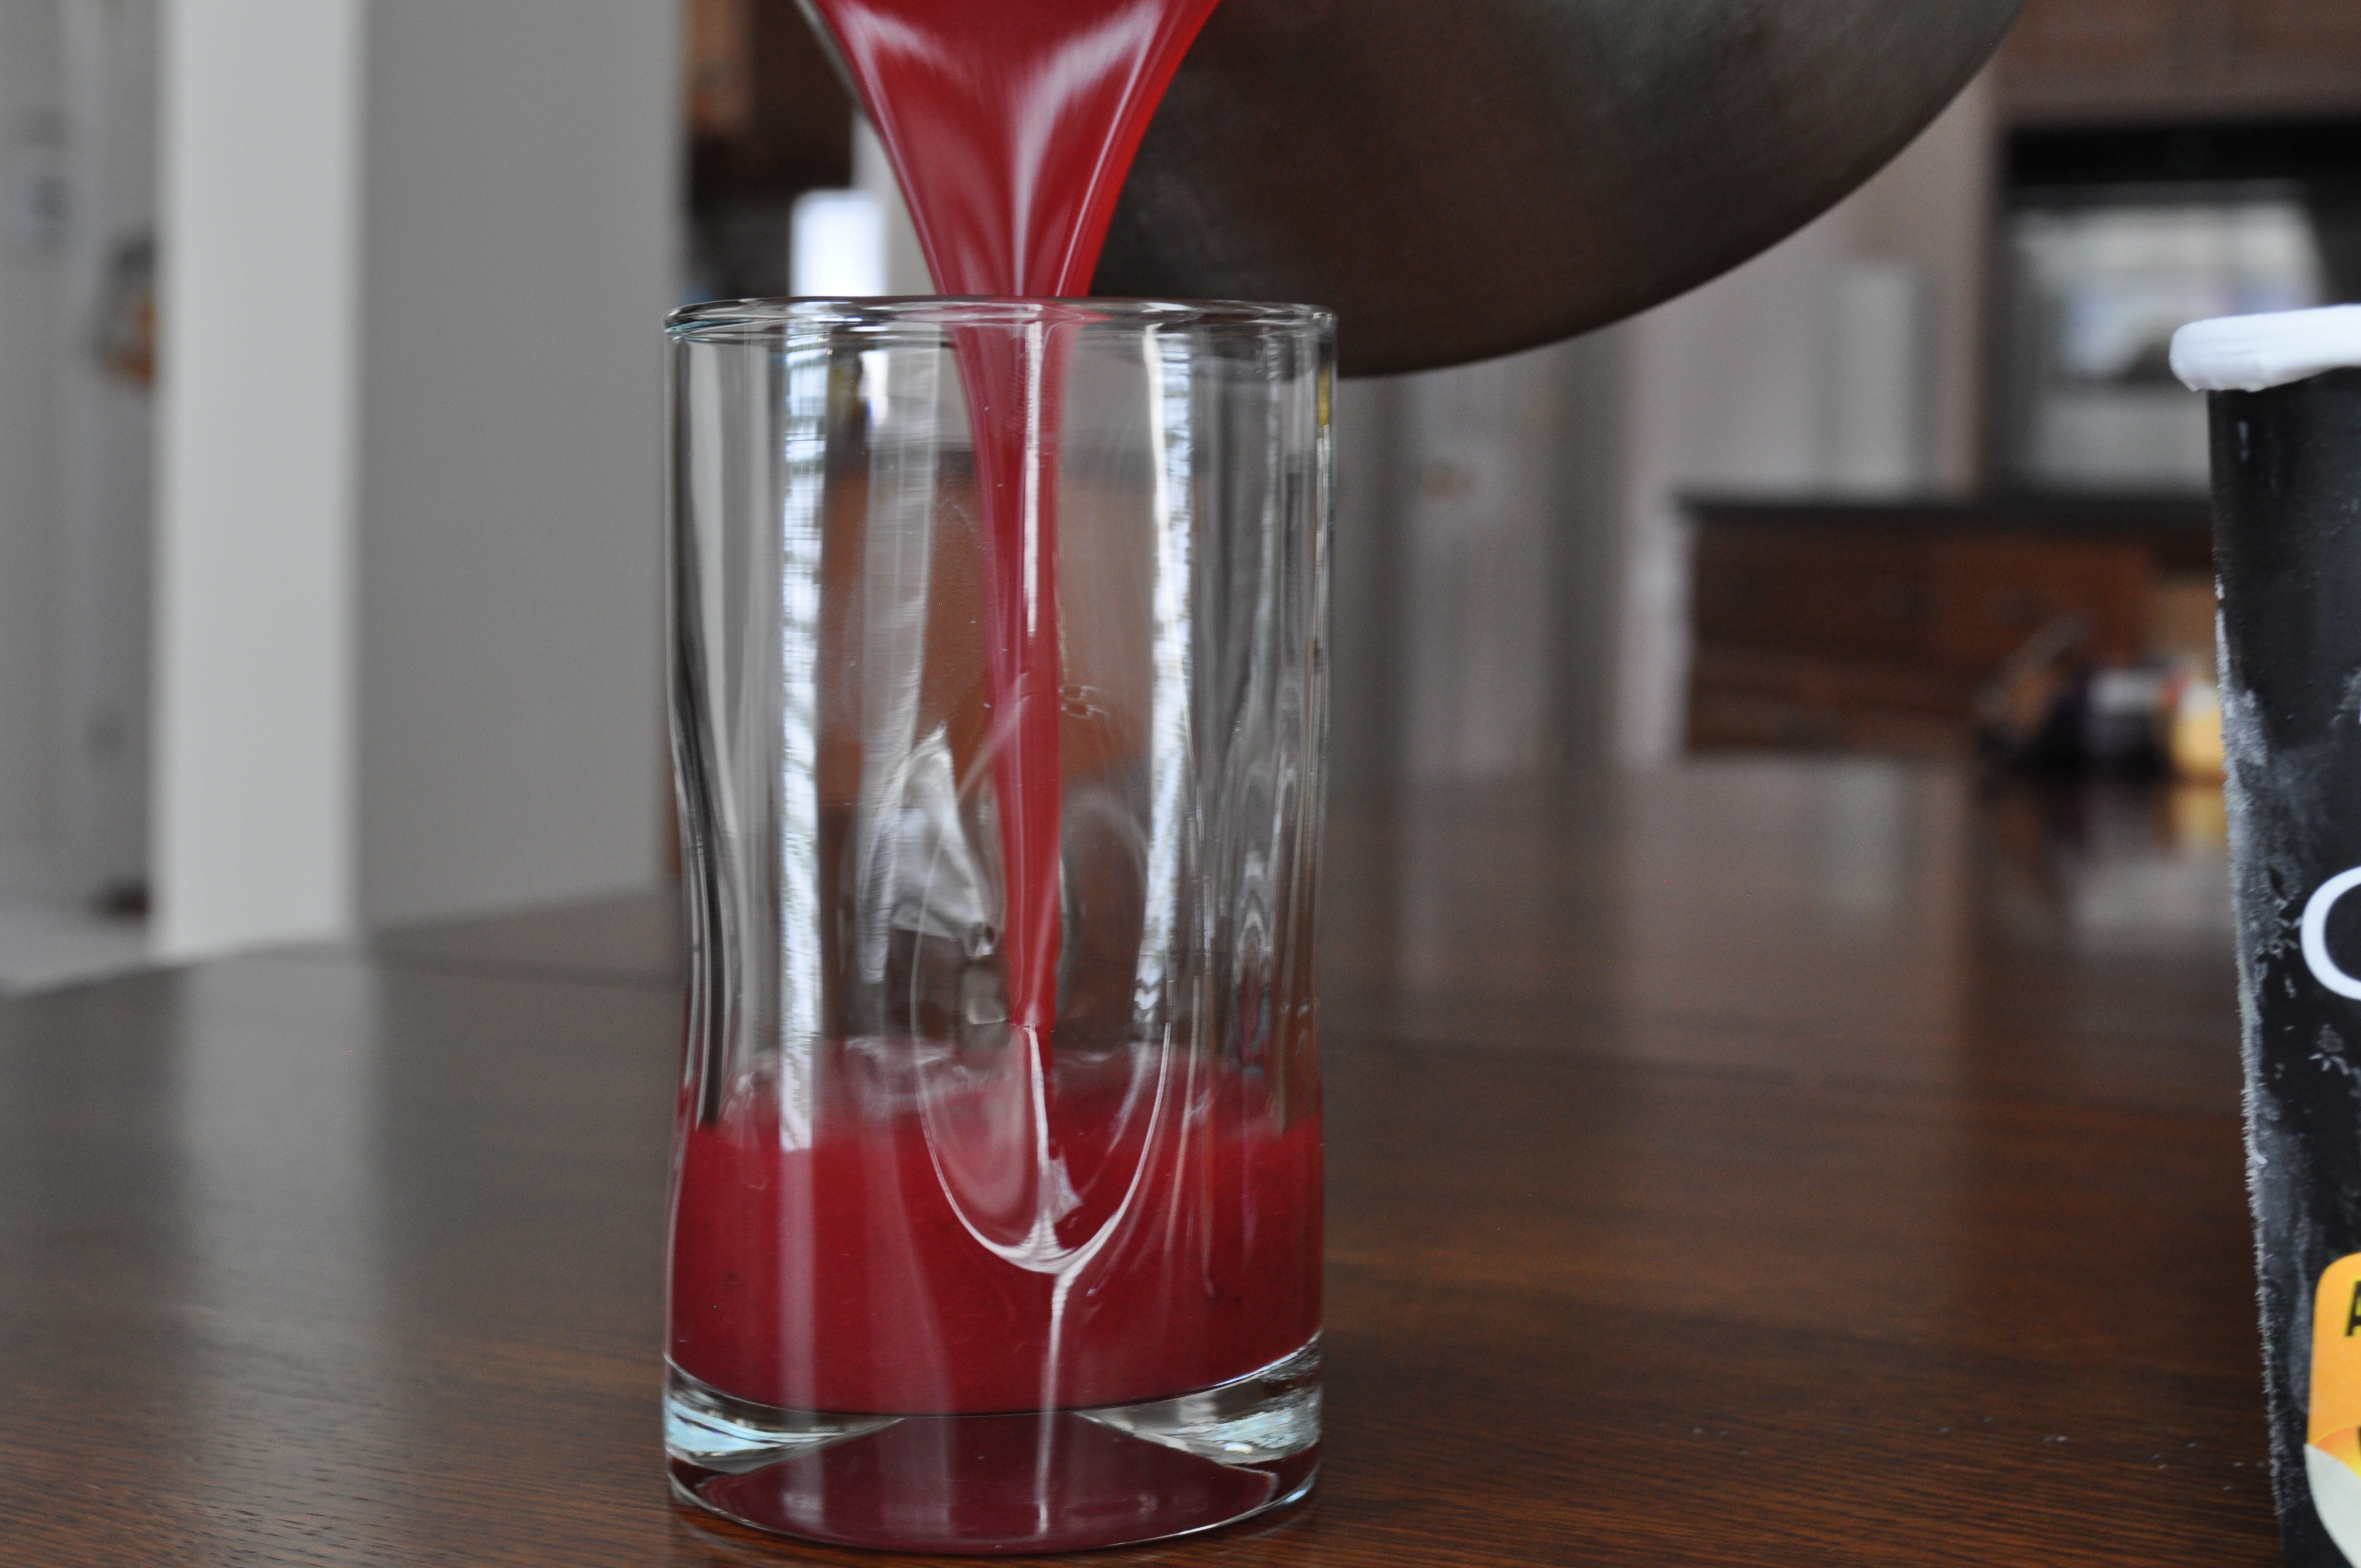
Place the juice in a pot, and place over medium heat.  Add more water if it seems too thick.  Stir in sugar, salt and spices, and let the juice come to a rolling boil.  Let boil for about a minute, turn the heat to low and adjust all of the spices.  Take pot off heat, and let cool to room temperature.  Place in the refrigerator until cold, and serve over vanilla ice cream.

Jiralu Powder

Jiralu is a combination of salt, cumin, dry ginger, chili powder and turmeric.  It is very commonly available at any Indian grocery store (and has so many other uses!), but if you don’t want to make this investment, I would suggest adding 1 tsp. cumin, 1/2 tsp. all spice, 1/2 tsp. ginger, and another 1/2 tsp. salt.  But you can also just flavor it however you please.  I think some cinnamon would be delicious in here.  And maybe a pinch of cardamom?  And adjust as you see fit.

Zucchini Butter

August 8, 2013

DSC_2759

Having this blog has completely changed my view of zucchini.  I started with a real disdain,  you may remember, as the default vegetable used for any token vegetarian dish at a restaurant.  I thought of it as bland, flavorless, pointless, even.  Poor zucchini, I was really hard on it.

DSC_2751

But man, you cook it right once, find a great recipe, and you realize that zucchini is wondrous!  It can be paired with lemon!  And with smoked cheese!  And with blander cheese!  And with basil!  And with mint!  And with basil and mint!  With nutmeg, even!  It will never be bland again!

DSC_2762

But this, my friends, is zucchini shining through in its truest form –  it literally melts in your mouth.  The squash is cooked down until it turns into a spreadable consistency, and let me tell you, friends, that is just brilliant.  Zucchini has impressed me yet again.

DSC_2770

Zucchini Butter (slightly adapted from Food52)

For this flatbread, I spread zucchini butter on the bottom of the flatbread as the sauce.  Then I layered baby spinach leaves on top, dolloped the whole thing with fresh ricotta, and then sprinkled with shredded mozzarella.  De-lish.

2 lbs. zucchini, or a mix of zucchini and summer squash, grated

1 onion, minced finely

2 large, or 3 medium cloves of garlic, minced finely

2 tbsp. butter

2 tbsp. olive oil

juice of 1 lemon

salt and pepper, to taste

In a deep pan, heat butter and olive oil over medium-high heat.  Add onions and sauté, stirring constantly, until translucent and well cooked.  This will take about 7 minutes.  Add garlic, and let it cook for a minute.  Salt and pepper the onion mixture.

Add zucchini to the pan, and stir to combine.  There will be a lot of water, and the goal will be to get rid of all of that water.  Salt, pepper and keep cooking, stirring occasionally.  If some of the zucchini gets charred, be happy, because that will add more flavor!  Keep stirring to release the moisture – this whole process will take about 30 – 35 minutes.

When most of the moisture has evaporated, and the mixture has reduced in size by half. add the juice of the lemon.  Stir and taste and adjust salt as necessary.  Use this as a sauce, a base for a pizza, on toast, on a spoon, however you want.

Homemade Almond Milk

July 31, 2013

DSC_2743

I love milk.  It’s a love for dairy, actually.  And the more fat it has, the better.  Want cream with that?  Yep!  Should we use whole milk yogurt?  Obviously.  Do we even need cereal with that?  Nope, let’s skip it!

DSC_2731

Of course, this is not a sustainable lifestyle.  (But it is a joyous lifestyle!).  So I’ve taken up almond milk (no, it’s not dairy, but it’s still milk…stick with me) to cut the calories a bit.  It’s actually very tasty, and there are flavors to choose from!  Vanilla unsweetened almond milk?!  Yes, please!  The only problem is that it’s just a bit thin for my taste.

DSC_2736

So leave it to me to fatten this up too.  I thought that I should give it a try to make almond milk at home.  And thought, while we’re at it, let’s make it a bit thicker than the usual.  And why stop at just vanilla?!  Let’s sweeten it up!  Add some cinnamon, even!  Maybe add some ice cream and turn it into a milkshake!  Oh, the possibilities!

DSC_2740

It was delicious, people.  I will have to do another juice cleanse to make up for the copious amounts of thick, sweet almond milk dessert like beverage I have had.  I could not stop drinking it.  But it was so worth it.  On to other nuts!

DSC_2742

Homemade Almond Milk (recipe from The Kitchn)

So, I exaggerated, people.  This milk isn’t super thick.  It does have more body than the store bought almond milk, which just amounts in deliciousness.  But if you do want to make it thinner, just add more water.  And if you are awesome and want to take this to the milkshake level, eliminate some of the water.  And the dates and cinnamon and vanilla, they’re all just add-ons.  You make it however you please.  But do make it, because, have I mentioned that this is so incredibly tasty?  It is.

1 cup raw almonds

2 cups water

4 dates, pitted and soaked in hot water for 10 minutes, drained

1/2 tsp. vanilla bean paste, or 1 tsp. vanilla extract

pinch salt

1/4 tsp. cinnamon

Place almonds in a bowl and cover with about an inch of water.  Soak at least overnight, or up to 2 days.  The longer you soak your almonds, the creamier your almond milk will be.  I, of course, soaked mine for 2 days.  Drain and rinse the almonds and discard the water.

Place almonds in blender.  Add the 2 cups of fresh water.  Add dates, vanilla, salt and cinnamon.  Blend on highest speed for 2-3 minutes until everything is well incorporated and liquified.

Strain the mixture over a strainer lined with cheese cloth or opened nut bag over a mixing bowl or measuring cup to catch the liquid.  Press down with a rubber spatula to make sure that all of the liquid has been extracted.

Refrigerate liquid until thoroughly chilled.  With the leftover almonds, you can add it to oatmeal or baked goods.  Or you can dry it by spreading it on to a baking sheet and baking it at 200 degrees for 2-3 hours until it is  completely dry.  Then you have yourself some almonds flour!  And you already know what you can make with that.

Cinnamon Pecan Tea Biscuits

July 27, 2013

DSC_2722

If I could have one meal for the rest of my life, I think I would have to go with afternoon tea.  Seriously, it makes so much sense.  First, you get your caffeine fix, which is obviously necessary, and not an integral part of lunch or dinner.  Second, you always get a dessert of some kind: scones! macarons! cookies, cake, pie!  And lastly, hello, there are sandwiches involved.  A no-brainer.  The best meal, really.

DSC_2717

Now I know what you’re thinking – who has time for an afternoon tea?!  To which I respond: make time, friends!  Everyone needs a little pick-me-up right around 4pm.  Why not fill it with tea and biscuits?!  Especially this one filled with wholesome goodness: oats and nuts and whole wheat flour.  It’s a biscuit that’s truly power packed.

DSC_2718

But, fine, if you don’t have the time for a daily afternoon tea, at least make these and crumble them into your yogurt for breakfast and dessert.  A versatile tea biscuit, it is!

DSC_2730

Cinnamon Pecan Tea Biscuits

1 stick butter, melted and cooled

1 cup pecans, toasted and cooled

1/2 cup powdered jaggery, or light brown sugar

1 cup rolled or quick oats

1/4 cup white whole wheat flour

1/4 tsp. cinnamon

1/4 tsp. salt

Preheat oven to 350 degrees.  Line a baking sheet with parchment paper.

Whiz everything in a food processor until the nuts are finely ground, and the mixture sticks together when pressed.  Scoop out tablespoon sized balls, roll and press slightly before placing on  prepared baking sheet.  The mixture will be crumbly.  Repeat with rest of mixture.

Bake for 15 minutes until the cookies are set, and are golden brown in color.  Let cool on a wire rack.

Strawberry Almond Crisp

July 19, 2013

DSC_2774

No, I probably don’t need to post another strawberry recipe.  And yes, strawberry season was at its peak about 6 weeks ago.  And I know that it will be nearly impossible to find gems like the one below at any farmers markets these days.  And, yes, sigh, I know that it will be another 11 months before we get the privilege of eating sweet, hand picked strawberries again.  But humor me for one second.  Because it is exactly at this time of year, every year, that I become nostalgic for summer.

DSC_2748

Oh, I know that we are just in the middle of it.  The heat waves are going strong and pools are still a welcome sight, and vacations are still to be had.  But it’s just this feeling I get, at the end of July, when I know that summer will end soon, and the winter coat that I have just put away will make an appearance again.  It is at this time that I just want to eat as much berries and watermelon and corn and tomatoes and everything else that spoils us in the summer.  Summer really does get to have it all and I just want to last for a little longer.

DSC_2754

So go on and get nostalgic about the summer before it even ends!  It will make it easier to take the blow come September.

DSC_2776

Strawberry Almond Crisp

For Strawberry Filling:

1/2 pint strawberries, cut in half
2 tbsp. sugar
pinch of salt
1 tbsp. almond flour
For Crisp Topping:
2/3 cup almond flour
1/2 cup slivered almonds
1/3 cup brown sugar
1/4 tsp. salt
1/2 stick butter, cold, cut in pieces
Preheat oven to 400 degrees.  In a 8×8 square pan, mix together strawberries, sugar, salt and almond flour until everything is well combined.  Set aside.
In a bowl, mix together almond flour, almonds, brown sugar and salt.  Whisk together until everything is combined.  With a fork, cut in the butter into the flour mixture until the butter is pea-sized and is incorporated into the dry ingredients.  Spread the topping evenly over the strawberry mixture.
Bake for about 25-30 minutes, until the top if golden brown, and the strawberries are bubbling.  Let cool for about 15 minutes before serving.

Cardamom Yogurt Mousse with Apricots

July 9, 2013

DSC_2768

I like to play this game whenever I go out to restaurants with my friends.  As soon as we get the dessert menu, we each have to guess what the others would get.  That’s the end of the game.  It doesn’t sound like much of a game, really, but it really is!  It is about how well you know each other, what kinds of tastes you prefer, and most of all, once the desserts have been ordered, who was right about picking the best one!  (That’s my favorite part of the game).

DSC_2743

Actually, winning is my favorite part.  It happens so rarely that I really like to make the win last as long as possible.  The last time I won was at one of my favorite restaurants, and I knew exactly what I wanted for dessert.  It was a fancy yogurt mousse decorated with different kinds of cooked apricots.  It sounded absolutely delicious: creamy, and fruity and light and just lovely.  That’s all I wanted.

DSC_2760

The looks I got from my friends when they realized that the yogurt dessert would have to take up space at our table were not pleasant.  But it was by far the favorite choice (I won!).  It was everything that a summer dessert should be.  We ordered extras.

DSC_2746

I have been trying out recipes that resemble that dessert ever since, and this is the closest I’ve gotten.  Go run out and make this while apricots are still in season!  And then make this yogurt mousse with every other fruit until the end of summer, and then with honey and walnuts in the fall, and cranberries in the winter, because, this is the winning dessert, my friends.  Did I mention that?

DSC_2764

Cardamom Yogurt Mousse with Apricots (adapted from Serious Eats)

So, in full disclosure, this wasn’t exactly the texture I would have liked for it to be.  But this isn’t the recipe’s fault.  It’s my own.  I couldn’t find any (vegetarian) gelatin out there, so had to go for the (vegetarian) pectin instead.  And alas, I ended up with lumps rather than the smooth, luscious mousse I was hoping for.  I have no doubt that gelatin will work very well.  So find that, will you?  Another point: I liked the cardamom in this, it’s true.  But I think that vanilla would just be a cleaner flavor and let the yogurt and apricot flavors shine through more.  Next time, I will go with that.  You should add any spice or flavoring as you please.  Also, how about some toasted pistachios or pecans on top?!  Food for thought.

For Mousse:

2 tsp. powdered gelatin

1/3 cup honey

2 egg whites

3/4 cup cream

1 1/2 cups Greek yogurt (2% or whole milk yogurt)

1/2 tsp. cardamom

pinch of salt

For Apricots:

6-8 apricots

3 tbsp. sugar

1 tbsp. flour

pinch of cardamom

For the apricots: Preheat oven to 400 degrees. Prepare fruit by placing in an 8×8 square baking dish, or 9 inch round pan.  In the dish, stir in sugar, flour and pinch of nutmeg, until everything is well-distribuited.  Bake for about 25 minutes until apricots are soft and jam like.  Put aside to cool.

For the mousse: Pour 1/4 cup water in a small pot and sprinkle the gelatin over the top.  Set aside for five minutes.  Put the pot over medium heat until the gelatin dissolves.  Whisk in the honey and continue whisking until the honey is thinned and the whole mixture is pourable.

Using an electric mixer, whip the egg whites until they are stiff.  Scrape the meringue out to a separate bowl.  In the same bowl, whip the cream until it holds stiff peaks.  Mix in the yogurt.  Beat in the cardamom and the salt. Then slowly drizzle in the honey mixture until everything is well combined.  Fold in the egg whites with a rubber spatula.

Place a spoonful of the apricots in 6 serving cups until all of the apricots have been used.  Spread the mousse on top and chill completely, about 1-2 hours.

Mixed Berry Lime Bundt Cake

July 3, 2013

DSC_2732

Let’s be honest, people.  Summer is never about the cake (or chocolate, really, but I’ll save that for another time).  Summer, especially this current summer in time, when the heat is seriously ridiculous, is about the ice creams, and cobblers, crisps, and pies.  I mean, did you see this in Monday’s paper?  Seriously, it’s no question.  There’s no need to make cake in the summer.

DSC_2709

And I get it.  Fruit is in abundance, and needs as little dressing up as possible.  But we are depriving ourselves!  Lovely, fresh summer fruit can be easily incorporated into any cake!  And this cake is delightful, and full of berries and summer flavors.  And it is even rocking some patriotic colors, perhaps appropriate for a holiday barbecue that you may be attending this week??

DSC_2712

And above all else, bundt cakes are the most perfect dessert to make: they tend to be made in one bowl, they feed a crowd, and they are always no less than a showstopper.  And because things are the way they are, in the summer, bundts are totally unexpected.  Which adds to the showstopper piece, and quite frankly, makes you awesome.

DSC_2714

So hurry up and make this cake.  And if you feel like it, you can go ahead and serve it up with your favorite ice cream.  We can’t always protest summer desserts, can we?

DSC_2721

Mixed Berry Lime Bundt Cake (slightly adapted from Joy the Baker)

scant 1 1/2 cups granulated sugar

2 tablespoon fresh lime zest

3 cups all-purpose flour

1 tablespoon baking soda

1.5 teaspoons salt

a couple swipes of fresh nutmeg

3 large eggs

1 cup unsalted butter, melted and cooled slightly

1 cup yogurt

2 tablespoon fresh lime juice

1/2 pint fresh raspberries

1/2 pint fresh blueberries

Preheat oven to 350 degrees.  Grease and flour a Bundt pan.  Set aside.

In a small bowl, combine granulated sugar and lime zest.  Rub the zest into the sugar.  Set aside.

In a large bowl, whisk together the lime sugar, flour, baking soda, salt and nutmeg.  In a separate bowl, whisk together eggs, butter, yogurt and lime juice.

Add the wet ingredients all at once to the dry ingredients.  Stir with a wooden spoon until all of the dry ingredients are moistened and the mixture is thoroughly combined.  The batter will be thick, but make sure that all of the flour is well-incorporated.  Add the fresh berries and gently fold in until evenly distributed through the batter.

Spoon the batter into the prepared pan.  Bake for 60 minutes, or until a skewer inserted in the center of the cake comes out clean.  Allow to cool in the pan for 20 minutes then invert onto a wire rack to cool completely.   Let cool completely and then sprinkle with powdered sugar.

Boston Cream Doughnuts

June 27, 2013

DSC_2722

Doughnuts!  They are so all the rage right now!  And I completely buy into it.   They are popping up everywhere – TV shows devoted to them, shops just selling doughnuts, recipes galore.  I love it.  I’m into this new trend.

DSC_2708

But I realized that as much as I want to make them, I rarely ever make doughnuts.  With the amount of time it takes to make, the quantity it produces and the short shelf life, these are much better in a crowd.  So when I found out that my parents were coming into town for Father’s Day weekend, I decided that this was the perfect time for me to attempt…croissants!  Seriously, that’s what I was planning on making.  But nope, my dad wasn’t going to have it.  This was his day, and he was going to capitalize.  He looooooooooves doughnuts.  Boston Cream, in particular.  And my mom haaaaaaaates that he eats them.  But it was Father’s Day, after all, which made it a judgement-free eating day.  He said no to the croissants.  Doughnuts were all he wanted!  Guess he didn’t know about these.

DSC_2715

Realizing that this day was actually not about me, I made my dad’s dream Father’s Day breakfast.  He limited himself to just two, but that was only because he had a cinnamon bun earlier in the morning.  Judgement-free, remember?  I should have just made the croissants as well.

DSC_2735

Boston Cream Doughnuts (slightly adapted from Flour)

These doughnuts are time consuming – you need two days to make them, but they were actually easier than other doughnuts I have made in the past.  So do it!  There is really nothing better than a fresh doughnut.

For Pastry Cream:

1 1/4 cups (300 grams) whole milk

1/2 cup (100 grams) sugar

2 tbsp. cornstarch

2 tbsp all purpose flour

1/2 tsp. salt

4 egg yolks

1 tsp. vanilla extract

The day before: In a medium sized pot, heat milk until scalding, just before the boiling point.  While the milk is heating, in a medium bowl, stir together sugar, salt, flour and cornstarch.  Whisk in egg yolks until the mixture is thick and well incorporated.  Slowly incorporate the heated milk by drizzling into egg yolk mixture, and whisking constantly, until all of the milk is mixed in, into a smooth liquid.  Transfer back to the pot.  Heat on low heat, whisking constantly until the it starts to thicken – it will take about 3 minutes.  Take off the heat and whisk in vanilla.  Transfer to a bowl and cover with plastic wrap directly on the cream and refrigerate overnight.

For chocolate glaze:

3.5 oz good quality dark chocolate

2 tbsp. butter

2 tbsp. light corn syrup

Heat everything in a microwave in 30 second intervals until a smooth glaze forms.

For Doughnut Dough:

1 package dry yeast

2/3 cup (160 grams) whole milk

3 1/2 cups (490 grams) all purpose flour

1 1/3 cups sugar (270 grams), divided

1.5 tsp. salt

3 eggs

7 tbsp. butter, at room temperature, cut into 7 or 8 pieces.

The day before: In a stand mixer fitted with the dough hook, or with a handheld mixer, stir together the yeast and milk until mixed together and then let it sit for 2 minutes, so the yeast dissolves.  Add flour, 1/3 cup sugar, salt and eggs and mix on low speed for about 3-4 minutes until the dough is well combined.  Add the butter, piece at a time, until it is full incorporated into the dough.  This whole process should take about 6-7 minutes.  Remove the dough from bowl and wrap into plastic wrap and refrigerate overnight.

The day of: Sprinkle a baking sheet lightly with flour.  Flour a clean surface and roll out doughnut dough until it’s about a 12inch square, and 1/2 inch thick.  Using a 3 inch biscuit cutter, cut out as many rounds as you can within the square without re-rolling any scraps (so cut out each circle close to each other).  Place each of the rounds on the baking sheet and wrap lightly with plastic wrap.  Allow the doughnuts to rise in a warm place for about 2.5 hours until the look big and soft.

Make chocolate glaze right before you are about to fry the doughnuts.

When getting ready to fry, place the remaining cup of sugar in a shallow baking pan, or plate.  Line a tray with paper towels, and heat oil to 350 degrees.  You will need enough oil to have a depth of 3 inches.  Working in batches, when the oil is ready, place 2-3 doughnuts, depending on the size of your pan, into the oil, and fry about 2 minutes on each side, until they are golden brown.  Using a slotted spoon, place the doughnuts onto the paper towel lined tray, and then into the sugar to coat.  Place the doughnut onto a wire rack.  Continue this process until all of the doughnuts are fried and coated in sugar.

When the doughnuts are cool to the dough, pipe vanilla pastry cream into the center of the doughnut.  Dip the tops of each doughnut into the chocolate glaze.  Woo, you’re done!

Watermelon Cucumber Juice

June 18, 2013

DSC_2757

DSC_2739

DSC_2740

DSC_2755

It’s summer!  Make some juice!

DSC_2759

Watermelon Cucumber Juice (recipe from Serious Eats)

1 baby watermelon

1 cucumber

10-15 sprigs of mint

2 limes, juiced

Chop up watermelon and cucumber and throw in the blender with mint and lime juice and whiz away.  If it needs some help along the way, add a bit of water – about 1/2 cup.  Chill and then enjoy, preferably outside, in the sun, and with a straw.

Key Lime Pie

June 6, 2013

DSC_2725

This recipe, my friends, was a test of patience in so many ways.  Key lime pie is something I’ve made so many times!  Successfully, even!  I love it – it’s by far one of my favorite desserts, and I especially like how easy it is to make.

DSC_2715

This is all because I have never used actual key limes before.  I, um, always used bottled key lime juice.  Stop judging me!  Have you ever seen these miniature limes?!  They’re tiny!  And filled with so many seeds, and, seriously, nearly impossible to juice.  While you are attempting to get the droplets of juice out of the actual fruit and into your measuring cup, they make your hand cramp up!  And then you will see that you need to juice about 20 more to fill that measuring cup.  And then you will have a little cry.  I speak the truth.

DSC_2712

At least this is what happened to me.  But, of course, I was in it (to win it).  And I wasn’t going to stop mid way (although I seriously considered it*).  So I persevered and made the pie.  And I waited.  And waited, and waited.  Because, of course, the most vital step for a key lime pie is for it to be chilled.  But after all of that work, all I wanted was a slice of pie.  So I dug into some while it was still warm.  “Bitter”, I believe, was the word used to describe the pie.  The sadness multiplied.

DSC_2717

But then, because I believe in second chances, I let it chill overnight, and had a slice for breakfast, and it was exactly how you want any key lime pie to be.  Tart and sweet and creamy and deliciousness.  Fine, fine…key limes win.

DSC_2722

*Especially when I decided to make lunch in the middle of the pie-making extravaganza.  Avocado tostadas were on the menu.  When my sister took the limes, of the non key lime variety, to juice onto the avocados, she muttered “man, these limes are really juicy!” and that just made me sadder and I almost gave up.

DSC_2728

Key Lime Pie

9 graham crackers
3 tablespoons sugar
5 tbsp. butter, melted and slightly cooled
pinch of salt

Preheat oven to 325°F.  In a food processor, or by hand, crush graham crackers until the form fine crumbs.  Mix in the rest of the ingredients until the crust comes together.  Press into a 9 inch pie or tart plate and bake for 10 minutes, or until lightly browned.  Let cool completely.

1 can sweetened condensed milk
4 egg yolks
1/2 cup key lime juice (from about 20 key limes)
1 tbsp. key lime zest

In a medium bowl, whisk together all of the filling ingredients until well combined.  Pour into the cooled pie crust.  Bake for about 18 minutes, or until the filling is just set.  Let cool completely, and then refrigerate until completely chilled, at least 4 hours.  Serve with whipped cream, recipe below.

1/2 cup heavy whipping cream
1 tbsp. sugar
1/2 tsp. vanilla bean paste or vanilla extract

In a deep bowl, whisk together the whipping cream, sugar and vanilla.  Either by hand or with an electric mixer, keep whisking until soft peaks form.  Dollop onto each piece of pie.