Archive for February, 2013

Orange Black Pepper Pound Cake

February 28, 2013

DSC_2597

When I was young, my dad was always in charge of weekend breakfasts.  He never really cooked anything – just added his own little touches to store-bought specialties that we never ate on weekday (mom-made) breakfasts.  Mini chocolate-chocolate-chip  muffins with more chocolate chips melted on top!  Canned biscuits baked with an extra pad of butter!  I see now that he may have let us indulge a bit.  But without fail, every weekend morning, we would have a tall glass of orange juice waiting for us.  My dad’s twist?  He would always mix in a little salt, a little sugar, and a touch of black pepper.

DSC_2575

It was actually incredibly tasty!  It was this sweet and tangy and savory drink, with a spicy kick.  Which we all loved.  Because we are Indian, after all.  No matter what he found as his inspiration at the grocery store, the glass of OJ always made the cut for our weekend breakfasts.

DSC_2584

These days, the only citrus I get from my parents is a box of sweet, honeybell oranges every February.  When I do remind my dad about the things he used to make when we were younger, he gets a little pouty saying that those days are long gone, and we are too old and grown-up now.  He also reminds me that I can now very well mix my own spices.  What?!  As you may have guessed, this doesn’t sit well with me.  I want my juice, goshdarnit!  And I want my dad to make it for me!!

DSC_2586

I think that the fair conclusion is that my dad has overestimated my maturity.  But still, this cake is in honor of the juice I used to have.  And maybe a little nudge to my dad’s nostalgic side to make it again for me when I come home next.  Maybe?

DSC_2603

Orange Black Pepper Pound Cake (recipe adapted from Martha Stewart)

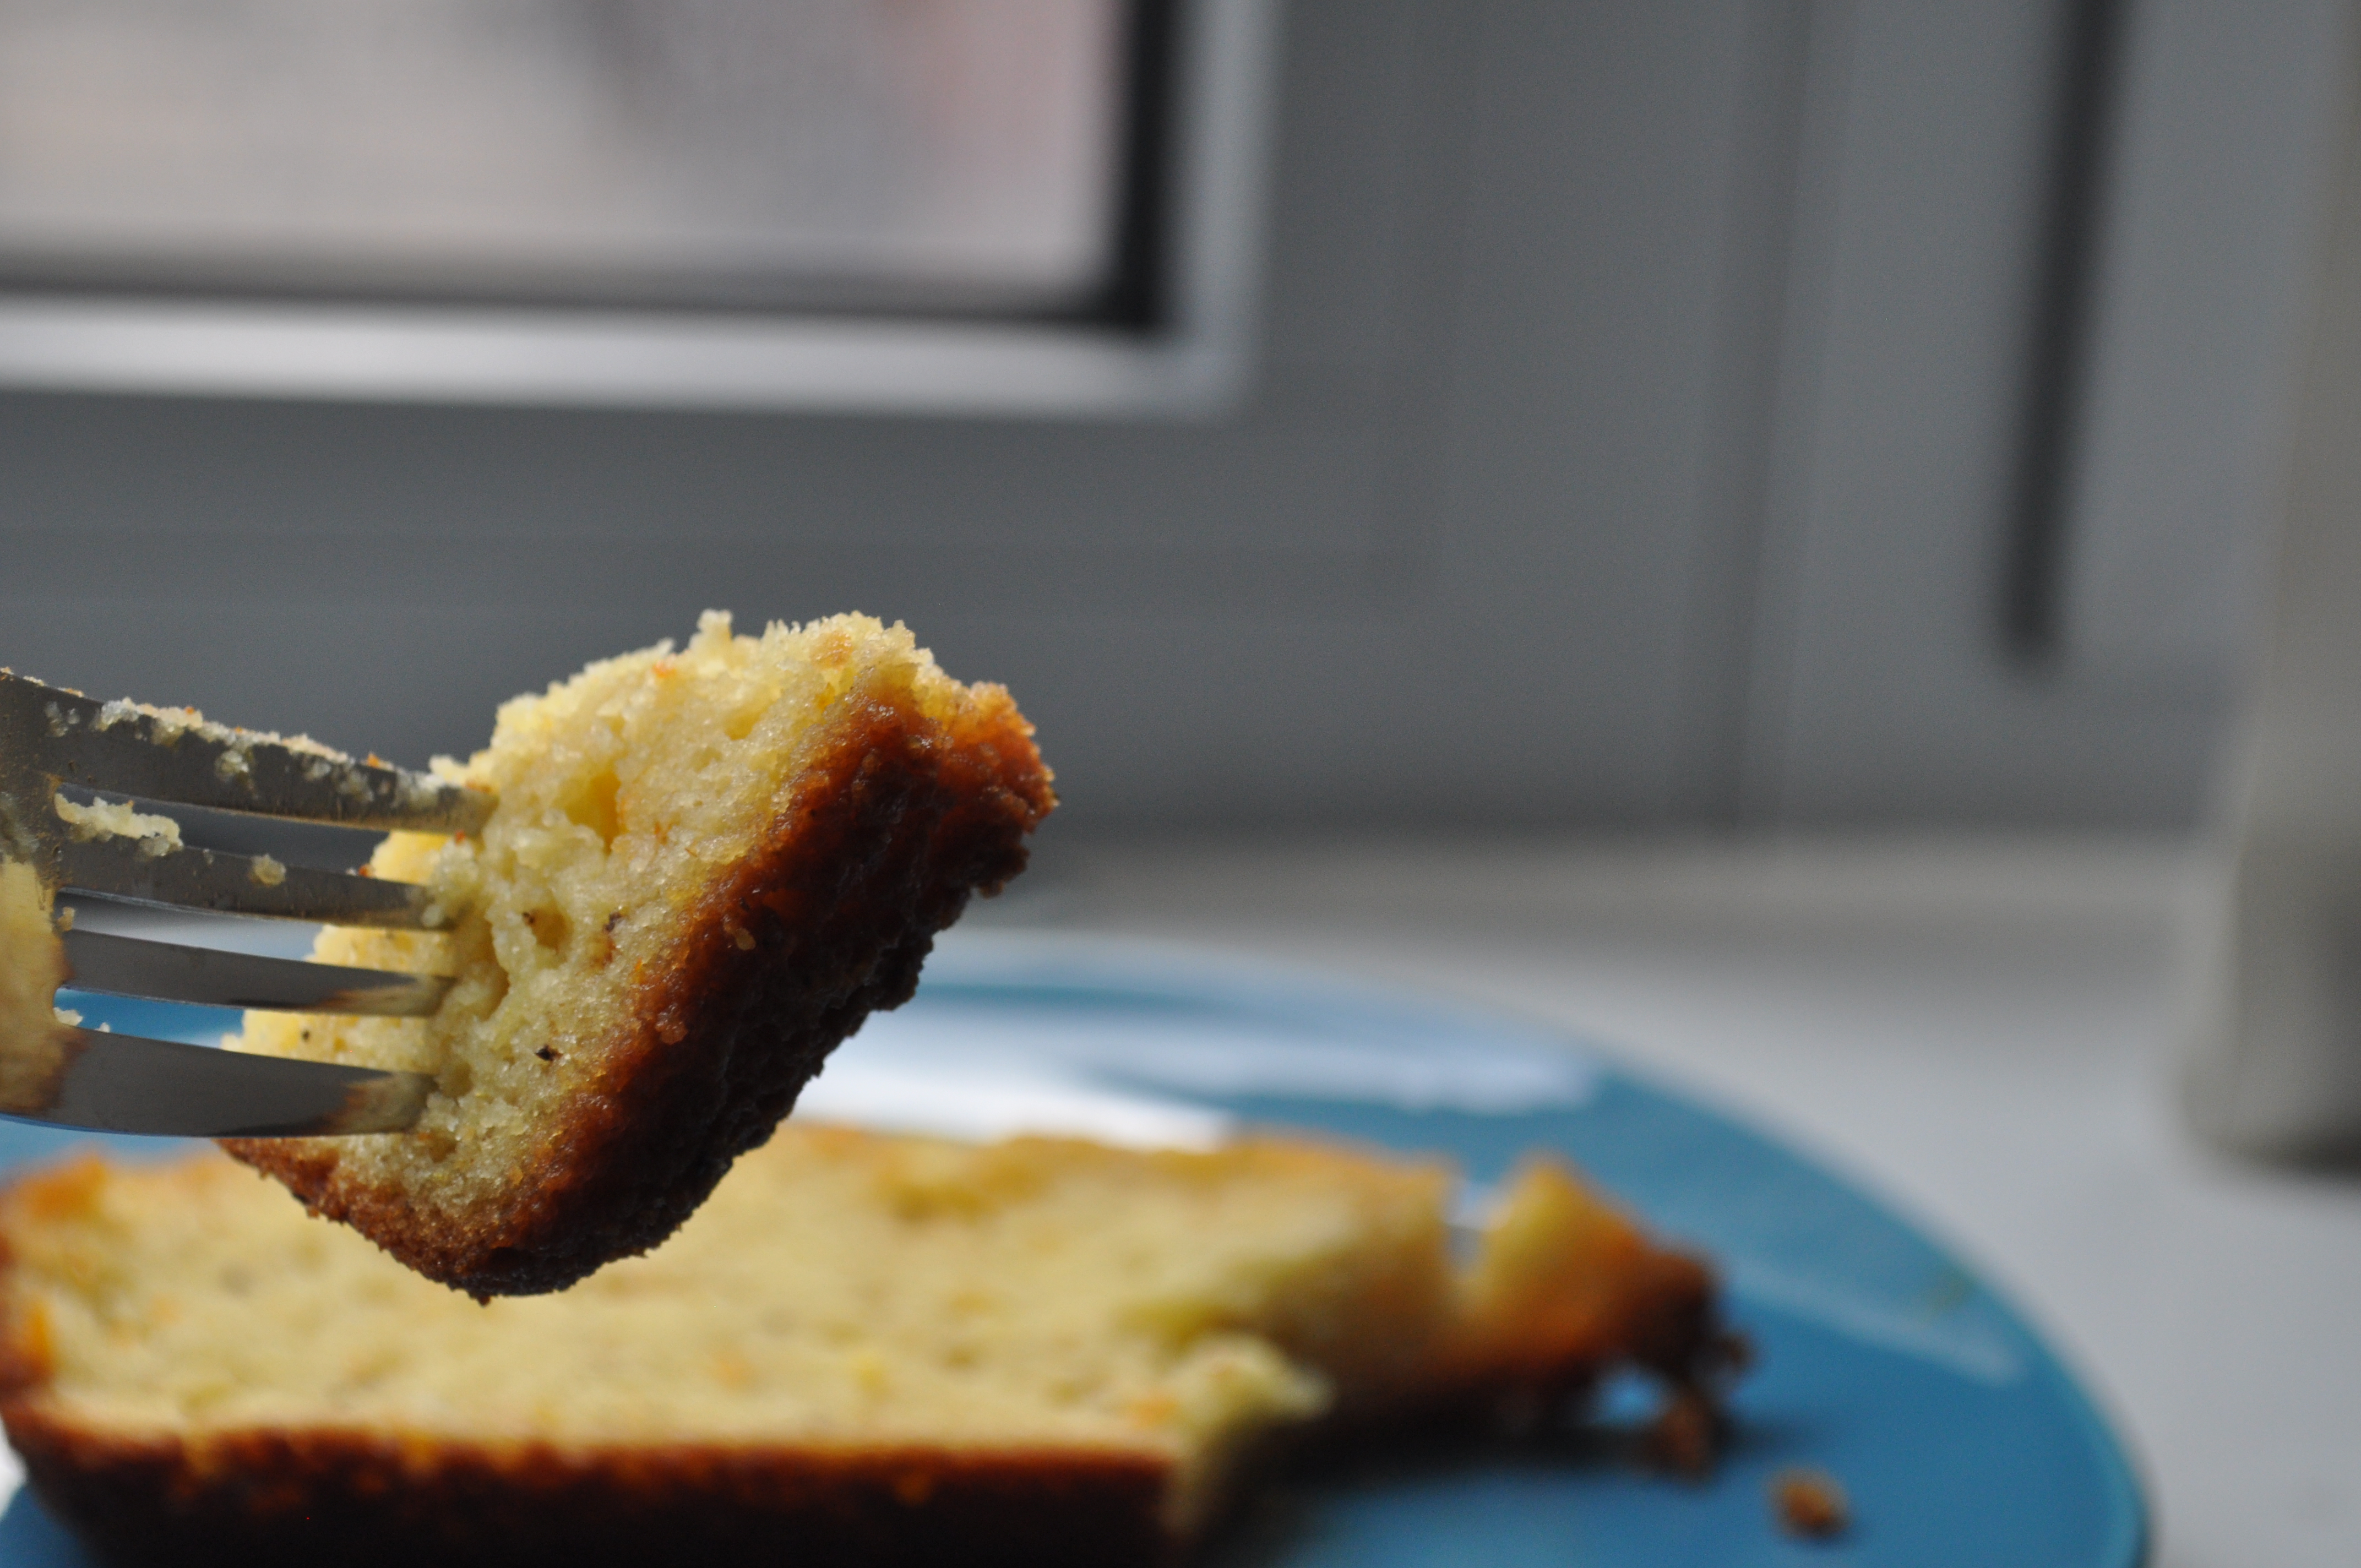
A couple things: the original recipe called for no black pepper, of course, but instead, a dark chocolate glaze on top.  I obviously love the orange chocolate combo and highly recommend it.  But this orange black pepper combo is quite nice and tasty.  And because it’s an olive oil cake, I think the black pepper adds a very lovely depth that you can’t get with the chocolate.  Also, I made this with a blood orange olive oil that was gifted to me, and it worked beautifully.  But the orange flavor is very pronounced even without the flavored olive oil – just make sure it is a good quality.  Lastly, I forgot to add the baking powder.  It didn’t even slip my mind – I kept thinking that it was so strange that this recipe didn’t call for baking powder.  And then continued to overlook it in the recipe.  But hey!  It didn’t really make a difference!  I would encourage you adding it, though.

For the cake:

  • two oranges, zested
  • 1 cup, sugar
  • juice of two oranges – about 3/4 cup juice
  • 1/2 cup plain yoghurt
  • 3 eggs
  • 2/3 cup extra virgin olive oil
  • 1 3/4 cup all purpose flour
  • 1 1/2 teaspoon baking powder
  • 1/4 teaspoon baking soda
  • 1/4 teaspoon salt
  • 1/2 tsp. coarse black pepper
For the glaze:
  • juice of 1 orange – 1/2 cup
  • 1/4 cup sugar
  • 1/2 tsp. salt
  • 1/2 tsp. coarse black pepper

Cooking Directions

  1. Preheat oven to 350 – Grease a standard size loaf pan.
  2. With a fork, mash the zest into the sugar until fragrant.
  3. Add the yogurt, juice, and olive oil.  Whisk to combine.
  4. Add the eggs, one at a a time, and the oil and whisk again until everything is combined.
  5. Fold in the dry ingredients until the mixture is smooth.
  6. Pour into the load tin and bake for an hour, or until golden brown on top, and cake springs back to the touch.
  7. While the cake is baking, mix together the juice, sugar, salt and black pepper for the glaze. Set aside until needed.
  8. When the cake is ready, take it out the oven but leave it in the pan. Let it cool slightly, about 10 mintues.  Make a few holes in the cake with a fork and pour over the glaze.  It will look like it’s not soaking in, but it will as it cools.
  9. Let the cake cool completely before slicing.
Advertisement

Macaroni and Cheese

February 23, 2013

DSC_2530

I once heard somewhere that the time we perceive it takes from when we are born to the age of 18, is the same amount of time that we think it will take from 18 to the rest of our lives.  Um, what?!  This is truly upsetting.  But, sigh, it must be true.  Because here we are, suddenly, out of the blue, at the end of February of 2013, and I truly have no idea how we got there.

DSC_2520

This is when I want comfort.  But no, this is really when I want to feel like a kid again.  Pretending that I am still in those first 18 years when time is measured by the next holiday break, or science test, rather than financial quarters.  And what is better to make you feel young again, with an incredibly high metabolism, than mac and cheese.

DSC_2523

To be perfectly honest, I never really crave this extremely typical comforting dish.  When I was little, my mom never reached for the blue box when things got a little busy around the house.  Nope.  She instead always grabbed the cans.  Spaghetti-o’s to be exact.  Mm.  But I digress.  Macaroni and cheese doesn’t have to bring up feelings of nostalgia when you eat it.  There’s just something about mac and cheese, right?  It’s cheesy, and gooey, and carby and wonderfully comforting, and of course undeniably delicious.  It’s also rustic and homey and accessible to pretty much anyone.  Blue box or not, this is so good that it will seem like time is standing still.

DSC_2529

Macaroni and Cheese (recipe from Barefoot Contessa)

1 pound elbow macaroni
1 quart milk
8 tablespoons unsalted butter, divided
1/2 cup all-purpose flour
12 ounces Gruyere, grated
8 ounces extra-sharp Cheddar, grated
1/2 teaspoon freshly ground black pepper
1/2 teaspoon ground nutmeg
1 1/2 cups fresh white bread crumbs (5 slices, crusts removed)

Preheat the oven to 375 degrees.

Pour the macaroni into a pot of boiling water and cook according to the directions on the package, 6 to 8 minutes. Drain well.

Meanwhile, heat the milk in a small pot, until simmering, but not boiling. Melt 6 tablespoons of butter in a large (4-quart) pot and add the flour. Cook over low heat for 2 minutes, stirring with a whisk. While whisking, add the hot milk and cook for a minute or two more, until thickened and smooth. Off the heat, add the cheeses, 1 tablespoon salt, pepper, and nutmeg. Add the cooked macaroni and stir well. Pour into a buttered, 3-quart baking dish.

Melt the remaining 2 tablespoons of butter, combine them with the fresh bread crumbs, and sprinkle on the top. Bake for 30 to 35 minutes, or until the sauce is bubbly and the macaroni is browned on the top.

Strawberry and Cream Macarons

February 14, 2013

DSC_2609

Are you guys tired of the hearts and the cupids and the chocolate yet?  Can you do without the “dessert for two” recipes, and the color red?  Are you ready to just move on and get on with it?

DSC_2582

Well, I’m not!  I love being festive, as I’ve told you before, and Valentine’s Day is no exception.  It is right around this time every year that I have a deep urge to take a shoebox, cut a hole at the top, decorate the whole thing, and wait for my classmates to drop in store-bought valentines.  With candy (!), if I’m lucky.  No people, this is not sad.  It is quite the opposite!  It is celebratory and fun and…fine, maybe a little sad.  But I still love it.

DSC_2584

I’ll spare all of you the decadence and the heart shape food.  But I will share what I love!  Because that’s what this holiday is about anyway, right?  My favorite dessert at the moment: French Macarons!  Bonus: They’re pink!

DSC_2590

I’ve told you that I have attempted to make these before without much success.  And these weren’t perfect by any means.  They didn’t rise the way they were supposed to, they were a bit too sweet, they were chewier than they are supposed to be, and they were all cracked on top.  But boy, am I in love.  This is the start of a lifelong relationship and it will just improve with time.

DSC_2604

Strawberry and Cream Macarons (recipe adapted from BraveTart)

There is a myth that making macarons is not for the faint of heart (pun full intended).  But this really could not be further from the truth.  There are no fancy stand mixers needed (in fact, I think that my batter was overmixed because of my stand mixer).  The recipe is quite straight-forward, not particularly labor or time intensive, and everything can be done by hand.  The one extra-ish tool that you will need, however, is a scale.  The proportions need to be exact.  I speak from experience.  I ended up with one giant sheet of macaron shell when I tried to “eye” the measurements.  It won’t work, people.  And then you will be sad.  And that’s the last thing I want on a day like today!

4 ounces (115g) almond flour, or ground up blanched almonds
8 ounces (230g) powdered sugar
5 ounces egg whites (144g), set out at room temperature overnight
2 1/2 ounce (72g) sugar
2 tsp vanilla extract, or the seeds from one vanilla bean, or 2 tsp. vanilla bean paste
1/2 tsp salt

3/4 oz. freeze dried strawberries, ground up

Preheat the oven to 300° and have ready a large pastry bag, fitted with a plain tip.  Or a freezer bag, and just cut off the tip when you are ready to use.  Also line two baking sheets with parchment paper.

This is where it gets a bit tedious.  Take a 1 to 1 1/2 inch cookie cutter and trace out circles on the parchment paper, about a 1/2 inch away from each other.  This is to guide you to size the macarons as you are piping them, to make sure they are all the same size.  Then after you are done, flip the parchment paper over on the baking sheet, ink side down.  You should will be able to see the circles from the other side.

Sift together the almond flour with the powdered sugar and freeze dried strawberries and set aside. If a significant portion won’t go through your sifter, however, you’ll need to grind them up until they do.

In the bowl of a stand mixer, or with a hand mixer, or by hand (!), combine the egg whites, sugar, vanilla bean (not the extract), and salt and turn the mixer to medium.  Beat for 3-5 minutes or until the egg whites just seem to be getting foamy.

Increase the speed to medium-high, and beat another 7-10 minutes, or until the egg whites are glossy and shiny and holds it shape.  You will end up with a very stiff and dry meringue and your arm will hurt if you are doing this by hand.

Now dump in the dry ingredients all at once and fold them in with a rubber spatula.  You will think that this is an impossible task, but it’s not!  Keep folding.  The meringue will lose some of its air, but that’s a good thing.  You want the end results to be like the consistency of say, pancake batter.

Pipe the batter into the pre-traced circles on the baking sheet. Stop piping just shy of the borders of the circle, as the batter will continue to spread just a bit.  If it doesn’t spread, your batter is still too thick, and you need to mix it some more.

After piping your macarons, take hold of the sheet pan and hit the baking sheet against your counter. Rotate the pan ninety degrees and rap two more times. This is to knock out any of the air bubbles.  Let the baking sheets sit at room temperature for about 30 minutes, or until the macarons are dry to the touch.

Bake for about 18 minutes, or until you can cleanly peel the parchment paper away from a macaron.  Let cool completely on the baking sheet and then transfer to a wire rack.  Pipe with white chocolate buttercream, recipe to follow, top with another macaron shell and enjoy!

White Chocolate Buttercream

6 ounces heavy cream
10 ounces good quality white chocolate (I found a bar with strawberry bits in it!), chopped
1 tsp. salt
1 tsp. vanilla bean paste
4 tbsp. unsalted butter, at room temperature

In a large, heat proof bowl, place the white chocolate, salt and vanilla bean paste.  In a small pot, bring the cream to a simmer, but make sure that it does not boil.  Pour the cream over the white chocolate and let it sit for a moment.  Sit everything together until the mixture is creamy and smooth.  Let it come to room temperature.  With a mixer, beat in the butter until the whole mixture is light and fluffy.  Fill the macaron shells and enjoy!  Store the extras in the refrigerator.

Hot Chocolate Cookies

February 9, 2013

DSC_2622

We made bets last night.  Cookies were at stake.  The bet was to guess how much snow the northeast would get, city by city.  I clearly did not have much faith in the strength of this storm named Nemo, because I lost.  By a lot.

DSC_2610

So I owe a lot of cookies to a lot of people.  Which is just fine because my informal poll shows that baking is one of the top snow day activities ever!  After playing in the snow, and coming back in to drink hot chocolate, that is.  But I’m about to say something controversial: hot chocolate is never all that satisfying.

DSC_2615

No, people, I don’t hate hot chocolate and childhood memories, really.  But, eh, hot chocolate?  Just to get a warm treat?  The concept is so pleasing and delicious sounding – a steaming mug of chocolate liquid topped with melty marshmallows.  But does it ever live up to that?  I mean, let’s think about this together – hot chocolate that comes out of the packets is usually too thin if you “just add water,” and is always too sweet.  And hot chocolate made from the fancier cocoas are usually too thick and makes you feel uncomfortably full.

DSC_2617

Hello?  Are you still there?  Sigh, I realize that I may be on my own in this.  But here I am giving you one better!  Warm, gooey, hot chocolate cookies (made with the aforementioned packets that will give you back your happy childhood memories…okay?) with an even warmer and gooier marshmallow on top.  Seriously, these warm, out-of-the-oven treats could beat out a warm cup of milk or water any day.  And we’re combining the two most beloved snow day activities (again, informal poll)!  Best snow day ever.

DSC_2623

Hot Chocolate Cookies (recipe from A Pastry Affair)

8 tablespoons (1 stick) butter
12 ounces (2 cups), a mix of dark and semi-sweet chocolate chips
1 cup dark brown sugar, packed
3 large eggs
2 teaspoons vanilla extract
1 1/2 cups all-purpose flour
2 packets hot cocoa mix
1 1/2 teaspoons baking powder
1/2 teaspoon salt
18 large marshmallows, cut in half
Chocolate shavings (optional)

In a small pot, melt together butter and chocolate chips over low heat. Stir until smooth and set aside.

In a large mixing bowl, beat together brown sugar and eggs, until light in color and double in volume. Add vanilla extract and stir. Slowly incorporate flour, hot cocoa mix, baking powder, and salt. Mix in melted chocolate. Refrigerate cookie dough for 1 hour to solidify.

Preheat oven to 325 degrees.

Scoop cookie dough by the tablespoon-full onto a baking sheet. Flatten each cooke dough ball slightly.  Bake for 12 minutes, or until cookie tops begin to crack. Pull cookies out from oven and press one marshmallow, cut-side down onto each cookie. Bake cookies for an additional 4-5 minutes, or until marshmallows are softened. Sprinkle chocolate shavings on top, if desired.

Serve warm or room temperature.  You should highly consider warming the cookie up in the microwave before eating, to get the warm, gooey, hot chocolatey taste.