Archive for October, 2013

Buttermilk Ice Cream with Concord Grape Swirl

October 24, 2013

DSC_0138

This post was supposed to be one about grape jelly.  Turned out that after spending time buying, cooking, straining, and cleaning (cooked grapes…they stain, people), my grape “jelly” looked like this:

DSC_0144

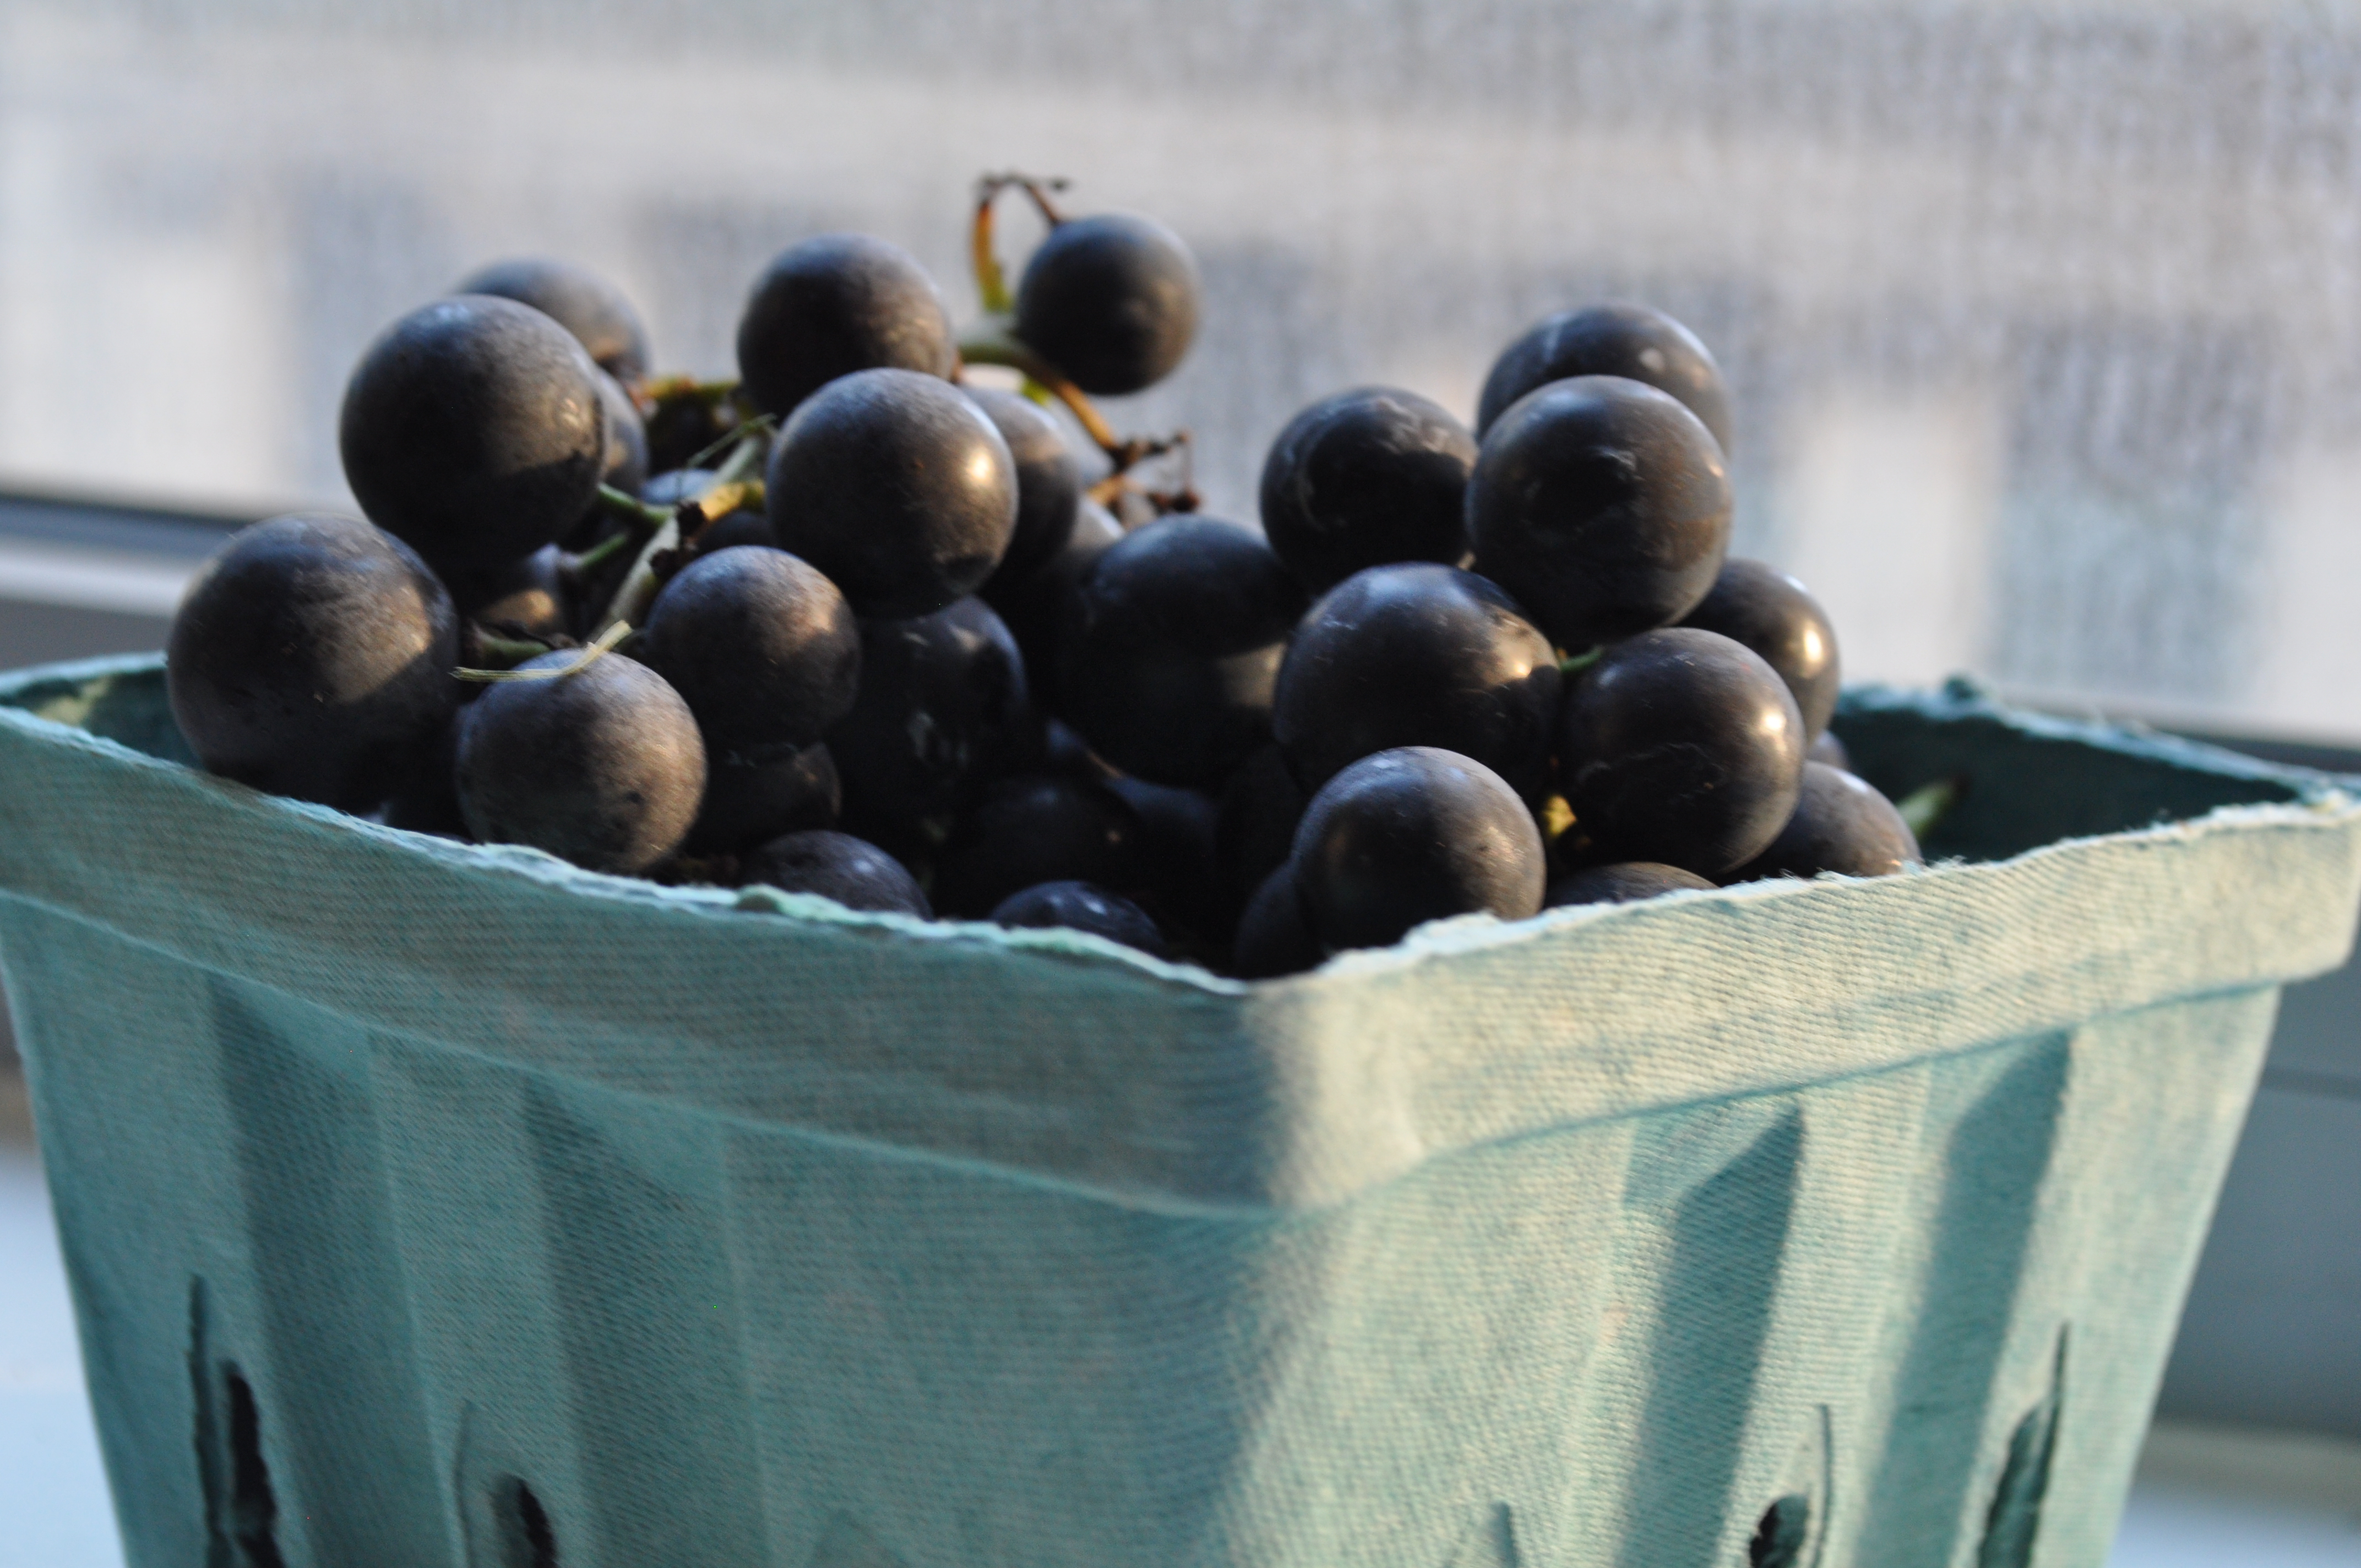
But let me back up.  Have you ever had Concord grapes?!  They have always intrigued me – kind of like champagne grapes…what are those?! – so I finally bought them.  They are the grapiest tasting grape I have ever tasted.  Yes, people, that sentence made sense, read it again.  These grapes are the grapes of your childhood – grape flavored children’s liquid Dimetapp?  Grape flavored lollipops?  And hello, PB&J?!

DSC_0065

After that one taste of this grapey grape, I knew I had to make homemade grape jelly.  Oh my goodness, and then make homemade peanut butter.  On homemade bread!  And then have the most satisfying (and labor intensive) peanut butter and jelly sandwich ever!  But first, the grape jelly.  I had just started the process when I realize that the recipe called for four cups of sugar!  I went with one cup – I felt like that was enough.  I know that sugar helps to thicken, I do.  But I just couldn’t bring myself to do it.  Instead,  I threw in some lemon juice and a bay leaf for good measure and ended up with the most delectable jelly sauce ever.  One that never thickened.

DSC_0139

There was nothing else I could do but to swirl it into some homemade buttermilk ice cream.  Tangy and creamy and sweet with this grape flavored deliciousness swirled throughout.  I’m happy with this outcome.  I hope none of my jellies ever gel again.  (No, I don’t mean that).

Grape Jelly (Sauce) (adapted from Epicurious)

  • 3 lb Concord grapes, stemmed
  • 1 cup sugar
  • juice of 1 lemon
  • 1 bay leaf

Take grapes off of stems and rinse.  Bring to a boil with 1 cup of water.  Simmer for an additional 10 minutes until skins start to slide off and the seeds rise to the top.  The grapes should be falling apart.  Strain the grapes, pressing to release all of the juices.  Discard the skin and seeds.

Place the juice back into the pot, and add sugar, lemon juice and bay leaf.  Bring to a slow boil for about 30 minutes.

I should note that I did nothing to properly can this sauce, so don’t leave it at room temperature!  To sterilize and can, follow the directions in the link above.

Buttermilk Ice Cream (adapted from Serious Eats)

  • 1.5 cups heavy cream
  • 1 cup buttermilk
  • 1/2 cup sugar
  • 1 cup 2% milk
  • 1 tsp. vanilla

Combine everything in a bowl and refrigerate overnight.  Churn ice cream the next day using your ice cream maker’s instructions.  When finished churning, place the ice cream into a container.  Pour about 1.5 cups of the grape sauce on top.  Using a butter knife, swirl the grape sauce into the ice cream, making sure that it’s not completely mixed in.  Put in freezer.  Serve with additional sauce.

No ice cream maker?  That’s fine!  There are other methods!

Advertisement

Homemade Cinnamon Toast Crunch

October 19, 2013

DSC_0087

I really love doing this.  You know, finding recipes for store-bought delicious things and trying to make them at home.  It’s always so fun and satisfying and always so delicious!  But not in the same way.  They taste delicious in that, “I know this is homemade and so tastes like it’s homemade” way.  Okay, I’m about to say something controversial: the homemade versions of store-bought things don’t always taste better.

DSC_0079

Eep.

DSC_0081

Let me clarify.  They almost never taste the same.  These goldfish crackers tasted like baked cheese puff pastry.  Hello. That’s amazing.  And these pop tarts tasted like a breakfast pie.  Pie!  But they don’t taste like the goldfish crackers from the supermarket, or the pop tarts from the vending machine.  They are missing the artificial preservatives piece that I, you know, skip adding.  And sometimes, that’s just what you want.

DSC_0088

Alas.  Here we are to these cute little cinnamon toast crunch.  These are so simple to make, and they are just so, so good.   I mean, this is now my definite go-to recipe for homemade graham crackers.  But that is what these are: absolutely mouthwatering miniature cinnamon sugar graham crackers.  Oh please, no need to be sad!  Time to make some homemade miniature marshmallows for some homemade miniature s’mores.  Sprinkle some store bought Cinnamon Toast Crunch on top and you’ll have yourself a party.

DSC_0096

Homemade Cinnamon Toast Crunch (recipe from Food52)

Cereal:

  • 1 1/4 cup white whole wheat flour or whole wheat pastry flour
  • 1 1/4 cup all-purpose flour
  • 2 teaspoons baking soda
  • 2 teaspoons cinnamon
  • 1/3 cup room temperature butter
  • 1/3 cup brown sugar
  • 1/8 cup granulated sugar
  • 1 tablespoon vanilla extract
  • 3 tablespoons honey
  • 1/2 cup buttermilk

Cinnamon-Sugar Topping:

  • 1 tablespoon melted butter
  • 1/8 cup granulated sugar
  • 3/4 teaspoons cinnamon
  1. Preheat the oven to 350° F and line two baking sheets with a silpat or parchment paper.
  2. In the bowl of a food processor, add the whole wheat flour, flour, baking soda, and cinnamon. Pulse to combine. Then add in butter, brown sugar, sugar, vanilla, and honey. Process until the dough looks like small peas, then add in the buttermilk and process until a dough ball forms. The dough will seem dry and crumbly, but this is fine.
  3. Dump the dough out onto a lightly floured counter and pinch any crumbles of dough together with your hands. Divide the dough into four flat disks.
  4. Working with one piece of dough at a time place a piece of wax paper over the dough, roll the dough as thin as you can, no thicker than 1/4-inch thick, but preferably an 1/8-inch thick (about the thickness of a quarter). Remove the top piece of parchment paper.
  5. With a pastry cutter, pizza cutter, or very sharp knife, even the edges of the rectangle. Slice into 1/2-inch squares and pierce each square with a fork 2 or 3 times.
  6. Make the cinnamon-sugar topping: in a small bowl, combine 2 tablespoons of sugar and 3/4 teaspoon cinnamon. In another bowl, melt the remaining 1 tablespoon butter in the microwave. Brush the whole sheet of dough with the melted coconut oil and then generously sprinkle with the cinnamon sugar.
  7. Use a very thin spatula and scrape the squares off the counter and then carefully use your hands to place the squares on the prepared baking sheets.
  8. Repeat with the remaining dough until all the dough has been used.
  9. Bake for 10 minutes or until lightly golden brown on top (watch closely). Allow to cool completely and store in an airtight container.

Smith Island Cake

October 10, 2013

DSC_0059

After making this recipe, I came away with one valuable lesson: if you want to make a multiple layer cake, make sure you have multiple cake pans.  It’s just good sense, really.  Because, there I was, in the kitchen, making pretty much the easiest from-scratch cake batter I had ever made, thinking that maybe it would have been wise to time myself to set some kind of record of fastest cake making ever (perhaps a little presumptuous…), and then noticed that I only have two cake pans.  Two cake pans for a 10 layer cake!  I was in the kitchen for a while.

DSC_0038

This all started because it was that time of year again. My sisters birthday.  And, of course, she wanted a cake bigger and badder than the one from the year before.  The criteria, like always, was the same: must include chocolate but may not be a chocolate cake.  Usually there are more, but she said that she was “making it easy for me this year.”  Or maybe she was giving me a challenge?  Still can’t figure that one out.

DSC_0054

But I was one step ahead, because, people, I thought that I had tricked her.  Because this recipe is just one of a (really tasty) yellow cake with a (really delicious) chocolate icing.  Nothing fancy.  Nothing crazy.  Just really grand looking.  I thought that I would sneak into the kitchen and get it done without telling anyone!

DSC_0057

Turns out people knew.  Right around the time when I was washing the cake pans for the 4th time, muttering about how two thick layers would have been perfectly acceptable.  But then all of a sudden, it was put together.  And it was brilliant.  I mean, it was one impressive cake.  It was just so tasty – moist and just the right amount of intense chocolate and dainty and just so pretty.  Fine, I’ll say it.  I’ll make it again.  As soon as I get a couple more pans.

DSC_0063

Smith Island Cake (slightly adapted from Saveur)

I should reiterate that this cake is actually quite easy to make and assemble, even if you don’t have a gazillion cake pans.  Which is just fine, but makes the end results that much tastier (because all of that effort is mixed in with the cake batter).  I ended up using 10 inch cake pans, which made 6 layers, and then made 1/3 of the cake batter to make two more layers.  Whoa, I only made 8 layers, I just realized.  Oh man, I just relived it.  I’m tired again.

FOR THE CAKE:
24 tbsp. unsalted butter, melted, plus more for pans
3½ cups flour, plus more for pans
4 tsp. baking powder
1½ tsp. kosher salt
2¼ cups sugar
2 cups milk
1 tbsp. vanilla extract
6 eggs

FOR THE ICING:
2 oz. unsweetened chocolate, chopped
3 oz. bittersweet chocolate, chopped (don’t use chocolate chips)
2 cups sugar
1 cup evaporated milk
6 tbsp. unsalted butter, melted
2 tsp. vanilla extract
1/2 tsp. flaky sea salt, or any other type of mild salt

1. Make the cake: Heat oven to 350°. Butter and flour four 9″ cake pans; set aside. Whisk together flour, baking powder, and salt in a large bowl; set dry ingredients aside. Whisk together butter, sugar, milk, vanilla, and eggs in another bowl. Pour wet ingredients over dry ingredients, and using a whisk, or rubber spatula stir together until just combined; let batter sit for 10 minutes.

Stir batter again until smooth, and then divide the batter in prepared pans.  Because I have no idea how many cake pans you keep in your house, and what size these pans are, you basically want enough batter to come up about 1/4 inch in the pan when spread out.  For my 10 inch cake pans, it was a ladle-full, which means nothing to you, but which I’m guessing is right around a cup of batter.  Tilt cake pans around to let batter cover entire bottom. Bake cakes until barely browned, about 15 minutes.   Mine took exactly 15 minutes – I even stopped looking when it was my 3rd batch in the oven – but make sure you keep an eye on them.  They are thin cakes, and have the potential of baking quickly.  Let cakes cool for 10 minutes in pans, and then invert onto wire racks to cool completely. Clean and dry pans, and grease and flour again; divide remaining batter among pans, take a deep breath, and repeat baking process.

2. Make the icing and assemble the cake: Bring both chocolates, sugar, milk, and butter to a boil in a 6-qt. saucepan over medium-high heat; cook, stirring often, until sugar dissolves, chocolate melts, and mixture is smooth and shiny, which will take about 8-10 minutes. Remove from heat, and stir in vanilla; let icing sit until thick enough to spread, about 30 minutes.  I would stir it occasionally during those 30 minutes to speed up the cooling process.  Place one cake on a cake stand and, using an offset spatula, spread with 1/4 cup icing; spread to the very edge, otherwise the ends of the cake will be dry.  It’s okay if the icing drips off the cake – you’ll need to frost the sides anyway.  Repeat with remaining cakes, leaving top cake un-iced.  You may have to chill the cake to set the icing between cakes for about 10 minutes.  Pour the remaining icing right on top and spread to the side until it drips over.  Spread the icing all around the sides and the top until it is completely covered.  Refrigerate until ready to eat.

Baked Chocolate Glazed Doughnuts

October 3, 2013

IMG_0923

When I was in pre-school, I would love to celebrate birthdays in school.  First, I got to wear a crown.  Amazing.  Second, I was allowed to wear my favorite pink party dress.  Awesome.  But most of all, and this was true for any birthday, not just mine, was that someone would bring in Dunkin Donuts munchkins for breakfast.  My favorite!

DSC_0025

I could go on and on about how much I used to love these doughnut holes.  I loved that there were only four flavors so I didn’t really have to make a decision.  I loved that they came in a yellow portable container with a handle.  I loved that they were as small as I was at the time.  They were practically made for pre school birthday parties.

DSC_0027

My favorite of the four flavors was the chocolate glazed.  I mean, they were all delicious, and I don’t remember ever really discriminating, but if I got my hands on one of those chocolate ones, I was beyond happy.  It was perfect: cakey and chocolately with the crunch of a sugary glaze.  Mm, it was tasty.

DSC_0031

I could still go and get them, I know.  But alas, I’m old enough to make them now!  These were exactly like those bite sized wonders.  Except they are baked, and they are huge.  Because I feel like my food should match my size now, but I should keep that size in check.  Get it?  They’re baked.  Haha!.  Uh, nevermind, just make these.

DSC_0033

Baked Chocolate Glazed Doughnuts (adapted from Buns In My Oven)

For the donuts:
1 cup flour
1/2 cup sugar
1/4 cup cocoa powder
1/4 cup mini chocolate chip
1/2 teaspoon baking soda
1/2 teaspoon vanilla extract
1 egg
6 tablespoons yogurt
1/4 cup milk
1/4 cup vegetable oil

For the glaze:
1 1/2 cups powdered sugar
6 tablespoons whole milk
1 teaspoon vanilla

For the doughnuts:
Preheat oven to 375 degrees.  Spray a doughnut pan (or a muffin tin) with cooking spray.

In a medium mixing bowl, combine the flour, sugar, cocoa powder, chocolate chips, and baking soda.

In a small bowl, beat together the vanilla, egg, yogurt, milk, and oil.  Pour the wet ingredients into the dry and mix until just combined.

Spoon about 1.5 tablespoons into the prepared pan.  Spread to make sure they are evenly baked.

Bake for 8-9 minutes or until the tops spring back when you touch them.

Let the donuts cool in the pan for about 5 minutes.  Turn over onto a wire rack and let cool for an additional 10 minutes.  Dip each doughnut into the glaze (recipe follows), and allow to set on a wire rack.

For the glaze:
In a small saucepan over low heat, combine the sugar, milk, and vanilla until well combined. Remove from the heat.  Dunk the donuts in the glaze to fully coat and place on a wire rack to set.