Archive for November, 2011

Last Minute Thanksgiving Ideas

November 23, 2011

One more day until the big feast!  I’m sure that you have your menus planned and everything is going exactly according to plan.  But juuuust in case you need any last minute ideas for side dishes, desserts, or even for breakfast the next day (early the next day, before shopping, of course), here are a few:

Appetizers and Side Dishes


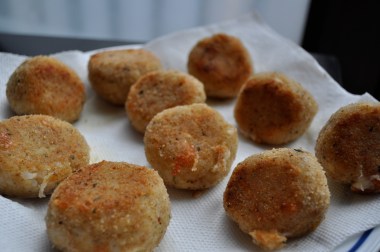
Baked Rice Balls

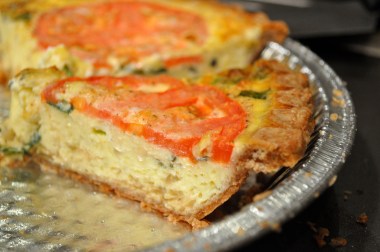
Caramelized Onion, Basil, Tomato, Goat Cheese Quiche

Brazilian Cheese Bread

Cheeseless Mac and Cheese

Zucchini Ricotta Galette

Corn Muffin Stuffing

Desserts

White Chocolate Cheesecake

Lemon Ginger Yogurt Tart

Fig Galette

Fresh Apple Layer Cake

Sweet Potato Pudding Cake

Pecan Cornmeal Cake

French Apple Tart

Breakfast on Friday Morning!

Blackberry, Almond, White Chocolate, Lemon Loaf

Pan de Mallorca

Almond Anise Biscotti

Carrot Cake Breakfast Bread

Barley Scones with Strawberry Balsamic Jam

Nutmeg Zucchini Bread

Pumpkin Spice Cheesecake Bread

Corn Muffins

Hope everyone has a lovely holiday!

French Apple Tart

November 22, 2011

This tart is basically the perfect last minute Thanksgiving dessert.  It’s perfect because it basically takes seconds to make (okay, about 30 minutes, if you make your own pie crust – which I will encourage!  It’s Thanksgiving, after all).  It’s super pretty – it looks like it came directly from a bakery.  And it has “French” in the name!  There literally is nothing else in a dessert that will impress a crowd.

But oh man, the flavor is what will impress the most!  This is an apple pastry in all that a pastry should be.  It has all of its ingredients highlighted in their purest form: apple, butter, sugar, so you can be sure to really taste all of them.  This is a true apple dessert.

I mean, let’s talk about this.  I’m not gonna lie.  I am a cinnamon fiend.  I will sprinkle cinnamon on just about everything, and to me, an apple pie isn’t real until it gets some spices to really dress the apples.  But no, this was apple at its best, and if I dare say it, my favorite apple dessert to date.  Make it.  Today, actually, because you don’t have much time left until Thursday!  Your guests will love you.

French Apple Tart (ever so slightly adapted from Saveur)

A couple notes: I had a 9 inch tart pan, so I made a big tart and a mini tart out of this.  But, how about not making a tart at all?!  I think that you could easily make this into a galette.  Also, the original recipe called for 7 apples.  I definitely did not need all 7, but make sure that you use the 4 listed.

Pie Dough

1 1/4 cup flour

12 tbsp. unsalted butter, cold and cubed, divided

1/4 tsp. salt

1/4 cup sugar + 1 tbsp., divided

3 tbsp. ice water

4 Golden Delicious apples, peeled, cored and thinly sliced

1/2 cup apricot jam

Whiz flour, 8 tbsp. butter, salt, and 1 tbsp. sugar in a food processor until it’s crumbly like cornmeal.  Add the iced water and process until the dough forms into a ball.  Take out of food processor and wrap in plastic wrap for about an hour.

Roll out dough on a lightly floured surface into a 13 inch circle.  It will be thin.  Transfer to an 11 inch tart pan.  Trim the edges and chill for another hour.

Preheat the oven to 375.  Tightly layer the apple slices to form any design you want.  Make it tight enough so you use all of the apples.  Sprinkle with the 1/4 cup sugar and dot with the remaining 4 tbsp. of butter.

Bake for about 60 minutes, or until the apples and the crust has turned a deep golden brown.

Warm the apricot jam in a small saucepan over low heat, until it is loose.  Pour through a strainer.  After the apple tart has cooled for about 10 minutes, brush the warmed jam on top of the apples as a glaze.  Let cool completely before slicing.

Corn Muffin Stuffing (Stuffing Part 2)

November 21, 2011


Things I learned about the art of making stuffing:

1. Don’t be stubborn about not toasting your bread.  I obviously just wanted to stale my bread, thinking that this would result in a much more authentic stuffing.  I cubed up my corn muffins, spread them out on a baking sheet and stuck it in the oven to dry out.  While preheating the oven for a delightfully simple yet delicious apple tart (which will be posted tomorrow), I forgot about the cornbread.  I was just thinking that my kitchen surprisingly smells wonderful, when I realized that corn muffins were burning.  I took them out just in time.  And it turns out that toasting the muffins added a lovely crunch to the stuffing that I quite appreciated.  Toast the bread.
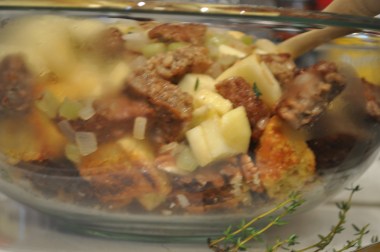
2. When in doubt, add more seasoning.  Stuffing is a weird, tricky beast.  You have all of these competing flavors, but you just may not have enough salt.  And there is absolutely no way to tell!  Because you try everything separately, but never together.  Especially when you have raw eggs mixed in!  Season the sauteed veggies, and the roasted potatoes, and the egg mixture.  Because otherwise, you have a whole lotta flavorless stuffing, which is just bad news bears.

3. If you are vegetarian, don’t add fake sausage.  It turns purple.  A very off-putting purple.  I mean, just don’t do it.

4. I still don’t get stuffing.  I just don’t understand it.  And though my first taste of it, and my first attempt at making it was successful, it’s just a bunch of random things thrown in a casserole over soggy bread.  But that’s exactly why it’s completely brilliant too!  How can it not taste great?!  So as long as everything on its own is delicious, your stuffing will probably be too.

Stuffing (adapted from a-many google searches on stuffing)

1 recipe corn muffins, cut into small cubes and toasted for 10 minutes in a 375 degree oven

3 tbsp. butter, plus more for greasing the casserole dish

1 onion, diced

3 stalks celery, chopped into the same size as onions

1 apple, cored and diced

1 tbsp. fresh thyme

1 sweet potato, seasoned with salt and pepper, roasted and diced

1/2 cup dried cranberries

1/2 cup pecans, toasted and chopped

1/4 cup parsley, chopped

salt and pepper

2 eggs

1/2 cup cream

1 1/2 cups veggie broth

Place the cubed and toasted cornbread into a large bowl.  To it, add the cranberries, pecans, sweet potatoes, and parsley.  Stir to combine.

Preheat the oven to 375.   Grease a large casserole dish with butter.  Over medium heat, melt the 3 tbsp. butter and sautee the onions and celery until soft and lightly caramelized, about 15 minutes.  Season with salt, pepper and thyme.  Add the apples and cook for another 2 minutes.  Add the mixture to the cornbread.  Stir to combine.

Whisk together the eggs, cream and broth.  Season with salt and pepper.  Pour over the cornbread mixture and stir until everything is well coated.  Pour everything into the prepared casserole dish and bake for about 40 minutes until the top is nice and toasty.
Corn Muffins (Stuffing – Part 1)

November 17, 2011

I don’t know a single person that doesn’t love Thanksgiving (it’s in a week, you must have heard).  And while I love Thanksgiving with all of my heart and soul, I have come here to admit that I have never had stuffing before!  I know!  Insanity.  For some reason, Thanksgiving at our household has always been a strange conglomerate of Indian dishes, Thanksgiving-y vegetarian side dishes, and whatever other recipes that I wanted to try because I had many guinea pigs around.  There was never a year when stuffing made the cut.

I have to say that I’m not completely surprised though.  There are some pretty stellar Thanksgiving vegetarian side dishes that sound much more appealing than stuffing.  Hello – caramelized brussels sprouts salad?  Goat cheese mashed potatoes?  Brown sugar glazed yams?!  You can’t blame me here.  Especially because if you think about it, stuffing is essentially dried out bread that you make soggy with eggs and broth and then put right back in the oven to try to crisp up again.  Why?  Why would anyone go through all of this just to get back to the same point you were at before?

But here I am, willing to try this age old tradition, asking my family to be guinea pigs once again.  So, in this two part post about stuffing, I will first make the cornbread for my cornbread stuffing.  I decided on cornbread stuffing, because, as you all know, I love all things corn.  But more than that, the sweet/salty combo intrigued me.  So instead of making standard cornbread, I knew that I wanted to use sweeter corn muffins, especially because this meant that I got more crispy edges in my actual stuffing.  Did I mention that I don’t like the idea of soggy bread?

Also, muffins get stale pretty quickly, and apparently, to ensure the best possible stuffing, you need the stalest bread.  See why this has always been such a confusing dish to me?  Come back this weekend when I post about putting this whole dish together!  I’m excited to be proven wrong about my thoughts on stuffing.  Hopefully.

Corn Muffins (from Baking from My Home to Yours)

1 cup all-purpose flour
1 cup yellow cornmeal
6 tablespoons granulated sugar
2 1/2 teaspoons baking powder
1/4 teaspoon baking soda
1/2 teaspoon salt
Pinch of freshly grated nutmeg
1 cup buttermilk
3 tablespoons unsalted butter, melted and cooled
3 tablespoons corn oil
1 large egg
1 large egg yolk
1 cup corn kernels (I used canned – I rinsed the kernels and then blotted them off on a paper towel)

Center a rack in the oven and preheat the oven to 400 degrees F.  Brush a standard 12 mold muffin tin with butter (you could also spray the muffin tin, but the butter will ensure really crispy edges).

In a large bowl, whisk together the flour, cornmeal, sugar, baking powder, baking soda, salt and nutmeg, if you’re using it. In a another bowl, whisk the buttermilk, melted butter, oil, egg and yolk together until well blended.  Mix in the corn kernels.  Pour the liquid ingredients over the dry ingredients and, with the whisk or a rubber spatula, gently but quickly stir to blend.  Divide the batter evenly among the muffin cups.

Bake for about 15 minutes, or until the tops are golden and a thin knife inserted into the center of the muffins comes out clean. Transfer the pan to a rack and cool for 5 minutes before carefully removing each muffin from its mold.  After the muffins have cooled completely, cut each one into quarters and spread out onto a baking sheet.  Don’t snack on them!  Place in a switched-off oven for two days to dry out before making stuffing.

Pumpkin Spice Cheesecake Bread

November 10, 2011

We all know that the next several weeks will be about eating.  Pies and stuffing and cookies and other delicious stuff that I plan to write about!  But for today, I’d like for you to think of the following: you will need a snack whilst you cook all of these yummy things.  You know, to keep the energy up so you will be alert and ready when it’s actually time to eat.

And what a snack this will be!  Pumpkin bread and cheesecake!  Two entities that are individually in and of themselves so satisfying and delicious.  But together!  And not together like a pumpkin cheesecake, which could never be a snack because of its heaviness.  But together like a perfect balance of a just-enough cheesecake layer atop a lovely spiced, light bread.  A snack that will allow you to eat and stir at the same time.  It is a perfect merriment of flavors and layers that will whet your appetite for the meal you will be preparing.

So go ahead and make this ahead of time.  Have it ready when the Thanksgiving crazy cooking begins.  Your family will appreciate your foresight and gobble it down.  You will appreciate the lovely bread you will have made.  And everyone will appreciate not being cranky by dinnertime.

Pumpkin & Cheese Spice Bread (slightly adapted from An Edible Mosaic)

For the Cheesecake Layer:

8 oz cream cheese, room temperature

1 large egg, room temperature, lightly beaten

1/4 cup powdered sugar

1/2 teaspoon pure vanilla extract

For the Pumpkin Bread:

3/4 cup brown sugar, lightly packed

2 large eggs

3/4 cup (1/2 can) pumpkin puree

1/4 cup canola oil

1 teaspoon pure vanilla extract

1 1/4 cups all-purpose flour

1 1/4 teaspoons baking powder

1/4 teaspoon baking soda

1/4 teaspoon salt

1.5 teaspoons cinnamon

1 teaspoon nutmeg

1/2 teaspoon ginger

1/8 teaspoon cloves

For the Cheesecake Layer:  Use a handheld electric mixer to beat together all ingredients until smooth and creamy.

For the Pumpkin Bread:  Preheat oven to 350F.  Spray a loaf pan with cooking spray.

In a medium bowl, beat together the brown sugar and eggs until light and fluffy.  Mix in pumpkin, oil, and vanilla.  Set aside.  In a separate bowl, sift together the flour, baking powder, baking soda, salt, cinnamon, nutmeg, ginger, and cloves.  Stir the dry ingredients into the wet ingredients and mix together until just combined, being careful not to overmix.  Pour the pumpkin batter into the prepared pan.  Pour the cheesecake mixture on top of the loaf.

Bake until golden around the edges, about 40-45 minutes, or until a toothpick inserted inside comes out clean.  Cool 10 minutes in the pans, then remove from the pans and transfer to a wire rack to finish cooling.

Chocolate Coconut Candy Bars

November 3, 2011

I always do this.  I always post recipes just a little bit after they are most relevant.  I posted cookie recipes immediately after the holidays last year, I wrote about a great football-watching snack exactly one week after the Superbowl, and now, here I am, posting a candy recipe just days after Halloween.  I can’t stop.

In my defense, though, no one ever gives out homemade candy to young trick-o-treaters.  In fact, if I remember correctly, kids are taught to never open those homemade treats (isn’t there some kind of rhyme for that?).  And you are probably so sick of the store-bought orange and black wrapped generic candies anyway that you’re probably ready to turn to something homemade.

Well, these are homemade and delicious, I must say.  This is unlike any candy I’ve ever made: nothing to boil, no candy thermometers, no risk of burning sugar…or burning yourself.  This is more like an amped up blondie that tastes, well, just like candy when it’s all said and done.  Spectacular, homemade candy.  Actually, spectacular, homemade candy that takes less than 30 minutes to make.  I would even go so far as to say that these are even time appropriate, maybe even a bit early – everyone makes candy during the holiday season!  I knew I’d come through eventually.

Chocolate Coconut Candy Bars (recipe from Saveur)

If you are like me, you will take one look at these ingredients and think that these bars are going to turn out way too sweet.  But then, if you think about it, candy bars usually don’t have much salt in them; they are 100% sweet and that works out just fine.  So, going again my instinct of adding just a 1/2 tsp of salt, I followed this recipe exactly.  And these were wonderful.

2 cups graham cracker crumbs
1⁄2 cup melted butter
1⁄2 cup sugar
2 cups sweetened shredded coconut
1  14-oz. can sweetened condensed milk
1 cup semisweet chocolate chips
1 tbsp. creamy peanut butter
1 tbsp. shortening

1. Heat oven to 350°.   Stir together graham cracker crumbs, butter, and sugar in a medium bowl. Transfer crumb mixture to a 9″ × 13″ baking pan and press down with your fingers to form an even layer. Bake until just golden around the edges, 10–12 minutes. Set aside.

2. Put coconut and condensed milk into a bowl and stir well. Transfer the coconut mixture to the baking pan with the prepared crust and spread it out evenly over the hot crust. Return pan to oven and bake until golden brown around the edges, 15–17 minutes more. Set the pan aside to let cool completely.

3. Put chocolate chips, peanut butter, and shortening into a medium pot and cook over medium-low heat, stirring constantly, until completely smooth, 3–4 minutes. Pour chocolate mixture over coconut layer in the pan and use a rubber spatula to spread out to the edges to form a thin layer. Set aside in a cool spot to let cool completely.

4. After the candy has come to room temperature, stick the pan in the freezer for about 10-15 minutes.  This will make cutting the bars easier.  Cut the bars unto 48 squares.