Archive for April, 2013

Rhubarb Ginger Crisp

April 29, 2013

DSC_2729

There’s an uncanny similarity between rhubarb and apricots.  First, they both have an incredibly short season.  They are both really sour but then bake into this glorious, honey-like, silky goodness.  And lastly, I had absolutely no idea how to use either one before making them into crisps.

DSC_2695

It’s a bit exciting, isn’t it?  To discover completely new fruits and vegetables as you grow older.  Come on, don’t judge. I knew that rhubarb existed before this.  I had made rhubarb strawberry things every spring.  But on it’s own?  Never thought about it.  Mostly because  I was too nervous (read: foolish) to find out what it was.  But rhubarb is just so delightful!  It need not be masked with the sweetness of strawberries.  It shines so marvelously on its own with a tang that’s not citrusy, and not like, you know, yogurty, but a tang all its own that is just barely mellowed with the sugar it marinates in.

DSC_2699

And then I added ginger.  Not because the rhubarb needed anything for supplement, but because I just felt like it, and thought that an extra spiciness would work well.  And boy did it work.

DSC_2700

This was all sorts of delicious.  It was so balanced with the sweet, tart and spicy.  The baked rhubarb had this jammy quality that contrasted so perfectly with the crunchy topping.  I’m a convert.  On to the next produce discovery!

DSC_2712

Rhubarb Ginger Crisp

For Filling:

1 tablespoon freshly grated ginger

1/2 cup granulated sugar
2 tablespoons flour
pinch of salt
1 1/2 pounds fresh rhubarb, cut into 1 inch matchsticks
For crisp topping:
1/2 cup oats
1/2 cup all purpose flour
1/8 tsp. cinnamon
pinch of salt
1/4 cup light brown sugar
1/2 stick butter, cold, diced
Preheat oven to 350.  Butter a 8 or 9 inch square pan.  Directly in the baking dish, mix together all of the ingredients of the filling, mixing well to combine.  Let it sit while making the topping, making sure that the sugar dissolves.
To make topping, stir together all of the dry ingredients.  Cut in the butter until it is worked into the flour mixture and the butter is pea-sized.  Evenly spread all over the rhubarb filling.
Bake for 45-50 minutes or until the filling is bubbling and the top is golden brown.  Let cool slightly and then serve warm or at room temperature.  It is even delicious straight out the refrigerator with a spoonful of Greek yogurt.
Advertisement

Coconut Macaroons

April 22, 2013

DSC_2692

Well, this is it.  Coconut macaroons.  Let’s talk about this for a minute.  Even though white chocolate cheesecake was the first recipe I had ever tried on my own, and adding chocolate chips to a cake mix was the first time I had ever been “inventive,” (no, really), coconut macaroons was the first recipe I had ever really experimented with.  I tried them with egg whites, condensed milk, egg whites and condensed milk, granulated sugar, powdered sugar, sweetened and unsweetened coconut, with and without chocolate chips, coconut milk, regular milk.  I mean, I really spent some quality time with these little soft cookie-confectionary items.

DSC_2687

And then finally, eventually, I came up with a recipe that I really, truly loved.  It’s saved on my computer as “top secret coconut macaroon recipe.”  It’s one of those recipes that I was positive that I would include in my future baking career’s repertoire.  It is just the right amount of involved that you felt like you accomplished something, but easy enough that you  never feel defeated.  It was, in my eyes, the perfect coconut macaroon.  I was done.  Move on to the next recipe!

DSC_2701

I think we all know that this isn’t that recipe.  Because, people, this one that I’m posting here is better.  This is what I both love and hate about the art of cooking.  You are never really done.  You can never really check any recipe off of any master list.  Recipes are always evolving, well, my work was a waste and I’m sad.  Sigh.  It’s a mix of emotions, really.

DSC_2688

But this recipe is nothing short of genius.  It uses pastry cream (!!) as the binder.  Which is exactly what makes them perfectly soft and chewy on the inside with crispy, toasty coconut on the outside.  It really is art.  Good work, recipe.

DSC_2695

Coconut Macaroons (slightly adapted from Flour)

  • 1/2 cup whole milk
  • 1/4 cup (50 grams) sugar
  • 2 tablespoons flour
  • 1 teaspoon cornstarch
  • pinch of salt
  • 2 egg yolks
  • 1/2 teaspoon vanilla
  • 2 (14 oz) bags of sweetened shredded coconut
  • 6 egg whites
  • 1 cup (200 grams) sugar
  • 1/4 tsp. salt
  1. Make the pastry cream: Pour the milk into a small saucepan, and scald it over medium-high heat until you see bubbles forming around the edge of the pan.  Be sure that the milk does not boil.
  2. Meanwhile, in small bowl, mix together the sugar, flour, cornstarch and salt.  In another small bowl, whisk together egg yolks until smooth and then slowly add to the flour mixture, and whisk until well incorporated.
  3. Remove the milk from the heat, and very slowly drizzle it to the egg-flour mixture, a little at a time, whisking constantly.
  4. When all of the milk has been added, pour the mixture back into the saucepan, and place over medium-low heat. Whisk continuously and vigorously for  about 1 minute, or until the mixture thickens.  It will happen very suddenly, so keep an eye on it.
  5. Remove from the heat, and stir in the vanilla.
  6. Cover the mixture with plastic wrap, placing it directly on the surface of the pastry cream, and let it cool completely.
  7. Position a rack in the center of the oven, and heat the oven to 350 degrees F.  Line a baking sheet with parchment paper.
  8. In a (very) large bowl, combine the coconut, egg whites, sugar, salt, and pastry cream. Stir with a wooden spoon until well combined.  If you feel like it it, toss in 1 to 1 1/2 cups of mini chocolate chips!  And then stir until well combined.
  9. Using a 1 tablespoon measure, scoop the dough in rounded mounds onto your prepared baking sheet.  Bake for 20-25 minutes, or until the cookies are golden brown all over. Let them cool on the baking sheet on a wire rack for at least 20 minutes. Then transfer the cookies to the rack to cool completely.


Lemon Curd

April 11, 2013

DSC_2686

I know far too many people who can eat jam and jelly right out of the jar.  You may be one of them.  I simultaneously find this to be both endearing and slightly off-putting.  How can you eat straight-up mildly fruit flavored sugar without any carby buffer?!  Even really well-made jams, with good, fresh fruit, and not resembling a sugar bomb is meant to be lightly spread on some toast before consumed.  Seriously people.  That’s how it’s supposed to be eaten.

DSC_2686

Here is when I tell you, though, that my one exception is lemon curd.  I always wondered about this anomaly when I would secretly sit in my room with a jar of it.  Why is this spread so unlike any other of it’s jammy counterparts?

DSC_2690

Well, I finally made it, and only then I found out.  It’s because lemon curd is not jam at all!  It’s not even curd!  It’s pudding, people!  All these years, we have been spreading pudding on our toasts and crackers.  Which is so so brilliant and makes me want to turn all fruit into pudding-like curd spreads!  It’s cooked with butter and eggs and slowly thickened to a pudding like consistency.  We have been eating lemon custard!  This revelation is mind-boggling!

DSC_2693

All I can tell you is that you should go ahead and grab a spoon.  Forget jarring this stuff.  It’s meant to be eaten out of a bowl, with maybe some whipped cream on top.  Because why not.

DSC_2690

Lemon Curd

6 tablespoons butter, softened to room temperature

scant 1 cup sugar

2/3 cup fresh lemon juice, from about 5 lemons

3 tsp. lemon zest, divided

3 eggs

With a mixer, beat together the butter sugar, and 1.5 tsp. lemon zest for about 2 minutes, until the mixture is light and fluffy.  With the mixer running on low speed, slowly mix in the eggs and lemon juice.  The mixture will curdle.  You will be sad.  But then you will remember that the name of this “spread” is called lemon curd, and then hopefully you will perk up again.

Transfer everything to a medium size pot, and over low heat, stir everything constantly until it comes together into one uniform looking liquid.  Turn the heat just a smidgen up.  Really, not too much at all, and continue to stir constantly, making sure you scrape the bottom of the pot.  The mixture will thicken, coating the back of the spoon, and as soon as it does, take it off the heat.  This step me about 6 minutes, so keep an eye on it.  Immediately strain the lemon curd to remove any lumps or egg that has cooked.  Stir in the remaining lemon zest.  Pour into whatever you want to pour it into, and cover with plastic wrap directly on top of the curd so it doesn’t form a skin (like when making pudding, people!), and chill in the fridge.

Salted Caramel Chocolate Truffles

April 4, 2013

DSC_2594

I have always been so impressed with those people who eat an apple for dessert.  How do they do that?!  Do you think they’re satisfied?  I wonder what unbaked apples that are not in a buttery pie crust with a brown sugary, cinnamon syrup enveloping them taste like.  You know, I may try doing this whole apple dessert thing when I (eventually) grow up, but for now, I need a real, honest sweet just about every day.

DSC_2572

DSC_2573

But it’s a challenge trying to compete with yourself with a recipe every week.  Sometimes you just don’t feel like one-upping your previous highest level of cooking skills with sticky buns or macarons.  Instead all you really want is a cereal treat, or some chocolate!

DSC_2580

DSC_2576

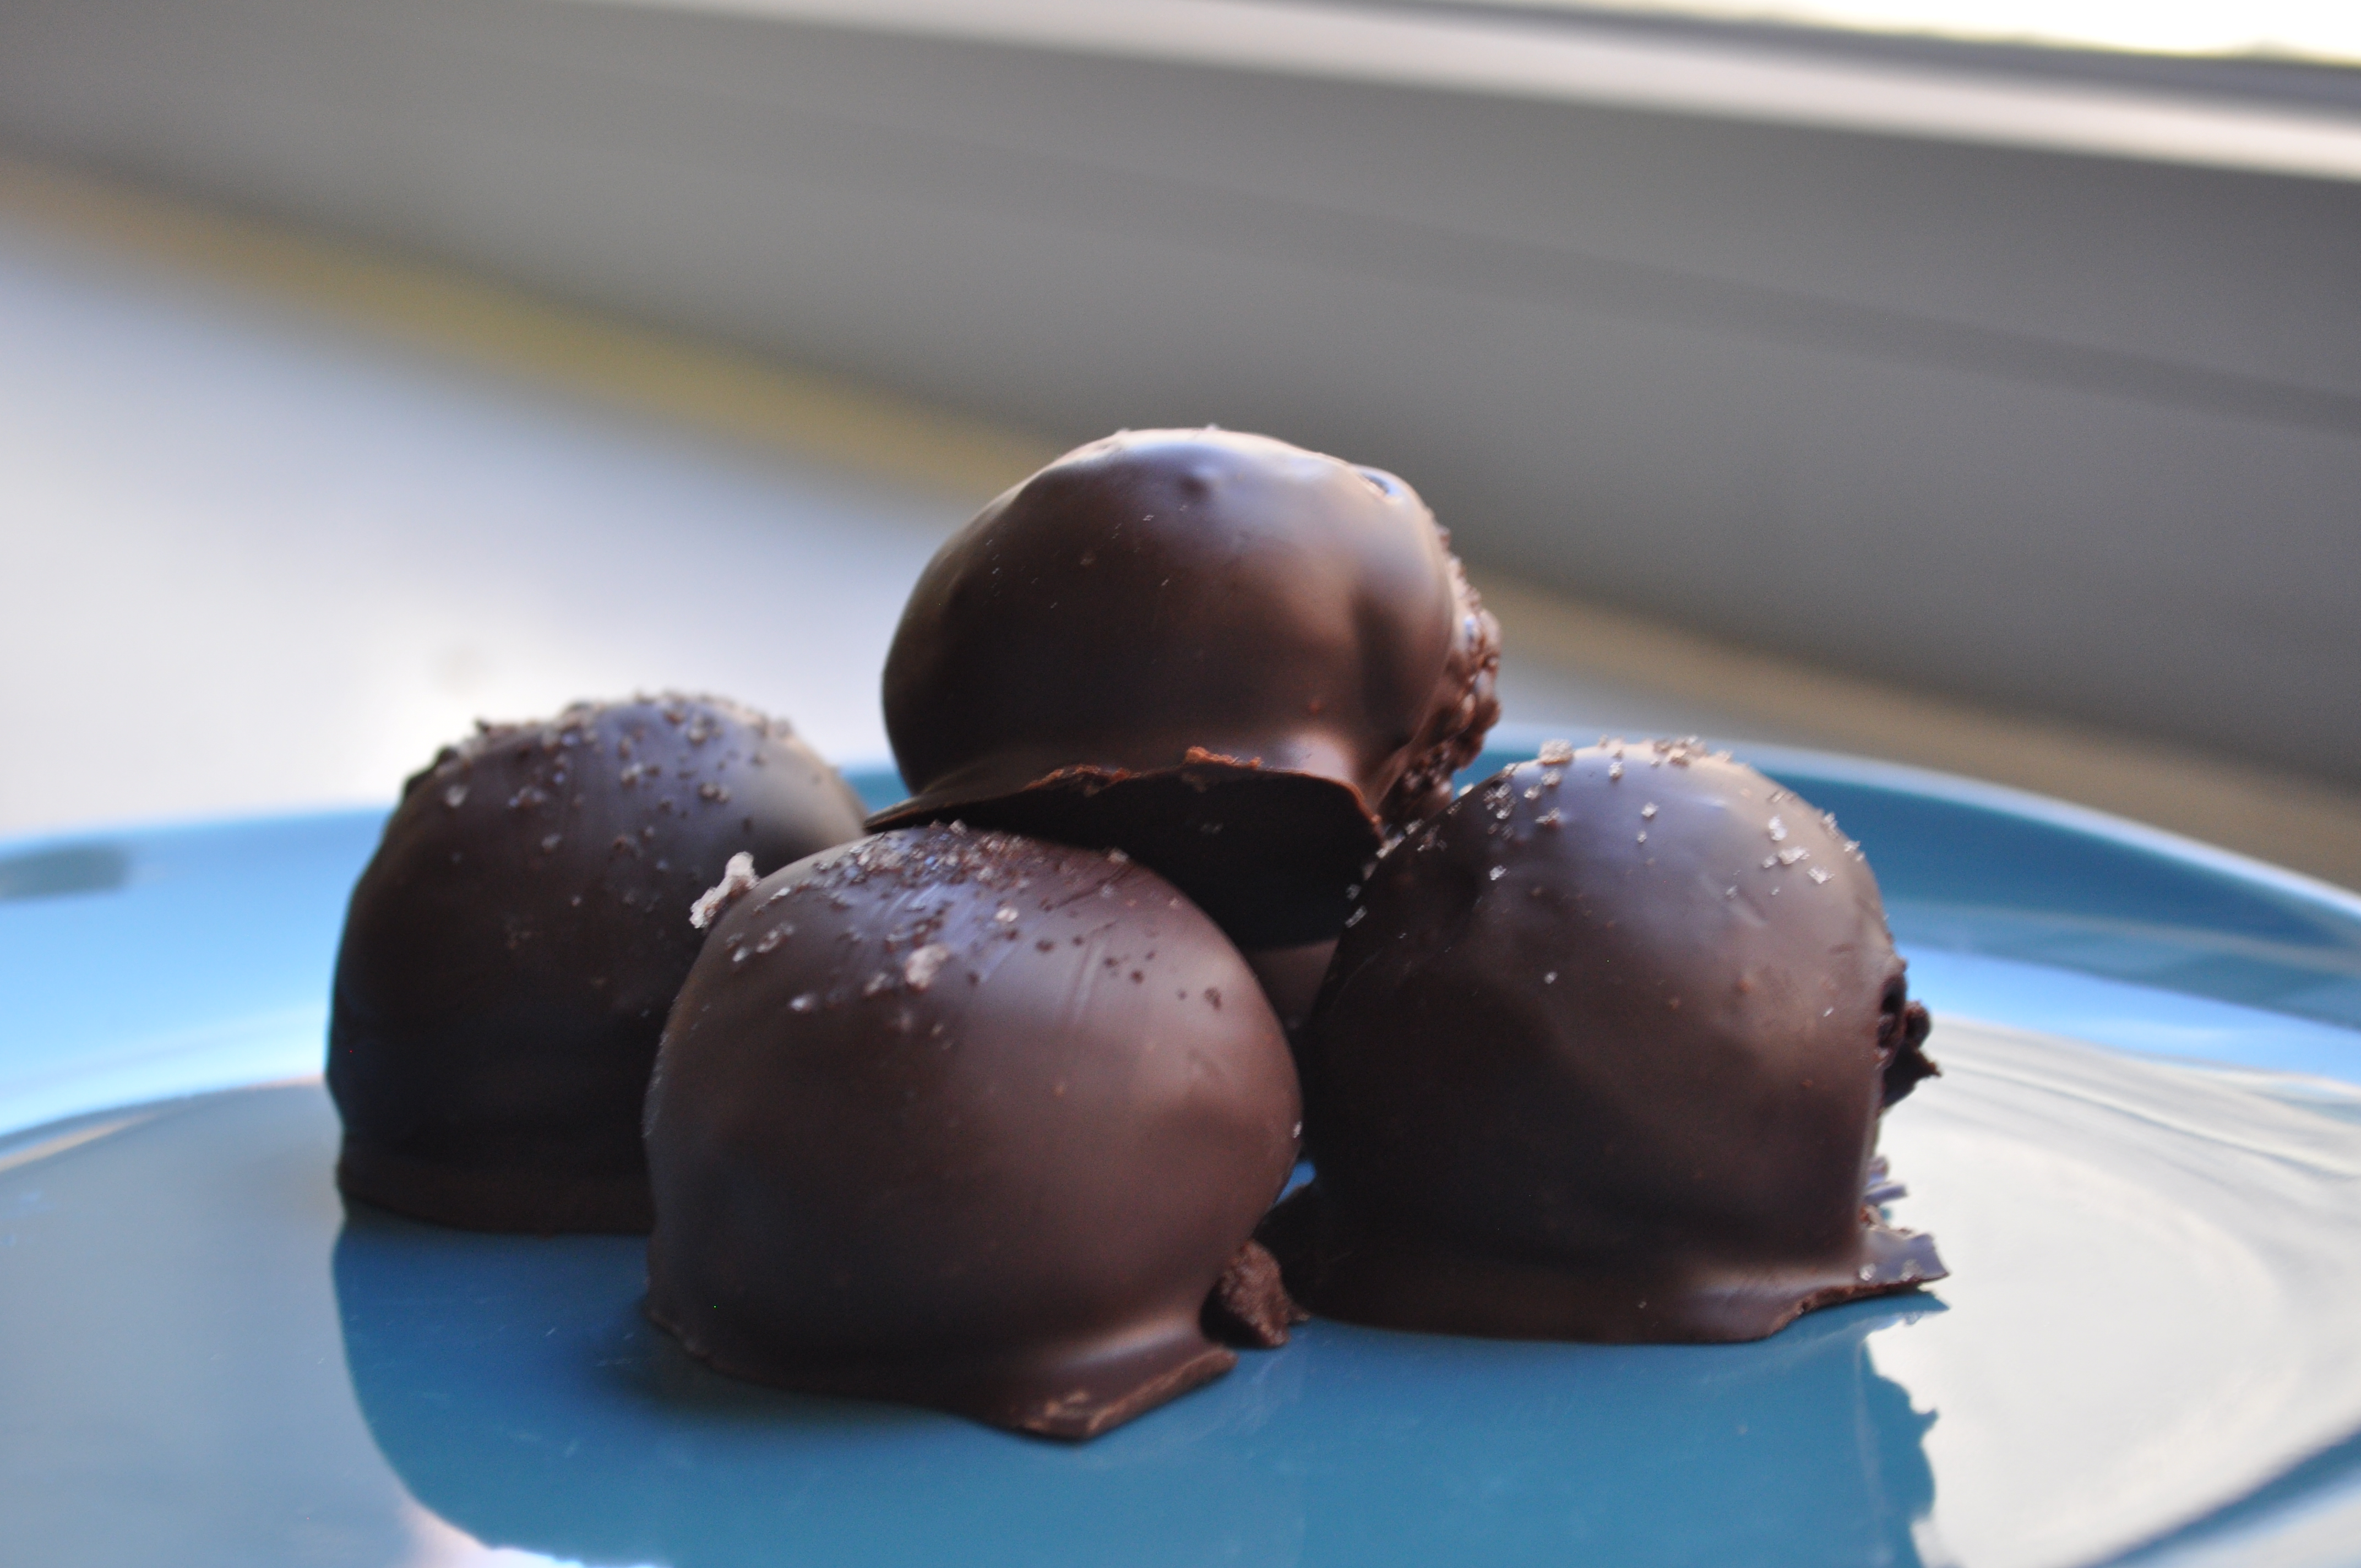
I wanted chocolate.  Really, that’s all I wanted.  Just some good quality, gooey, always-there-for-you, little globs of chocolate.  And this is what transpired.  Salted caramel and chocolate truffles!  A two for one deal!

DSC_2582

DSC_2588

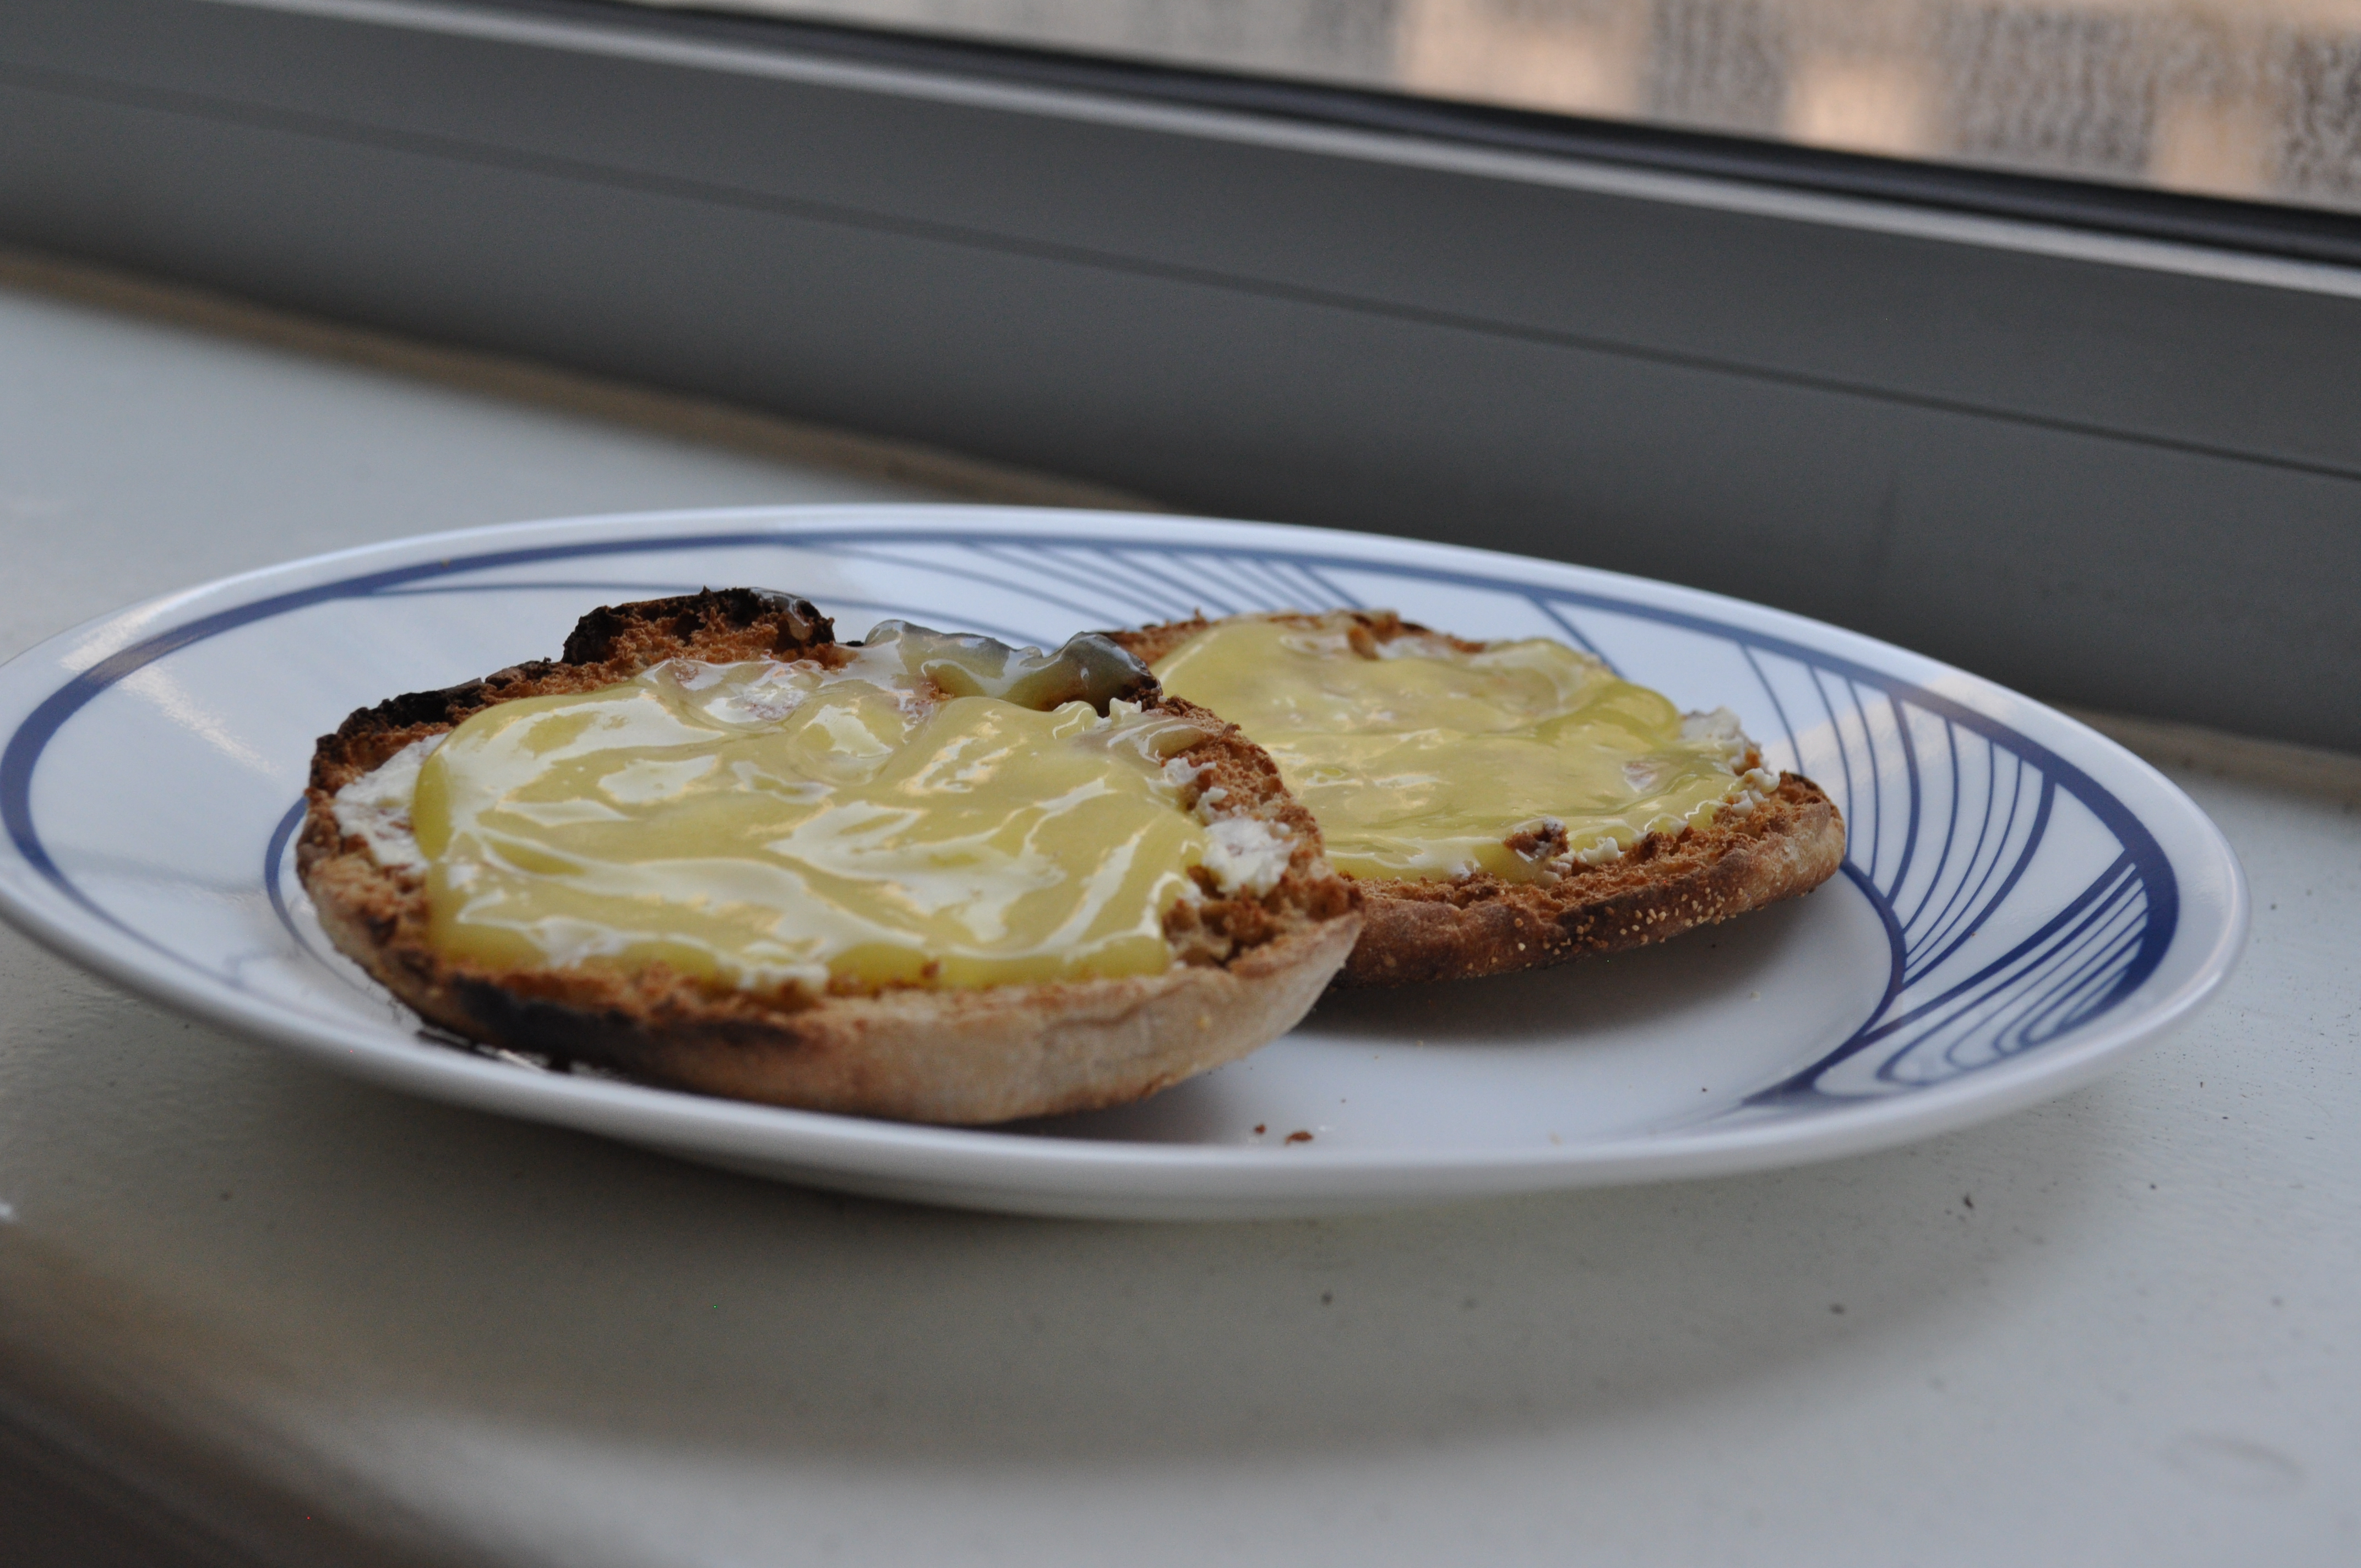
It may seem like the kind of chocolate you make when you’re having an internal competition with yourself.  But it’s not!  I mean, it turned out to be quite impressive, but it wasn’t meant to be like that.  These delicious balls of goodness are the simplest chocolates to make, and are so extremely satisfying that they put any fancy dessert to shame.  They are especially delightful alongside an apple.

DSC_2592

Salted Caramel Truffles (recipe from Serious Eats)

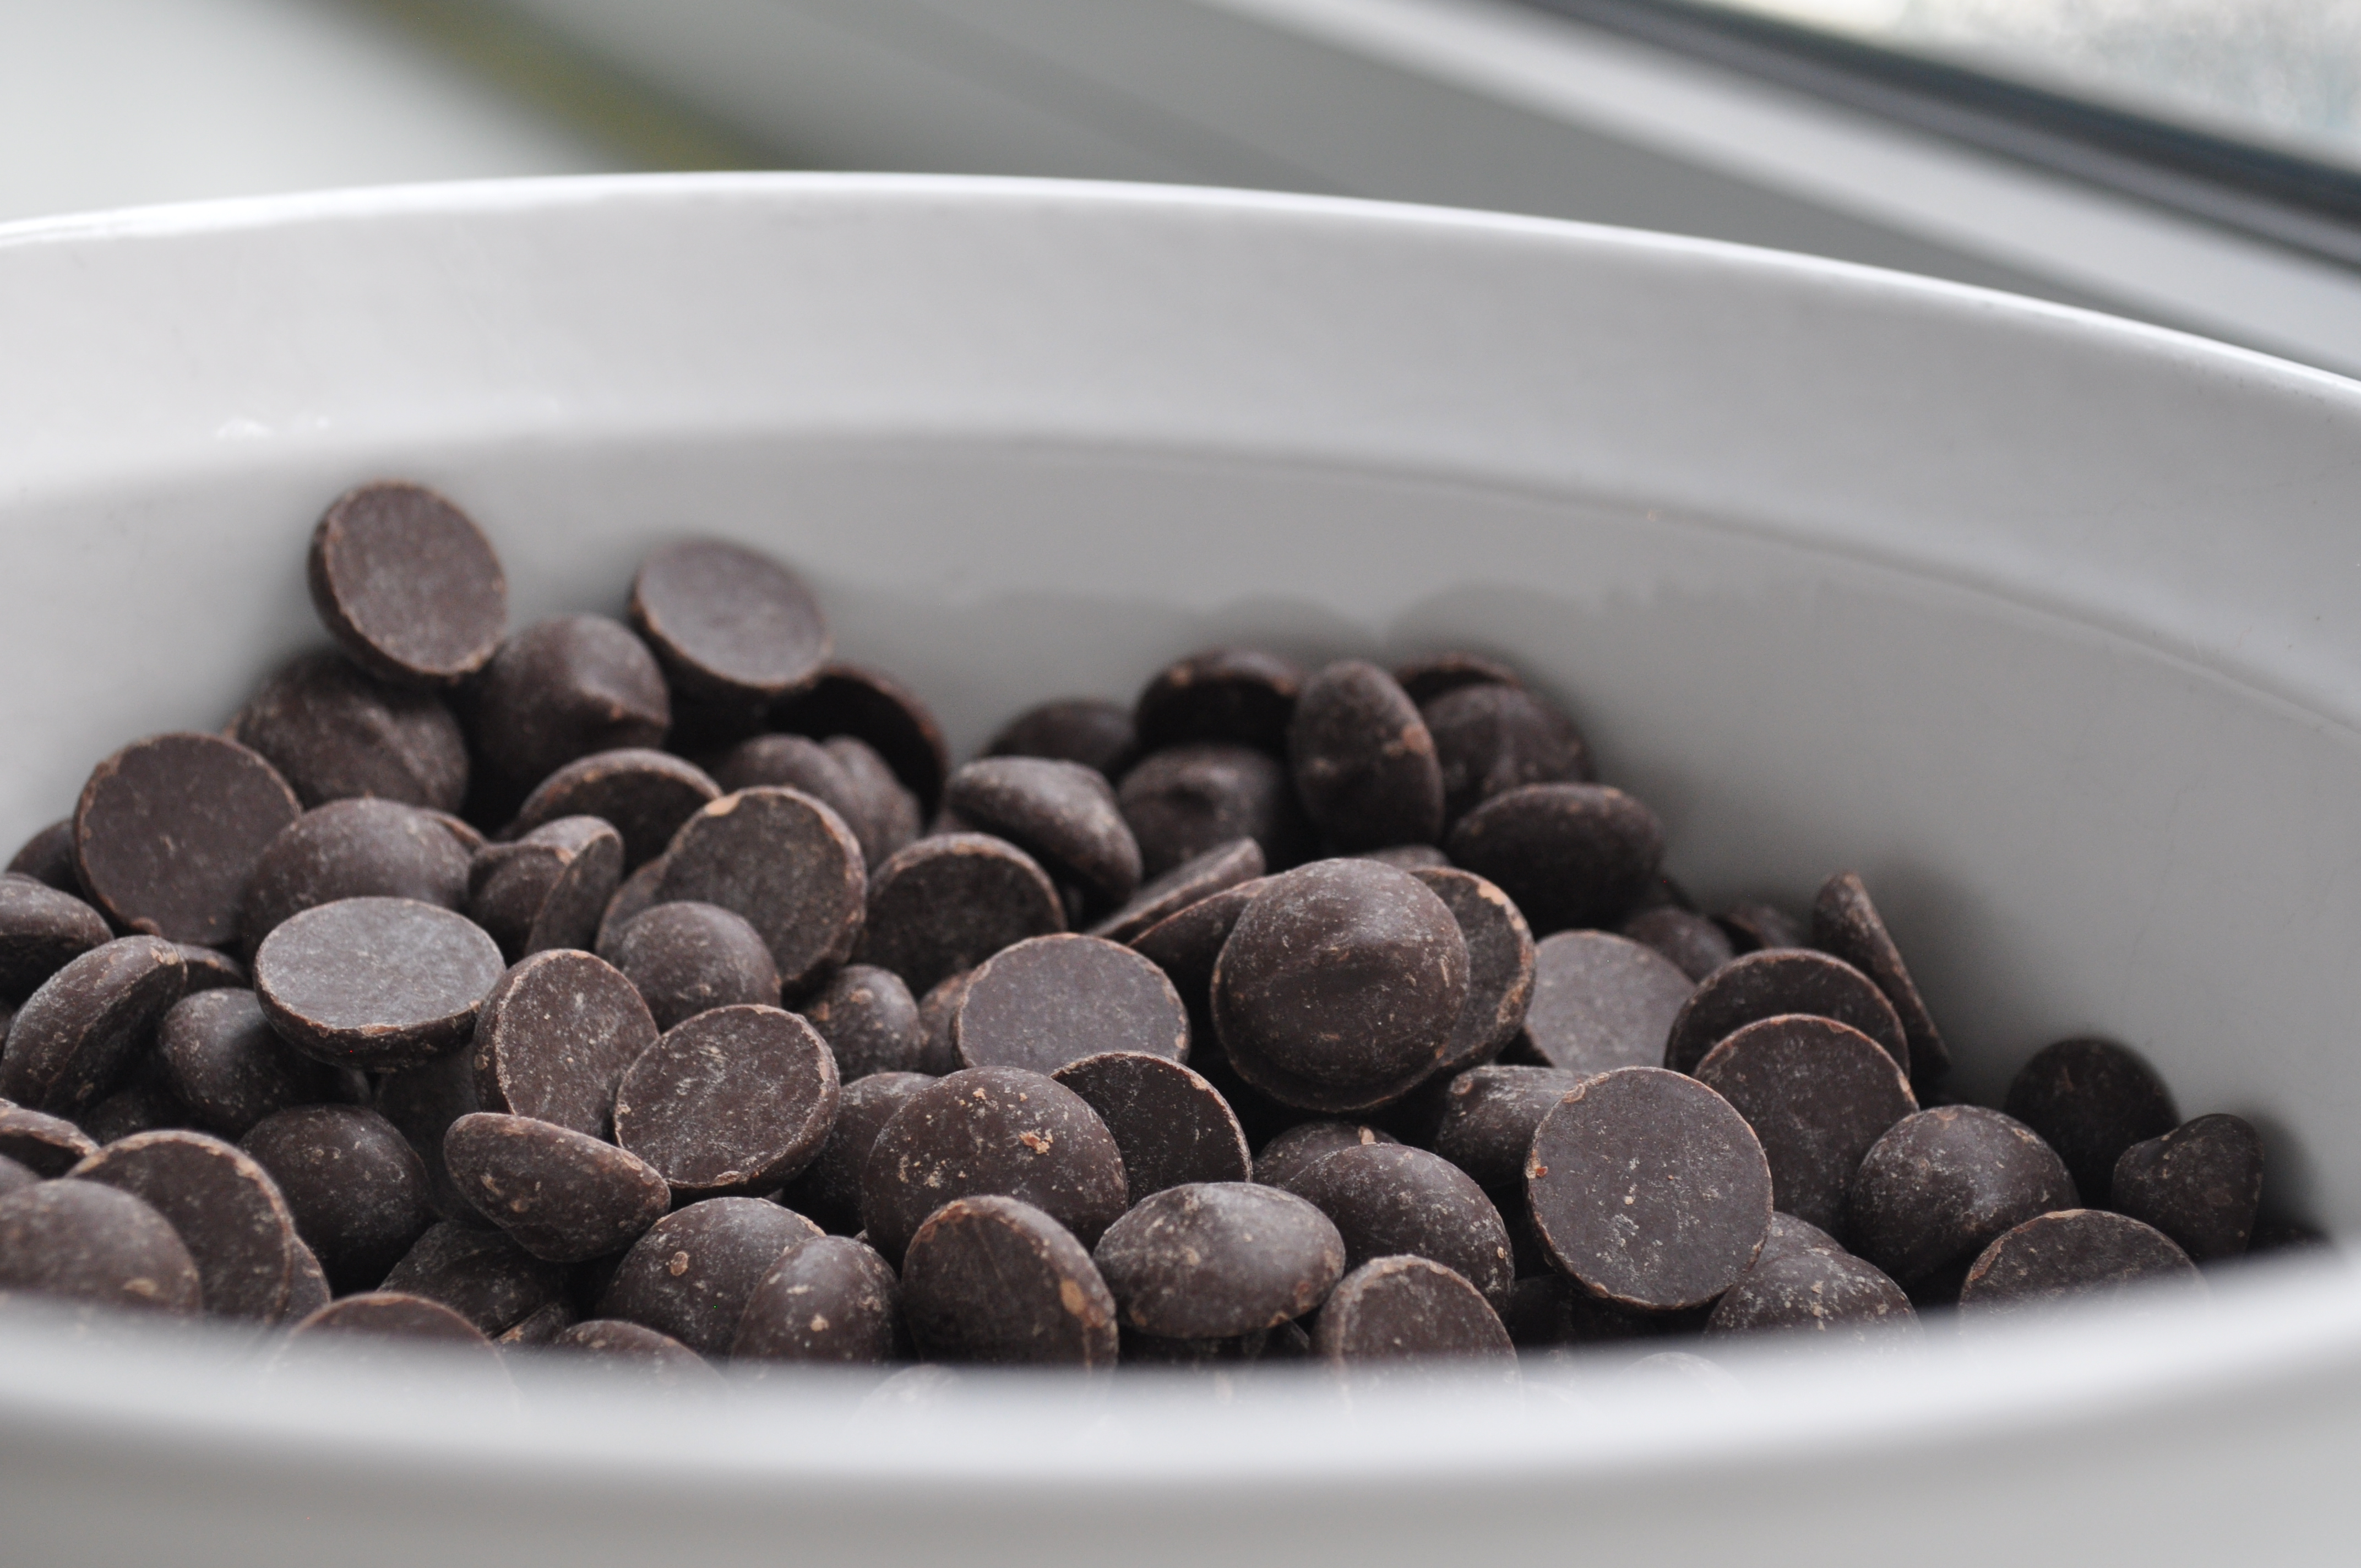
  • 18 ounces bittersweet chocolate (62% to 72% cacao content), finely chopped, or dark chocolate chips, divided
  • 3 ounces (6 tablespoons) unsalted butter
  • 3/4 cup (5 ounces) granulated sugar
  • 3/4 cup heavy whipping cream
  • 1 teaspoon pure vanilla extra
  • 2 1/2 teaspoons fleur de sel or other fine-grained sea salt, divided
  • 2 tablespoons unsweetened cocoa powder

Place 8 ounces of the chopped chocolate in a 2-quart bowl and set aside.

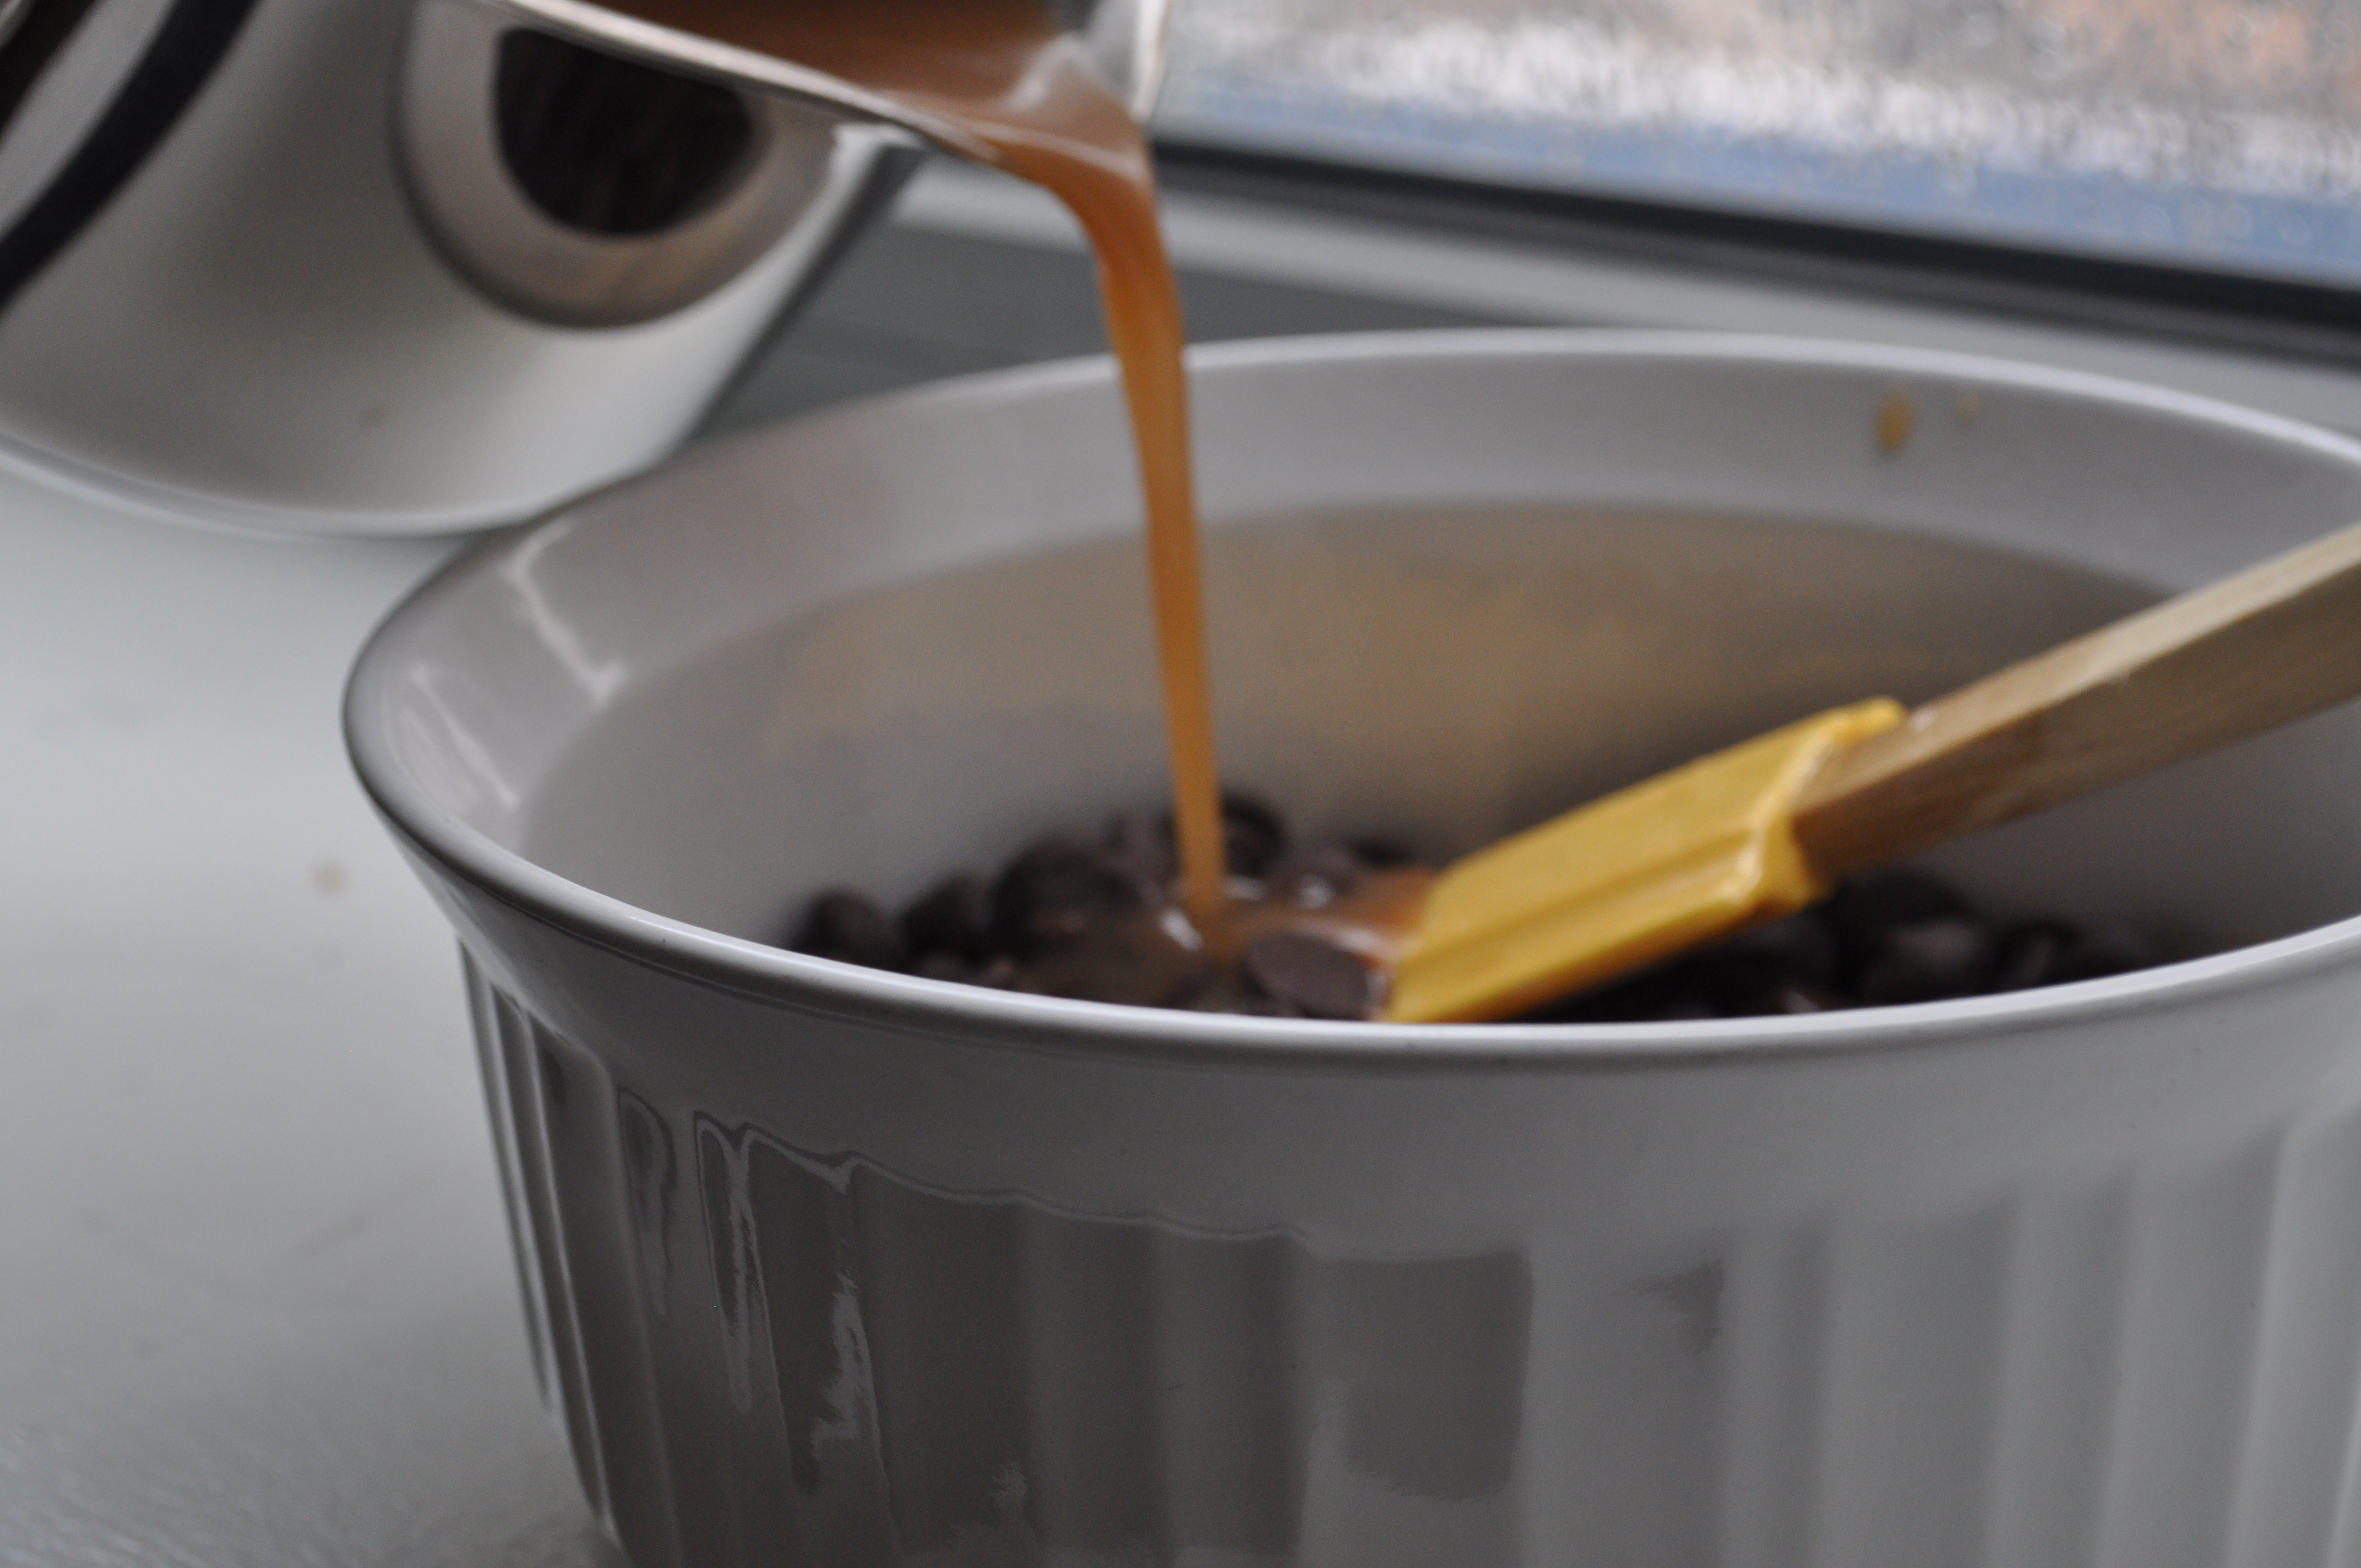
Cut the butter into small pieces and place it in a medium-sized pot with the sugar and cook over medium heat, stirring until the sugar and butter have melt. Raise the heat to medium-high and cook until the mixture turns amber colored, about 5-7 minutes. Keep an eye on it, and constantly stir, because this has the potential of burning quickly.

Simultaneously, bring the cream to a boil in a 1-quart saucepan over medium heat. Stir the cream into the butter mixture until completely smooth. Be careful because the cream will bubble and may spatter when added.

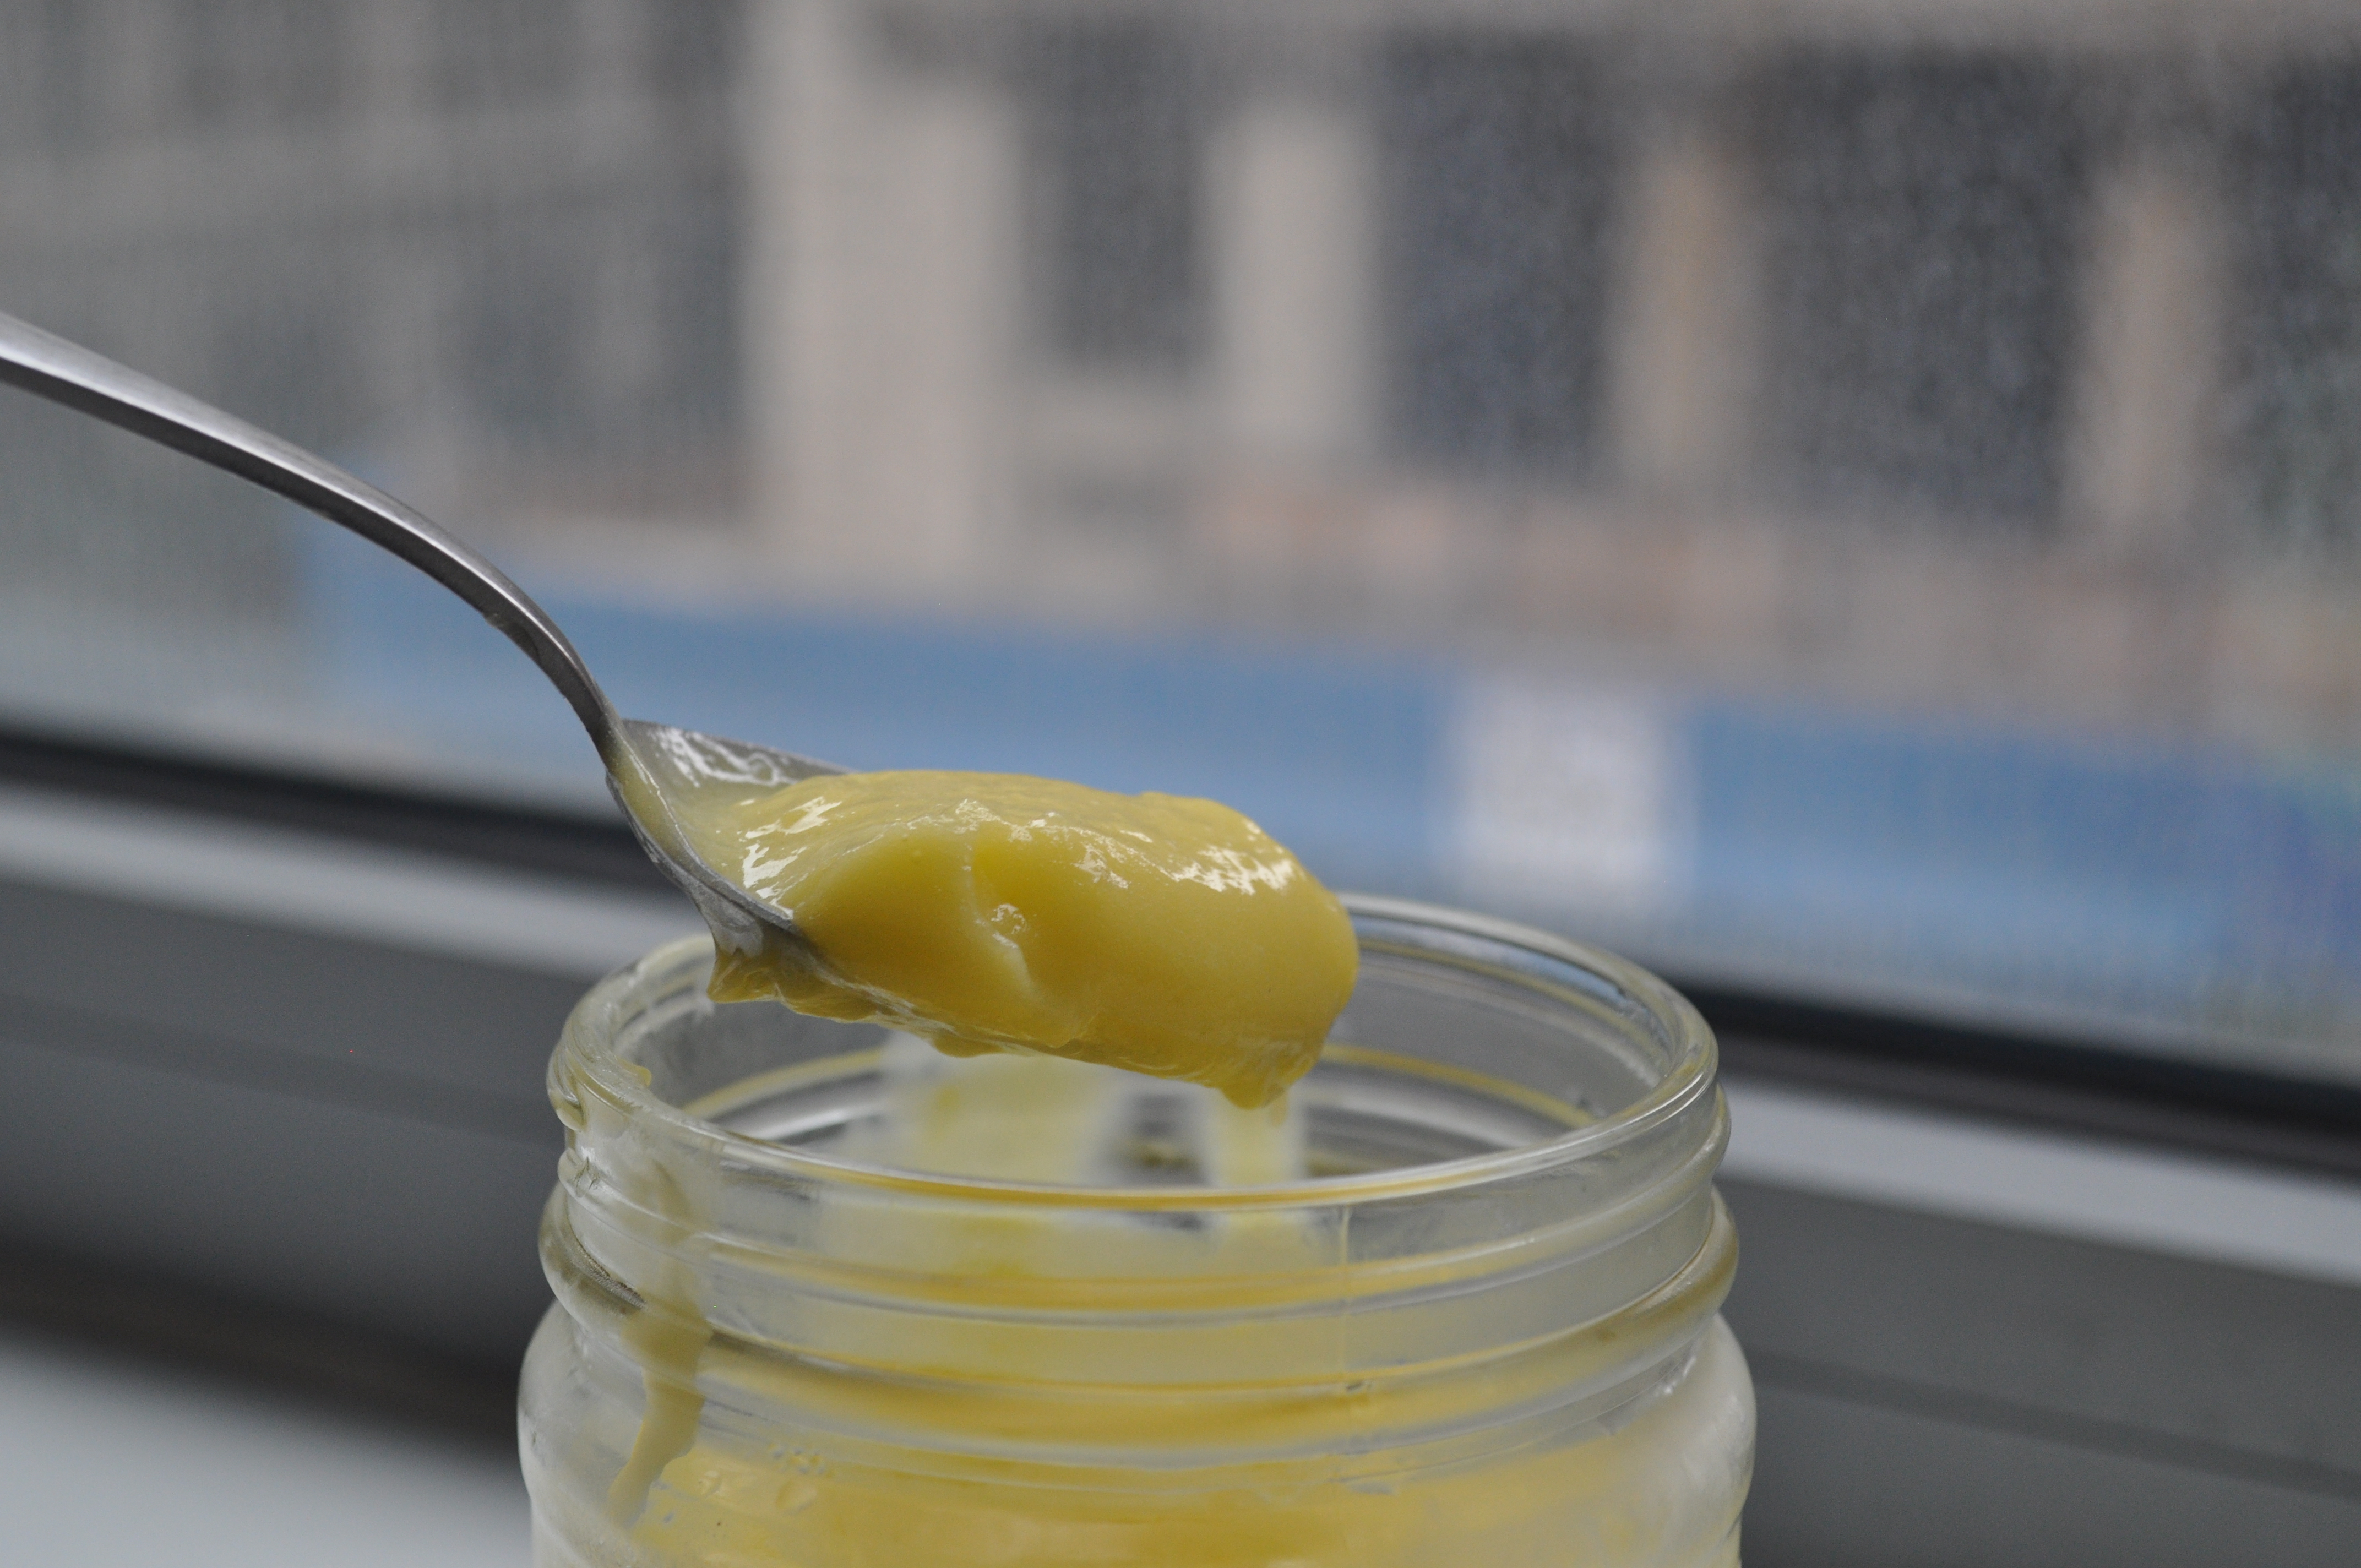
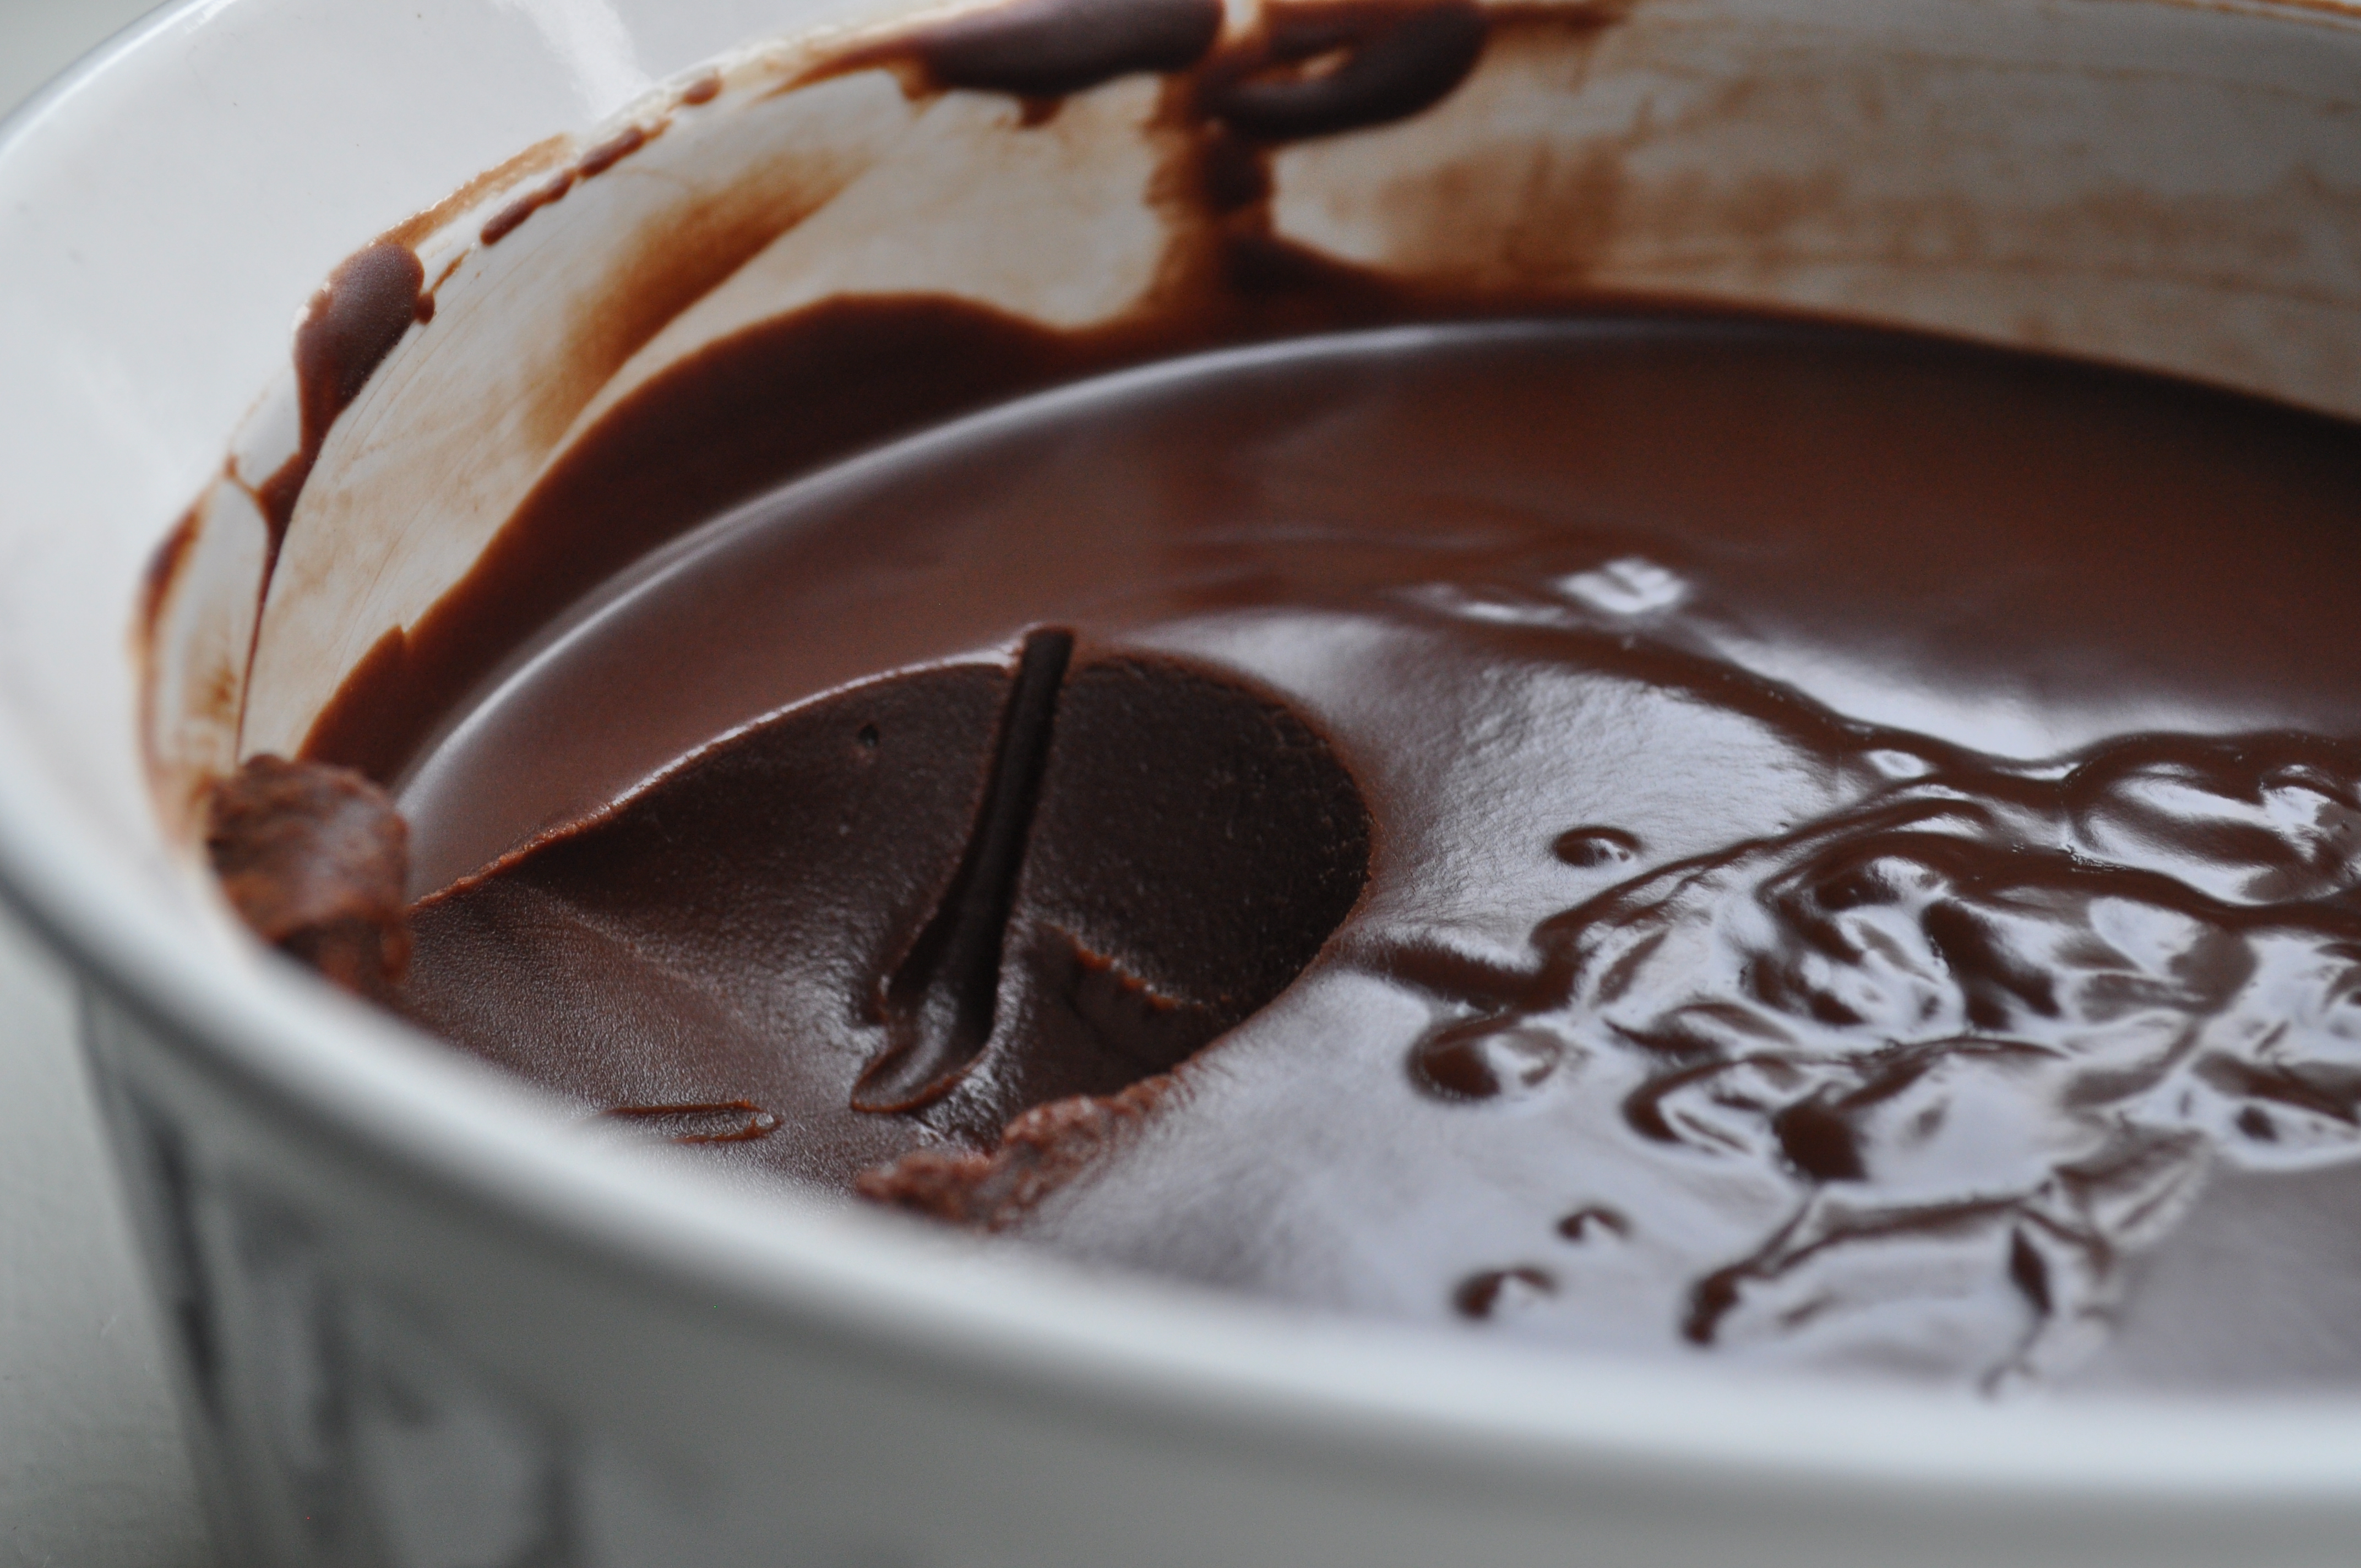
Remove the caramel from the heat and stir in the vanilla and 1 1/2 teaspoons of the salt until thoroughly blended. Immediately pour the caramel over the chocolate in the bowl. Let it stand for 15 to 30 seconds, then stir together until smooth. Cover the bowl with plastic wrap and cool to room temperature. Chill until thick, about 1 hour.  At this point, you can just grab a spoon and have at the mixture.  But if you want fancier, portion-controlled chocolate pieces, keep on going:

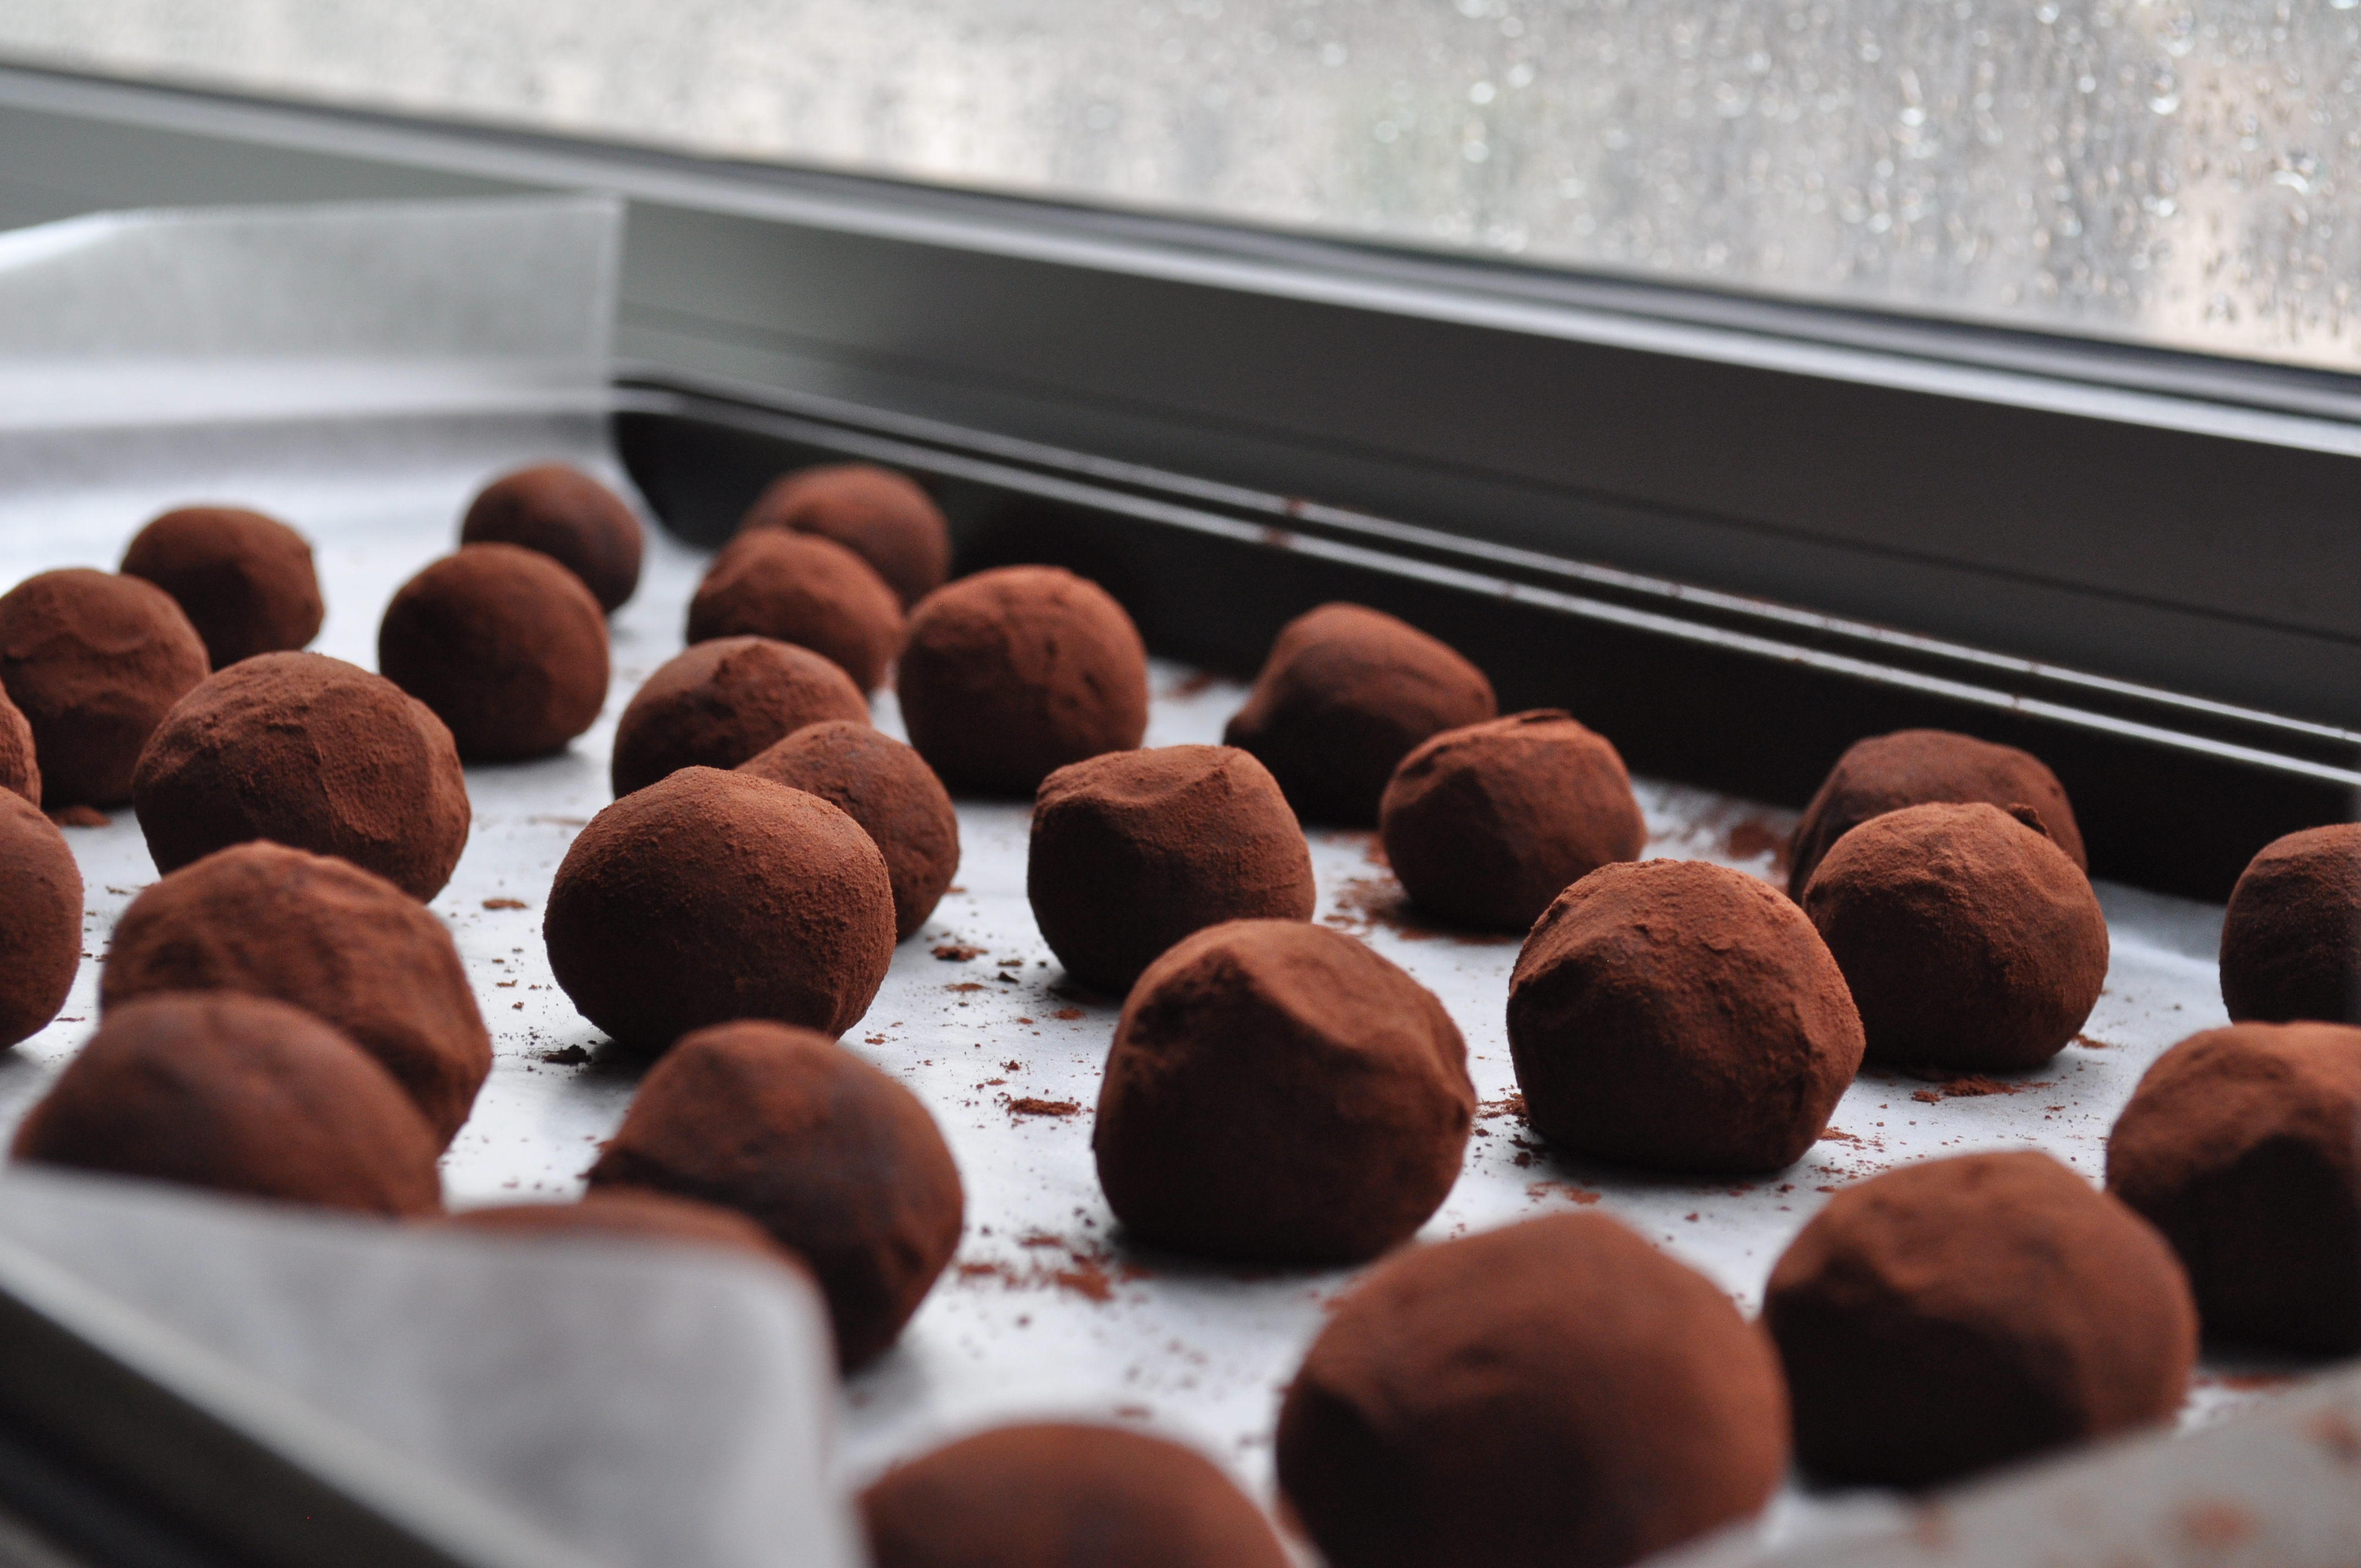
Line 2 baking sheets with waxed or parchment paper. Use a 1-inch round ice cream scoop, or a tablespoon measure, to scoop out the truffles and place them on a baking sheet. Chill uncovered for 20 minutes.  At this point, you can just eat these portion balls o’ goodness, but if you want them to be actual truffles, rather than just ganache, keep on going:

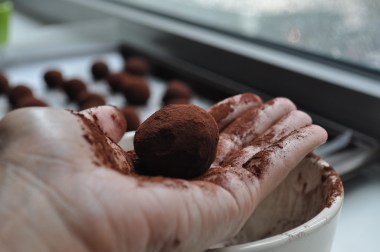
Dust your hands with cocoa powder and roll the truffles into balls.  At this point, you can just pop them in your mouth and call it a day.  But if you want extra chocolate lusciousness, keep on going:

Melt 7 ounces of chocolate in the top of a double boiler over low heat, stirring frequently. Or melt the chocolate in a microwave-safe bowl on low power for 30-second bursts. Stir after each burst to to make sure that the chocolate is melting evenly.

Remove the top pan of the double boiler, if using, and wipe it dry. Add the remaining 3 ounces of chocolate in 3 stages, stirring until it’s completely melted. This tempers the chocolate so it won’t have any streaks, and so the chocolate won’t melt when kept at room temperature.

Place a truffle into the melted chocolate and coat completely. With a fork, scoop the truffle out, and let the excess chocolate drip off, then place the truffle on the clean lined baking sheet.

After dipping 5 truffles at a time, sprinkle a few grains of the remaining salt on top of each. Let the truffles set at room temperature.