Best Brunch Toast Ever

June 30, 2015

DSC_0510

I have written about being sick before.  About how I cannot eat anything for a couple weeks, and then there is an emergence, after watching hours and hours of Food Network and Cooking Channel, where weeks of inspiration pour out into the kitchen.  I have done that before.  And the results were well worth the wait.

DSC_0498

Alas, not much has changed.  Again, I was sick.  Again, I ate saltines day after day, and more yogurt than one can imagine.  Again, I spent my days watching food television, welcoming repeats so I can memorize the gist of the recipe without breaking out the laptop and finding it online.  And again, I was inspired by one of those recipes to make my first dish out of sickness.

DSC_0501

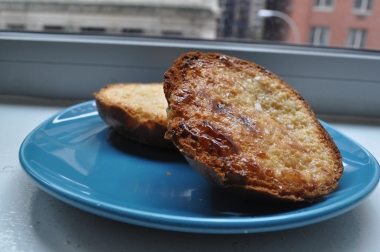
We know that toast is all the rage.  You can find avocado toast, and ricotta toast, and cream cheese and honey toast, and every toast imaginable these days.  And they are delicious.  But I am about to introduce you to the easiest (yet so impressive-seeming) brunch toast imaginable.  It is so good that I could only name it the best brunch toast ever!

DSC_0504

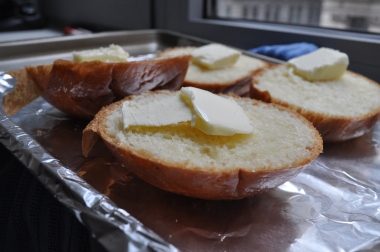
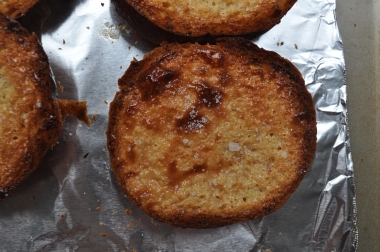
I mean, it an already buttery and rich bread, slathered with butter and condensed milk, broiled until it all caramelized together, and if that’s not enough, it is finished off with a sprinkle of sea salt.  Come on, people!  This toast is so good that I almost want to get sick again so I can see what other yummy things will eventually come out of it.

DSC_0516

Best Brunch Toast Ever

Remember this butter that I whipped up?  I cannot help but think that this would be incredible on this toast.  But, I chose to forego the extra work this time, and still wound up with this sweet/salty caramelized, dulce de leche, best toast ever.  But, you know, even that has the potential to be even better!

brioche buns, sliced in half (the number of halves is up to you! the amount of other ingredients will simply change accordingly)

softened butter (1 tablespoon per slice of bread)

sweetened condensed milk (1 tablespoon per slice of bread)

sea salt, for sprinkling

Preheat oven to 350.  Line a baking sheet with aluminum foil, and spray with cooking spray.  Lay the halves of the brioche on to the baking sheet.  Spread a tablespoon of softened butter evenly on each of the halves.  Place in oven and let toast for about 5-7 minutes.

Take out of oven.  Turn on the broiler.  Spread 1 tablespoon of condensed milk on each of the toast halves, making sure that it is even, and stays on the bread.  Place the tray under the broiler, and let it heat up and caramelize, about 5 minutes.  Take out of the oven, and sprinkle with sea salt.  Let cool slightly and serve.

Churros with Chocolate Cake

June 3, 2015

DSC_0489

I have a tendency of turning desserts into other desserts.  Let’s turn a cookie into a cake, I think!  Why can’t a biscotti be a pie?!  Can rice pudding be an ice cream flavor?!  This is obvious in my many attempts to create cannoli cakes, and s’mores ice cream.  Or really, my favorite: cannoli s’mores.

DSC_0484

It’s actually super fun to create desserts into other desserts!  You want something familiar, but with a new (and exciting!) twist.  It’s unexpected, and brings life to a whole new dessert.  I obviously take my desserts seriously, people – work with me.

DSC_0485

This time, the two dessert combo was churros (with chocolate), and cake.  I wanted to get that iconic crunchy cinnamon sugar outer edge, with a light, fluffy cake, sandwiched with creamy, decadent chocolate ganache.  And, that, my friends, is exactly what we got.

DSC_0492

This cake is exactly what a churro is.  Light, but decadent.  Not too sweet, but just sweet enough.  Served with a dark, dripping chocolate.  And just like churros, you can’t stop at just one.

photo (6)

Churros with Chocolate Cake (adapted from here)

I have doubled the recipe below – that was the only way it would have enough height to make a layer cake.  However, I first made the recipe how it was originally stated, and added that layer as part of my three layer cake – just in case if you want to do the same.

Also, let’s think about taking this cake to another level.  Already, you will be spreading butter and sprinkling with cinnamon and sugar on every layer.  But if you have the patience (and can stand the mess), why not do the same thing with the sides of the cake?!  Why not, I ask.  You ponder that.

For cake:

2 cups + 2 tbsp. (300 grams) all purpose flour

2 tsp. baking powder

1/2 tsp. salt

1/2 tsp. cinnamon

10 tbsp. (120 grams) unsalted butter, at room temperature

1.5 cups (300 grams) sugar

2 eggs, at room temperature

2/3 cups whole milk

2 tsp. vanilla extract

For topping:

4 tbsp. butter, melted

3 tbsp. sugar

1/2 tsp. cinnamon

For chocolate ganache:

8 oz. dark chocolate chips

1/2 cup cream

scant 1 tsp. espresso powder

Preheat oven to 350°F.  Spray a 9 inch springform pan (or cake tins) with cooking spray.
In a medium bowl, whisk together the flour, baking powder, salt, and cinnamon.  Set aside. Mix together milk with vanilla.  Set aside.
Using an electric mixer, cream butter and sugar, until light and fluffy – about 4 minutes.  Add egg and beat until smooth.

Alternating with the milk mixture, beat in the flour in thirds, beginning and ending with the flour mixture.  Beat until well combined.
Spread mixture into prepared pan and bake for about 40 minutes or until golden and risen and a skewer inserted in the center comes out clean.
Cool in the pan over a wire rack for 30 minutes. Carefully unmold and cool completely over a wire rack.

Meanwhile, make the chocolate ganche: Over a double boiler, whisk together cream, chocolate and espresso powder until smooth. Set aside to cool.

Cut the cake in half horizontally using a large serrated knife. Place the bottom half of the cake onto a serving plate.  Brush with melted butter and sprinkle evenly with cinnamon and sugar.  Spread the chocolate ganache evenly on top.  (If making three layers, as noted above, evenly distribute both the butter/cinnamon sugar mixture, as well as the chocolate ganache).  Top with second layer, and repeat with butter and cinnamon and sugar.


Starry Starry Night Cookies

April 30, 2015

DSC_0547

Oh, hello.  I know, I know.  I just up and disappeared on you for the entire month of April.  Wanna know the reason why?  I have had nothing to post!  I have been making homemade almond milk over and over again, and I keep thinking that I’ll bake something from the resulting almond meal that I get from making almond milk, but instead I put it in my oatmeal in the morning, and it’s all just a cycle that I can’t seem to break out of!  A month long cycle.  A month long, almond-filled cycle.  I’m ready to break out.

DSC_0536

These cookies (that have a touch of almond flour in them!), I made a really long time ago.  Years ago, even.  I thought that my photographs of the cookies weren’t pretty enough to post, and they were not a popular enough cookie for people to know what they are supposed to look like.  But, man, they were delicious.

DSC_0544

And then, all of a sudden, for the past couple weeks, I’m seeing starry starry night cookies pop up everywhere!  On all the food blogs, in magazines, on food lists.  Everywhere.  So, it is time.  These cookies are dark and chocolatey and nutty and fudgey, and everything you need for a bite of sweetness. Perfect with some almond milk. Don’t wait years to make this one.

DSC_0548

Starry Starry Night Cookies (recipe from My Life from Scratch)

2 eggs

1/4 cup + 1 tbsp. sugar, plus additional for dipping

1 tbsp. honey

8.2 ounces bittersweet chocolate

3 tbsp. butter

5/8 cup slivered almonds, ground to a fine powder1

1/2 tsp. salt

1 tbsp. cocoa powder

Combine the eggs, sugar, and honey in the bowl of an electric mixer.  Beat with the whisk attachment on high speed until the mixture reaches a thick ribbon stage.

Melt the chocolate and butter together in a heatproof bowl over simmering water. Cool slightly.

Toss the almond flour, salt, and cocoa in a bowl until well combined. Add to the melted chocolate and mix until fully incorporated.

Add a quarter of the whipped egg mixture to the chocolate to lighten.  Stir until no egg is visible.  Gently fold the rest of the egg mixture into the chocolate until well combined, being careful to maintain the aerated quality of the eggs.

Chill until firm.

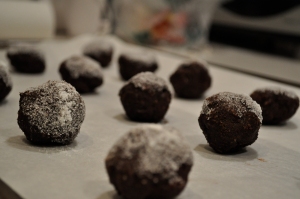
Place a few tablespoons of sugar in a small bowl.  Using the smallest cookie scooper available (melon scooper sized), scoop individual cookies, dip them in the sugar, and place on a parchment-lined sheet pan 1/2 inch apart.  Freeze uncovered until very hard, about an hour

Preheat the oven to 350F. Just before baking, dip each cookie in sugar again. Bake 10 minutes, turning after 5 minutes to ensure even baking.  Cookies should be slightly cracked but the sugar should not be browned.


Chocolate Toffee Covered Matzo

April 8, 2015

DSC_0500

I would like to note that there are many versions of this recipe.  With every type of cracker, with all types of chocolate, and with various topping to sprinkle over.  All of these recipes are called crack.  No joke.  There is no other universal name for this recipe.

DSC_0481

So let me tell you what the components of crack are: a cracker of some sort, brown sugar, butter, chocolate, vanilla and salt.  Yep.  The naming of this recipe seems about right.  And the addictive qualities are those of what the actual substance are (or so I hear, people…come on now) – I’ve already eaten about half of the pan, even though I finished making this about 10 minutes ago.  Yes.  Stomach ache.  Worth it.

DSC_0495

So be careful making this.  It’s lethal, but so, so good.  Make it Passover friendly this week!  Or make it Passover friendly all weeks!  Because, trust me, you’ll be making this all weeks.

DSC_0508

Chocolate Toffee Matzo (recipe from David Lebovitz)

It has been noted that for Passover, this recipe works well with margarine; also omit the vanilla extract or find a kosher brand.

  • 4 to 6 sheets unsalted matzohs (or saltine crackers, enough to be lined up on a baking sheet)
  • 1 cup unsalted butter, cut into chunks
  • 1 cup firmly-packed light brown sugar
  • 1/2 teaspoon sea salt
  • 1/2 teaspoon vanilla extract
  • 1 cup (160g) semisweet chocolate chips (or chopped bittersweet or semisweet chocolate)
  • 1 cup (80g) toasted sliced almonds (or another favorite nut)
  • a sprinkle of flaky sea salt

Line a rimmed baking sheet completely with foil, making sure the foil goes up and over the edges. Cover the foil with a sheet of parchment paper.  Preheat the oven to 375F.

Line the bottom of the sheet with matzoh, breaking extra pieces as necessary to fill in any spaces.

In a medium sized pot, melt the butter and brown sugar together, and cook over medium heat, stirring, until the butter is melted and the mixture is beginning to boil. Boil for 3 minutes, stirring constantly. Remove from heat, add 1/2 tsp. salt and vanilla, and pour over matzoh, spreading evenly with a heatproof spatula.

Put the pan in the oven and immediately reduce the heat to 350F degrees. Bake for 15 minutes. As it bakes, it will bubble up but make sure it’s not burning every once in a while. If it is in spots, remove from oven and reduce the heat to 325F, then replace the pan.

Remove from oven and immediately evenly sprinkle with chocolate chips. Let stand 5 minutes.  They will melt and then you will be able to spread all over with an offset spatula.

Sprinkle with toasted almonds (or another favorite nut, toasted and coarsely-chopped), and a sprinkle of flaky sea salt.

Let cool completely, first at room temperature, and then in the refrigerator, then break into pieces and store in an airtight container until ready to serve. It should keep well for about one week.  Ha, it will never last that long.


M and M Cookies

March 25, 2015

DSC_0500

I have a slight fascination with M&M cookies.  I think it all stems from snack time in elementary school.  Parents would bring those peanut butter cheese crackers all the time (so yum), or boxes or raisins (whyyyyy?!), but sometimes, sometimes there would be that mom that sent cookies.  And cookies, my friends, were fab.

DSC_0481

But it didn’t stop there.  Because there were those amazing days that my classmates would not just bring in cookies for snack time, but they would bring the cookies with the rainbow candies in the them.  The cookies that exuded all things magical, fairies and unicorns.  Those were the cookies that had an actual rainbow on the package itself, because those cookies just knew how special they were.  Those were the cookies that came around only if you happened to be lucky.

DSC_0490

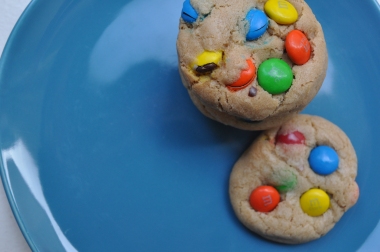
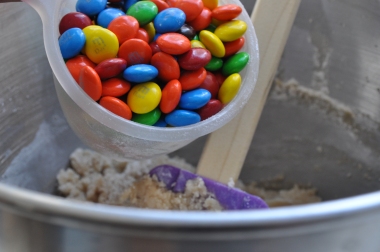
Clearly I’m a bit nostalgic about them.  So I made them.  They’re not quite as magical as I remember.  Most likely because the original had about 3 candied nestled on top, and therefore, much more appreciated.  But these studded gems sure are fun, and tasty.  Perhaps eat them in a sandbox for the full nostalgic effect?  Or perhaps not.

DSC_0496

M&M Cookies

1 stick unsalted butter, at room temperature

1/2 cup granulated sugar

1/2 cup packed light brown sugar

1 egg

1 tsp. vanilla

1 tsp. salt

1 tsp. baking soda

2 cups all purpose flour

1 cup + 1/4 cup M&M candies, divided

Preheat oven to 325 degrees.  Lined two baking sheets with parchment paper.

Cream together butter and both sugars until well combined, and light in color.  Beat in egg and vanilla.  In a separate bowl, mix together salt, baking soda and flour.  Slowly add the flour mixture to butter mixture, with an electric mixer until thoroughly combined.  By hand, fold in 1 cup of candies.

Scoop out tablespoon-sized balls of dough and place on baking sheet, ensuring that there is enough space between each cookie.  Press in several of the additional candies on top.  Bake for 12-15 minutes or until the cookies are cooked-through and light in color.  Transfer to a wire rack to cool completely.


Chocolate Streusel Poundcake

March 3, 2015

DSC_0361

I need something sweet to top off every meal.  (I made a pan of rice krispy treats last week, and I ate three for breakfast every morning until I finished them.  I felt the need to tell you that).  And not the type of sweet where I can eat a piece of fruit and call it a day.  I typically want some chocolate.  I always want chocolate.  Revised: I need something chocolate to top off most every meal.

DSC_0343

This doesn’t mean that I break the calorie bank every 4 hours.  I improvise.  Sometimes I sprinkle some chocolate chips on to yogurt.  Sometimes I sprinkle some chocolate chips onto a graham cracker.  Sometimes I sprinkle some chocolate chips on to a rice cake.  Sometimes I sprinkle some chocolate chips into my mouth.  It’s sophisticated stuff.

DSC_0345

But you see a pattern.  So when I saw this recipe – a chocolate poundcake with a chocolate chip streusel not just sprinkled on top, but also the bottom – I knew that this would satisfy my chocolate needs for a bit.  This is actually brilliant.  A salty crumbly streusel, with chocolate chips still in tact, surrounding a velvety chocolate cake.  The streusel gives it texture and depth and everything you cannot get from sprinkling several chocolate chips on a rice cake.

DSC_0349

I may make a batch of the streusel and keep it for my daily chocolate sprinkling needs.  That will class it up a bit.

DSC_0359

Chocolate Streusel Poundcake (recipe from New York Times)

For the Streusel:

  • ½ cup/60 grams all-purpose flour
  • 3 tablespoons/45 grams granulated sugar
  • 1 ½ tablespoons/11 grams cocoa powder
  • ½ teaspoon/4 grams kosher salt
  • 4 ½ tablespoons/64 grams cold unsalted butter, cubed
  • cup/60 grams semisweet chocolate chips

For the Poundcake:

  • 3 ounces/85 grams extra-bittersweet chocolate (70 percent), chopped
  • 1 ⅓ cups/185 grams all-purpose flour
  • ¾ cup/89 grams Dutch-process unsweetened cocoa powder
  • ½ teaspoon/2 grams baking powder
  • ¼ teaspoon/2 grams baking soda
  • ½ cup/113 grams unsalted butter, melted
  • 1 cup/200 grams granulated sugar
  • ½ cup/100 grams dark brown sugar
  • ½ teaspoon/4 grams kosher salt
  • 1 large egg, at room temperature
  • 2 teaspoons/10 milliliters vanilla extract
  • ½ cup/120 milliliters plain Greek yogurt
  • ½ cup/120 milliliters whole milk
  1. Heat oven to 350 degrees. Grease a 9-by-5-inch loaf pan, then line with parchment paper, leaving enough to hang over the edges of the pan. Grease the parchment on the bottom of the loaf pan.
  2. In a heatproof bowl set over a pan of simmering water, or in the microwave, melt the chocolate for the cake, stirring until smooth. Set aside to cool while you prepare the streusel.
  3. Prepare the streusel: In a bowl, stir together flour, sugar, cocoa powder and salt. Using fingers or a fork, cut in the butter until it is evenly distributed and forms large, moist crumbs. Stir in the chocolate chips.
  4. Scatter half the streusel evenly into the bottom of the loaf pan. Bake for 15 to 18 minutes, or until baked through.
  5. Prepare the cake: In a large bowl, sift together flour, cocoa powder, baking powder and baking soda.
  6. In the bowl of an electric mixer fitted with the whisk attachment, beat melted butter, both sugars and salt together until combined. Beat in egg, vanilla extract, yogurt, milk and melted chocolate. Fold in dry ingredients until just combined.
  7. Scrape batter into prepared pan and top with remaining streusel. Bake until a toothpick inserted in the center of cake emerges clean, about 1 hour 15 minutes. Transfer pan to a wire rack and cool completely before turning out and slicing.

Macadamia Nut Brittle

February 20, 2015

DSC_0344

I don’t know if you have noticed, but it’s pretty cold outside.  Like, bone chilling, never want to go outside, wearing layers at home, cold.  And from what I hear, everyone is pretty sick of it.

DSC_0334

This winter is pretty bad – maybe even worse than we ever have had before – but I feel like whenever winter comes along, I completely forget what it’s like to be warm.  What did that feel like?  How did we go outside without a scarf, hat and a coat?  We didn’t have to layer?  What a wondrous time that must have been.

DSC_0336

So instead of day dreaming of the warm weather in front of my space heater, with three pairs of wool socks on, I decided to change things up a little bit.  I brought a little bit of tropical-ness to me with a macadamia nut brittle.  Macadamia nuts completely evoke warm weather, and they are able to play with your mind to make you think that you may just be sitting on a beach in Hawaii.

DSC_0341

Swirl it into some coconut ice cream made from fresh snow!  Or eat it piping hot and warm yourself up.  Either way, this will momentarily take you away from the misery that is outside, hopefully reminding us of a time when we were complaining about the summer heat.

DSC_0342

Macadamia Nut Brittle (recipe from here)

2 T brown sugar
1/2 T light corn syrup
1/2 T butter
1/2  C nuts
1/8 tsp cinnamon

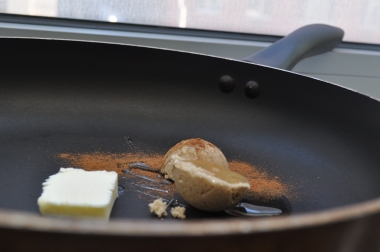
Place brown sugar, corn syrup, and butter (and cinnamon if you’re using) in a non-stick skillet on the stove top. Set heat to medium or medium-high. Stir the mixture as it comes together until it bubbles.  Add nuts and stir to coat completely.  Continue cooking for 5-7 minutes, stirring constantly until nuts turn golden brown in color and smell toasted.

Transfer to foil, lightly sprayed with non-stick spray, or parchment and cool completely.

Break them apart with your fingers and enjoy!


Orange Corn Muffins with Crunchy Orange Glaze

February 3, 2015

DSC_0367

I have been known to have breakfast spurts.  I go for a couple weeks only eating oatmeal in the mornings (including a great oatmeal bake that I will be posting soon!).  Then, I switch to smoothies (green ones, if I’m really feeling ambitious).  That, of course, doesn’t last long.  So then, I switch to yogurt and granola, which is actually my go-to when it’s warmer outside (I don’t know why – it seems like a perfectly delicious winter breakfast).  And then I go back to tea and and an English muffin (maybe with a digestive biscuit or two on the side), because that seems easy and I feel like that was my original breakfast from back in the day, which somehow qualifies it to be the best.

DSC_0350

And then, like clockwork, every couple of months, all I want to eat for breakfast (or a snack, or dessert!…or just breakfast), is a muffin.  It’s slightly bizarre, actually, because I almost never go for a muffin when they’re part of a breakfast spread.  They are almost always too sweet, and too big, and too greasy.  But homemade muffins, they just can’t be beat.  They’re just a quick portable breakfast that can be eaten cold or warm, and can even be made healthy!

DSC_0357

I should say that the original recipe did not call for a glaze.  And it certainly didn’t recommend spreading butter on it.  But, any cornmeal-based carbohydrate product practically demands to be smeared with butter, so I give myself a pass there.  And the glaze, well, we’re in hibernation mode at the moment, it’s really cold outside, and that’s the best excuse I can give about that.  And it’s a darn good one.

DSC_0362

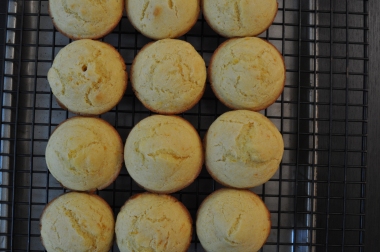
So take advantage of this glorious orange season and make these muffins.  They will satisfy your breakfast needs until muffins need to be brought back into the morning rotation.

DSC_0368

Orange Corn Muffins (recipe slightly adapted from Taste of Home)

1 cup yellow cornmeal

1 cup all-purpose flour

1/3 cup sugar

1 tbsp. + 1 tsp. baking powder

1/4 tsp. salt

1 egg, lightly beaten

1 cup milk

1/4 cup vegetable oil

zest of 1 orange

crunchy orange glaze, recipe to follow

Preheat oven to 425 degrees.  Spray a 12 cup muffin tin with cooking spray, or line with muffin liners.

In a bowl, whisk together cornmeal, flour, sugar, baking powder, and salt.  In a separate bowl, whisk together egg, milk, oil and orange zest.  Make a well in the dry ingredients and pour in the wet ingredients.  Gently fold together until just combined – do not over mix.

Spoon out and distribute into prepared muffin tin.  Bake for 12-15 minutes until lightly golden and a tester comes out clean.  While the muffins are baking, prepare the orange glaze.

Let cool in the muffin tin for 5 minutes, and then transfer to a wire rack to cool completely.  Place a baking sheet under the wire rack to catch the excess glaze.

While still warm, pour the glaze evenly over the muffins.  Spoon the excess glaze from the baking sheet and pour over muffins again.  Eat warm or let cool completely.

Crunchy Orange Glaze (recipe adapted from David Lebovitz)

1 cup powdered sugar

1/3 cup white granulated sugar

zest and juice of 1 orange

Whisk together all ingredients until combined and uniform.


Eclairs

January 21, 2015

DSC_0364

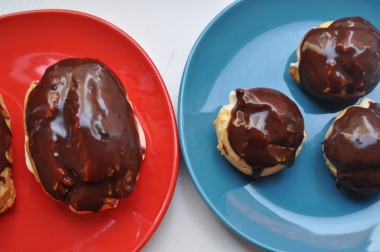
As we all know, I wanted to make eclairs last week.  Very badly.  But my conscience got the best of me for my first January post, and decided to make some healthy instead.  So now, now that it is squarely in the middle of the month, and we have long forgotten about the holidays, and hopefully, the resolutions, and we have already fast forwarded to gamewatching and chocolatebased foods, we can move on to French pastries.  Please join me.

DSC_0339

DSC_0348

DSC_0362

DSC_0366

Thank you for your time.

Eclairs (recipe from Food and Wine Magazine)

I probably should have pointed out that these are extremely easy to make.  Perhaps a little time intensive, but certainly nothing too difficult.  This could be your new game food!  Seriously, how popular would you be.

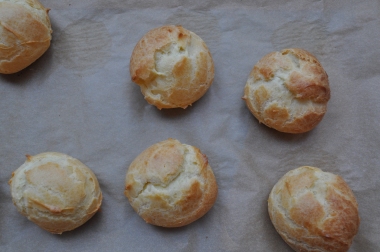
Also, important to note: I preferred the smaller cream puffs, over eclairs.  Mostly because they came out more hollow, allowing for more cream, and more goodness all around.  They were also easier to eat.  Alas, I will note – on the third day of eating these eclairs (still so fresh!), I ate these by tearing the pastry, and dipping it, first, directly into the vanilla pastry cream, and then straight into the chocolate.  Yes.  That is just fine with me.  That could be your new game food!  Really, how helpful am I with all of these ideas.

Choux Pastry

  1. 1 cup water
  2. 1 stick (4 ounces) unsalted butter
  3. 2 tablespoons sugar
  4. 1/4 teaspoon salt
  5. 1 cup plus 2 tablespoons all-purpose flour
  6. 4 large eggs

Pastry Cream

  1. 1 cup whole milk
  2. 1 vanilla bean paste or vanilla extract
  3. 1/2 cup sugar
  4. 3 tablespoons cake flour
  5. Pinch of salt
  6. 1 large egg
  7. 1 large egg yolk
  8. 1/2 cup heavy cream

Chocolate Glaze

  1. 4 ounces bittersweet chocolate
  2. 1/2 cup heavy cream
  1. Preheat the oven to 400°.   Line two baking sheets with parchment paper.  In a medium saucepan, bring the water, butter, sugar and salt to a boil over moderate heat. Remove the pan from the heat. Add the flour and stir vigorously with a wooden spoon for about 2 minutes, until the dough comes together and a film forms on the bottom of the pan. Transfer the dough to a large bowl and beat at medium speed until slightly cooled, about 1 minute. Add the eggs, 1 at a time, beating well after each addition.
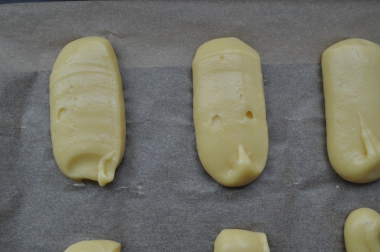
  2. Transfer the dough to a pastry bag fitted with a 1-inch round tip. Pipe twelve 5-inch-long logs onto a baking sheet.  You can also do this with a ziplock bag, and just cut off the corner.  Or, you can scoop out tablespoon-fulls of the dough to make cream puffs.  Bake for 15 minutes at 400 degrees.  Turn the oven down to 325° and bake the shells for 30 minutes longer, or until golden brown. Transfer the baking sheets to a rack and let cool completely.
  3. In a medium saucepan, bring the milk, vanilla bean and seeds just to a boil. Meanwhile, in a large bowl, whisk the sugar with the cake flour and salt. Whisk in the egg and egg yolk. Slowly add the hot milk, whisking constantly. Pour the mixture back into the saucepan and bring to a boil over moderate heat, whisking constantly. Continue to boil the pastry cream, whisking constantly, until thick, about 30 seconds longer. Immediately strain the pastry cream through a fine sieve into a medium bowl. Cover with plastic wrap and refrigerate for at least 1 hour, or until cool.
  4. In a medium bowl, whip the heavy cream until soft peaks form. Whisk the pastry cream, then fold in the whipped cream into the chilled pastry cream until combined.
  5. Chop the chocolate and place in a heat-proof bowl.  In a medium pot, heat cream for the chocolate glaze until scalded – do not let it come to a boil.  Pour over  the chocolate and let it sit for 1 minute.  Stir to combine, until it’s thick and silky.
  6. With a serrated knife, split the éclair shells lengthwise. Spoon a generous amount of the pastry cream into the bottom half of each shell. Dip the top half of each shell into the chocolate glaze, close the éclairs and serve.  If making cream puffs, poke a hole into the side of the cream puff, and pipe in pastry cream.  Dip the cream puff in chocolate.

Fosters Granola

January 5, 2015

DSC_0309

This week, my friends, I wanted to make eclairs.  Delicate pastries filled with a luscious vanilla cream and doused in rich chocolate sauce.  Mm, I wanted to make nothing more.
DSC_0278

And then I saw them: the commercials prompting me to lose the holiday weight I had gained.  The ones that told me that I actually may benefit from buying a treadmill that I would totally be able to make room for it in my apartment.  And the ones that told me that I should most definitely feel guilty about the delicious sweets I happily consumed throughout the duration of the last two weeks in December.

DSC_0284

Alas, here I am, practicing the art of restraint.  As it turns out, though, this is a perfect recipe for the new year!  There are a couple Fosters Market around my college town.  Without fail, whenever there we did anything important (“important” in that 19 year-old college sense), me and my roommate would get Fosters granola to pump ourselves up.  We would get it for a usual breakfast too, but we would get the full size before an interview, or a race or a school show.  So, in a way, this granola represents new adventures and beginnings!  Making connections!

DSC_0301

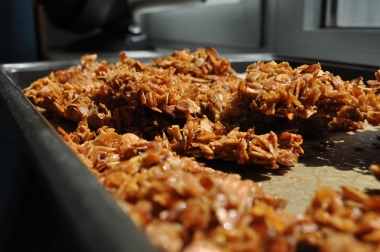
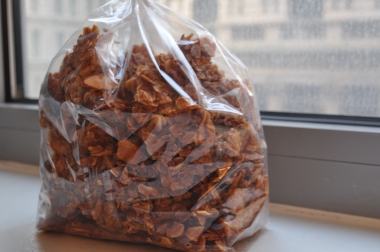
So, enjoy this.  This nostalgic breakfast treat is so crunchy and satisfying and perfect with some vanilla yogurt and berries.  The only thing that may be able to top this is…maybe…eclairs.

DSC_0310

Foster’s Granola (recipe from here)

2 cups old-fashioned rolled oats
1 cup shredded sweetened coconut
1 cup sliced almonds
1 teaspoon kosher or sea salt
¼ cup canola
¾ cup maple syrup
¼ cup honey

Preheat the oven to 275°F.

Spread the oats, coconut, and almonds on a large baking sheet with sides. Sprinkle with salt and bake for 12 to 15 minutes, stirring occasionally, until the ingredients are lightly toasted but not yet golden. Transfer the ingredients to a large bowl.

Increase the oven temperature to 350°F.  Spray baking sheet with cooking spray.

Stir the maple syrup, oil, and honey together in a small bowl, pour over the oats, nuts, and coconut, and toss to coat evenly.  Spread the granola onto the prepared baking sheet and bake for 25 to 30 minutes, until the granola is just crispy and golden brown, stirring several times, about every 10 minutes, while baking.  Let the granola cool completely on the baking sheet, breaking up any large clumps while it is still warm.