Archive for the 'Uncategorized' Category

Granola Nut Muffins

March 7, 2013

DSC_2587

I always thought that I was one of those people who tries to put a twist on recipes to make them as healthy as possible.  Can I use applesauce instead of butter?  Bring it on!  Will this recipe taste the same if I make it eggless?  Why not?!  Can we avoid the sugar altogether?  Let’s give it a try!

DSC_2574

This is exactly what attracted me to this recipe.  I wanted to make something healthy because, you know, it’s been one of those years…I mean, months…and this was the perfect wholesome recipe I was searching for.  I mean, people, I had started making my morning oatmeal with water instead of milk, and a sprinkle of ground flaxseed instead of a tablespoon of peanut butter.  It was necessary to find a tastier breakfast treat.  But it still had whole grains, and unrefined sugars and was basically tugging at my inner healthy girl’s heartstrings.  A perfect storm of a recipe, if you will.

DSC_2577

Turns out that the watered down oatmeal left something to be desired.  The entire time I was making this virtuous recipe, I kept thinking, “why is there only a total of 1/4 cup of honey in this entire recipe?!”  And that, my friends, was the beginning of the end.  I looked at the rest of the recipe and decided that butter would be more delicious than tasteless oil, white flour would make this recipe lighter than its whole wheat counterpart, and heck, let’s just double the sugar.

DSC_2581

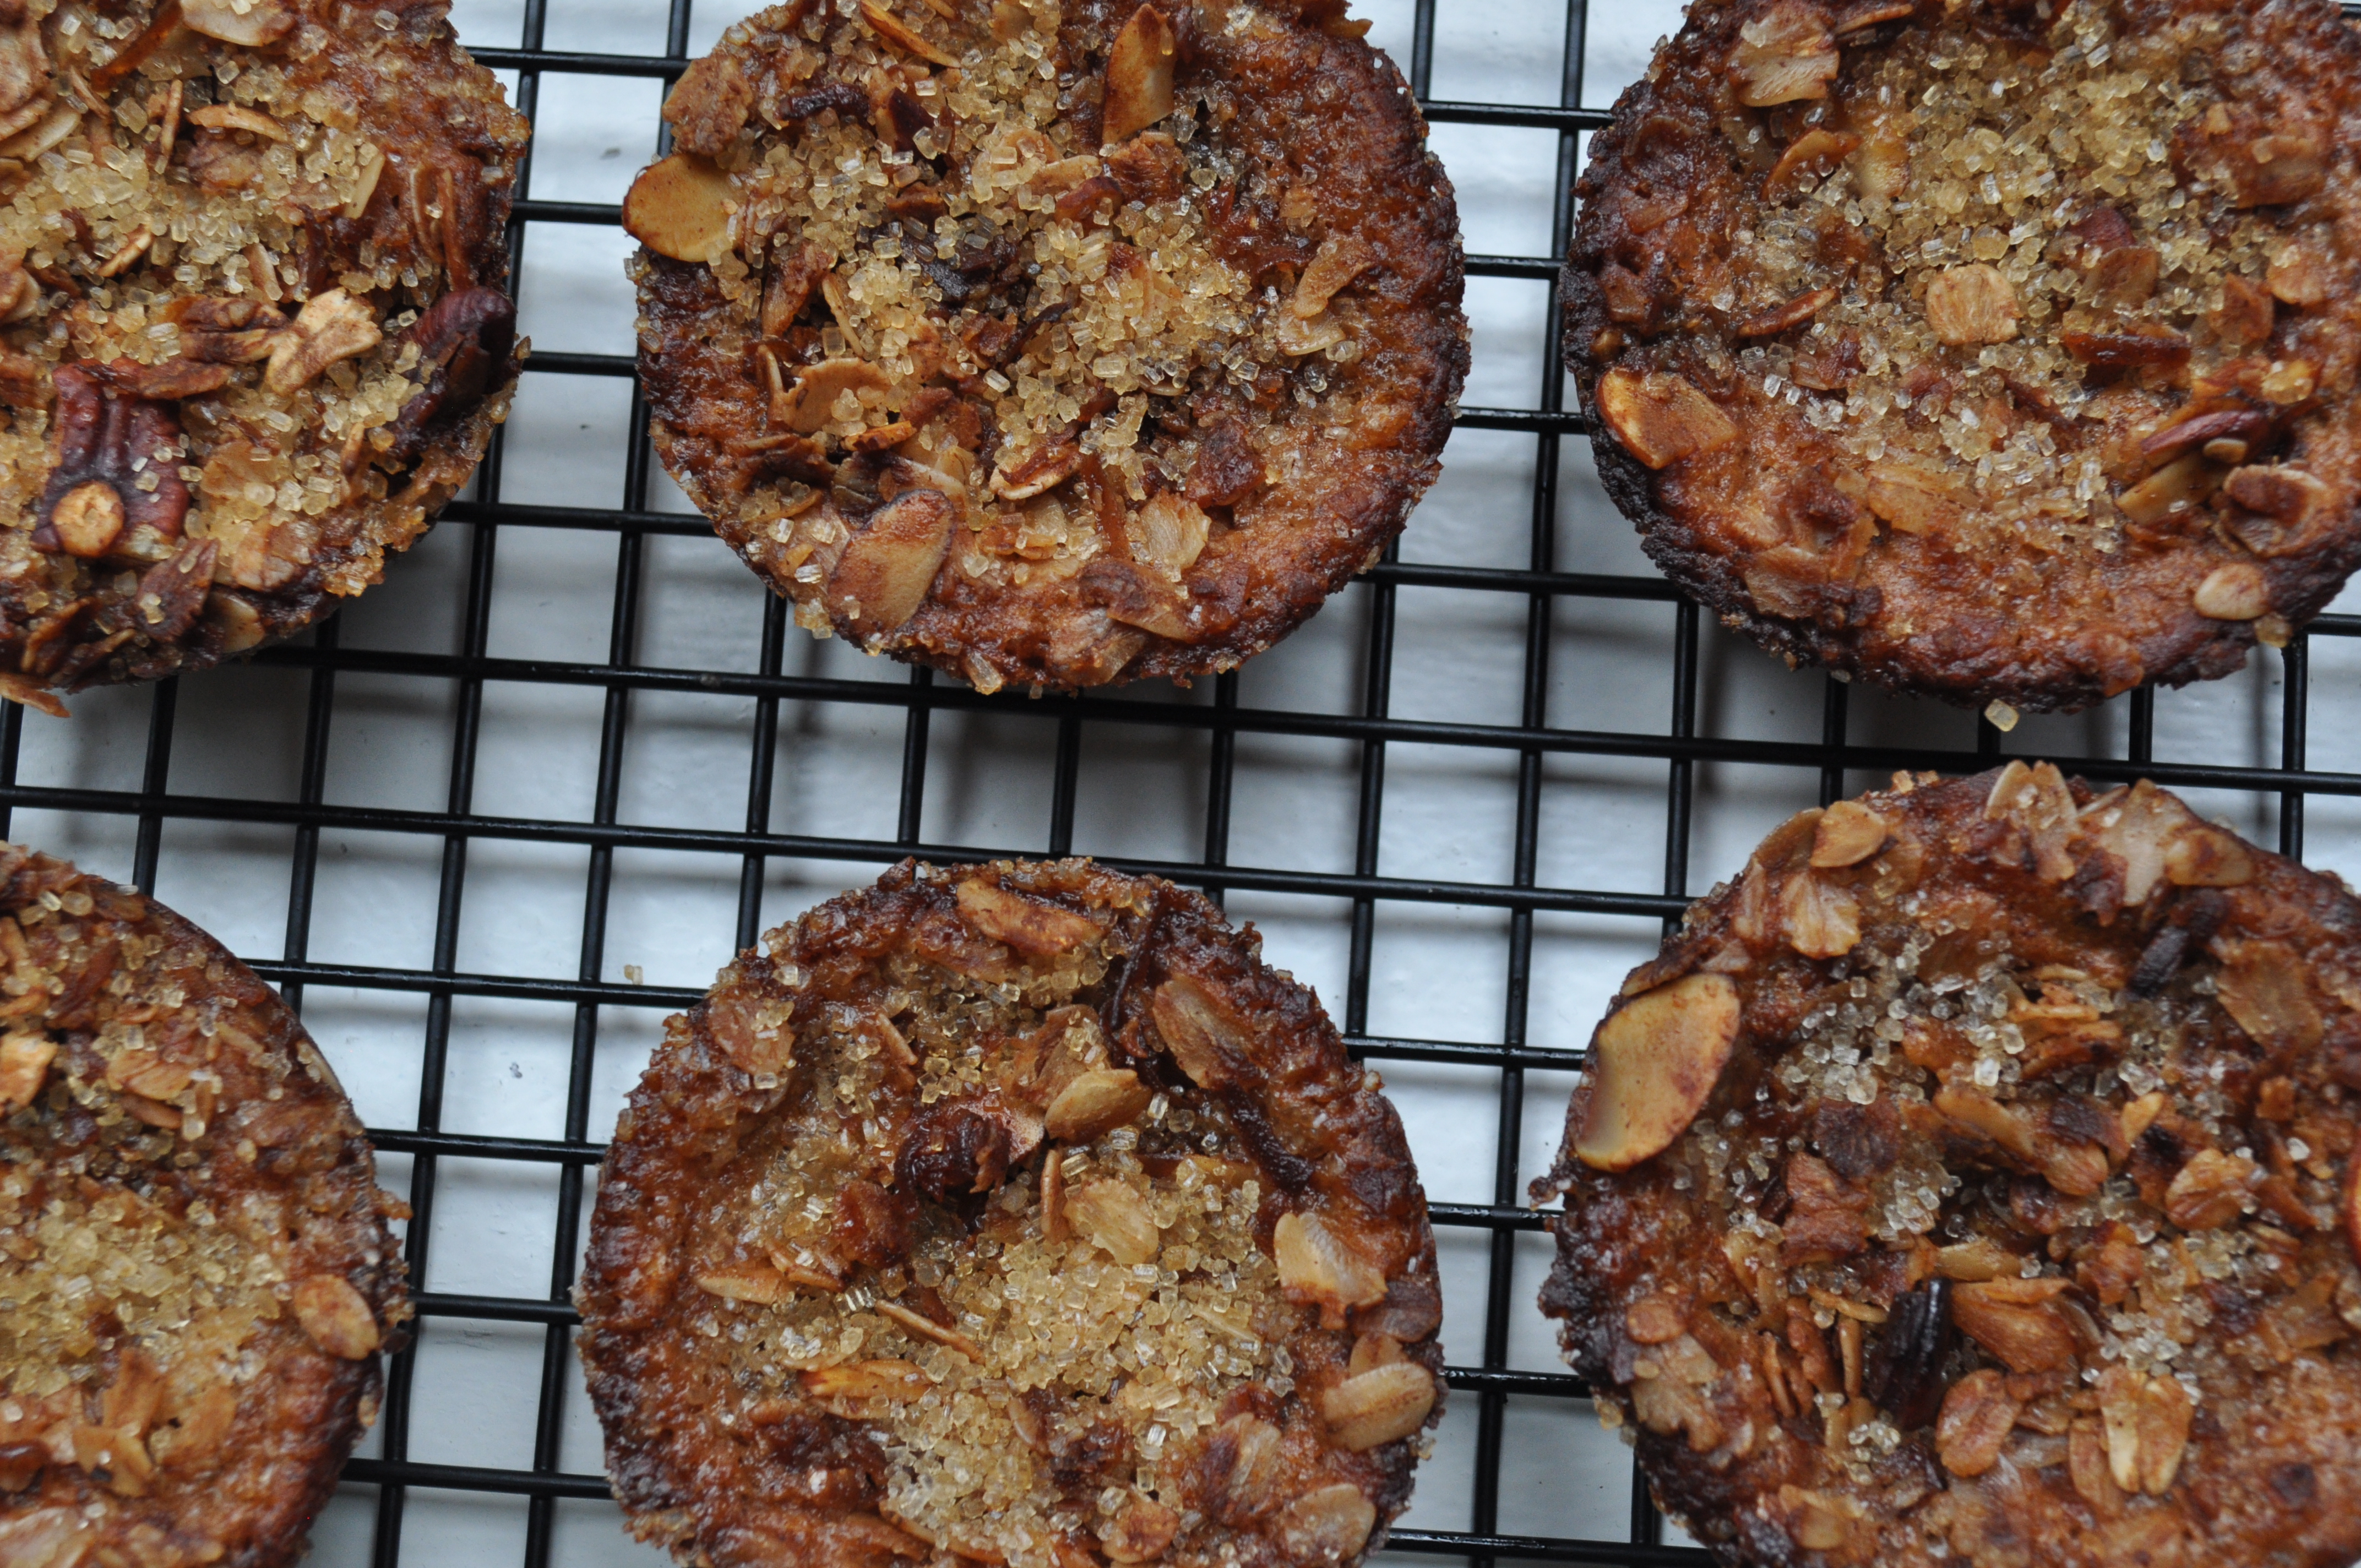
What resulted was a most delicious muffin with the most healthy sounding name.  It made me believe that I was eating healthy!  I hope it does the same for you.

DSC_2593

Granola Muffins (recipe adapted from New York Times)

Don’t worry – if you would like to be better than me, I have put the actual recipe below, with my “adjustments” in parentheses.  You can be good.  You can be half good!  You have options is what I’m saying.

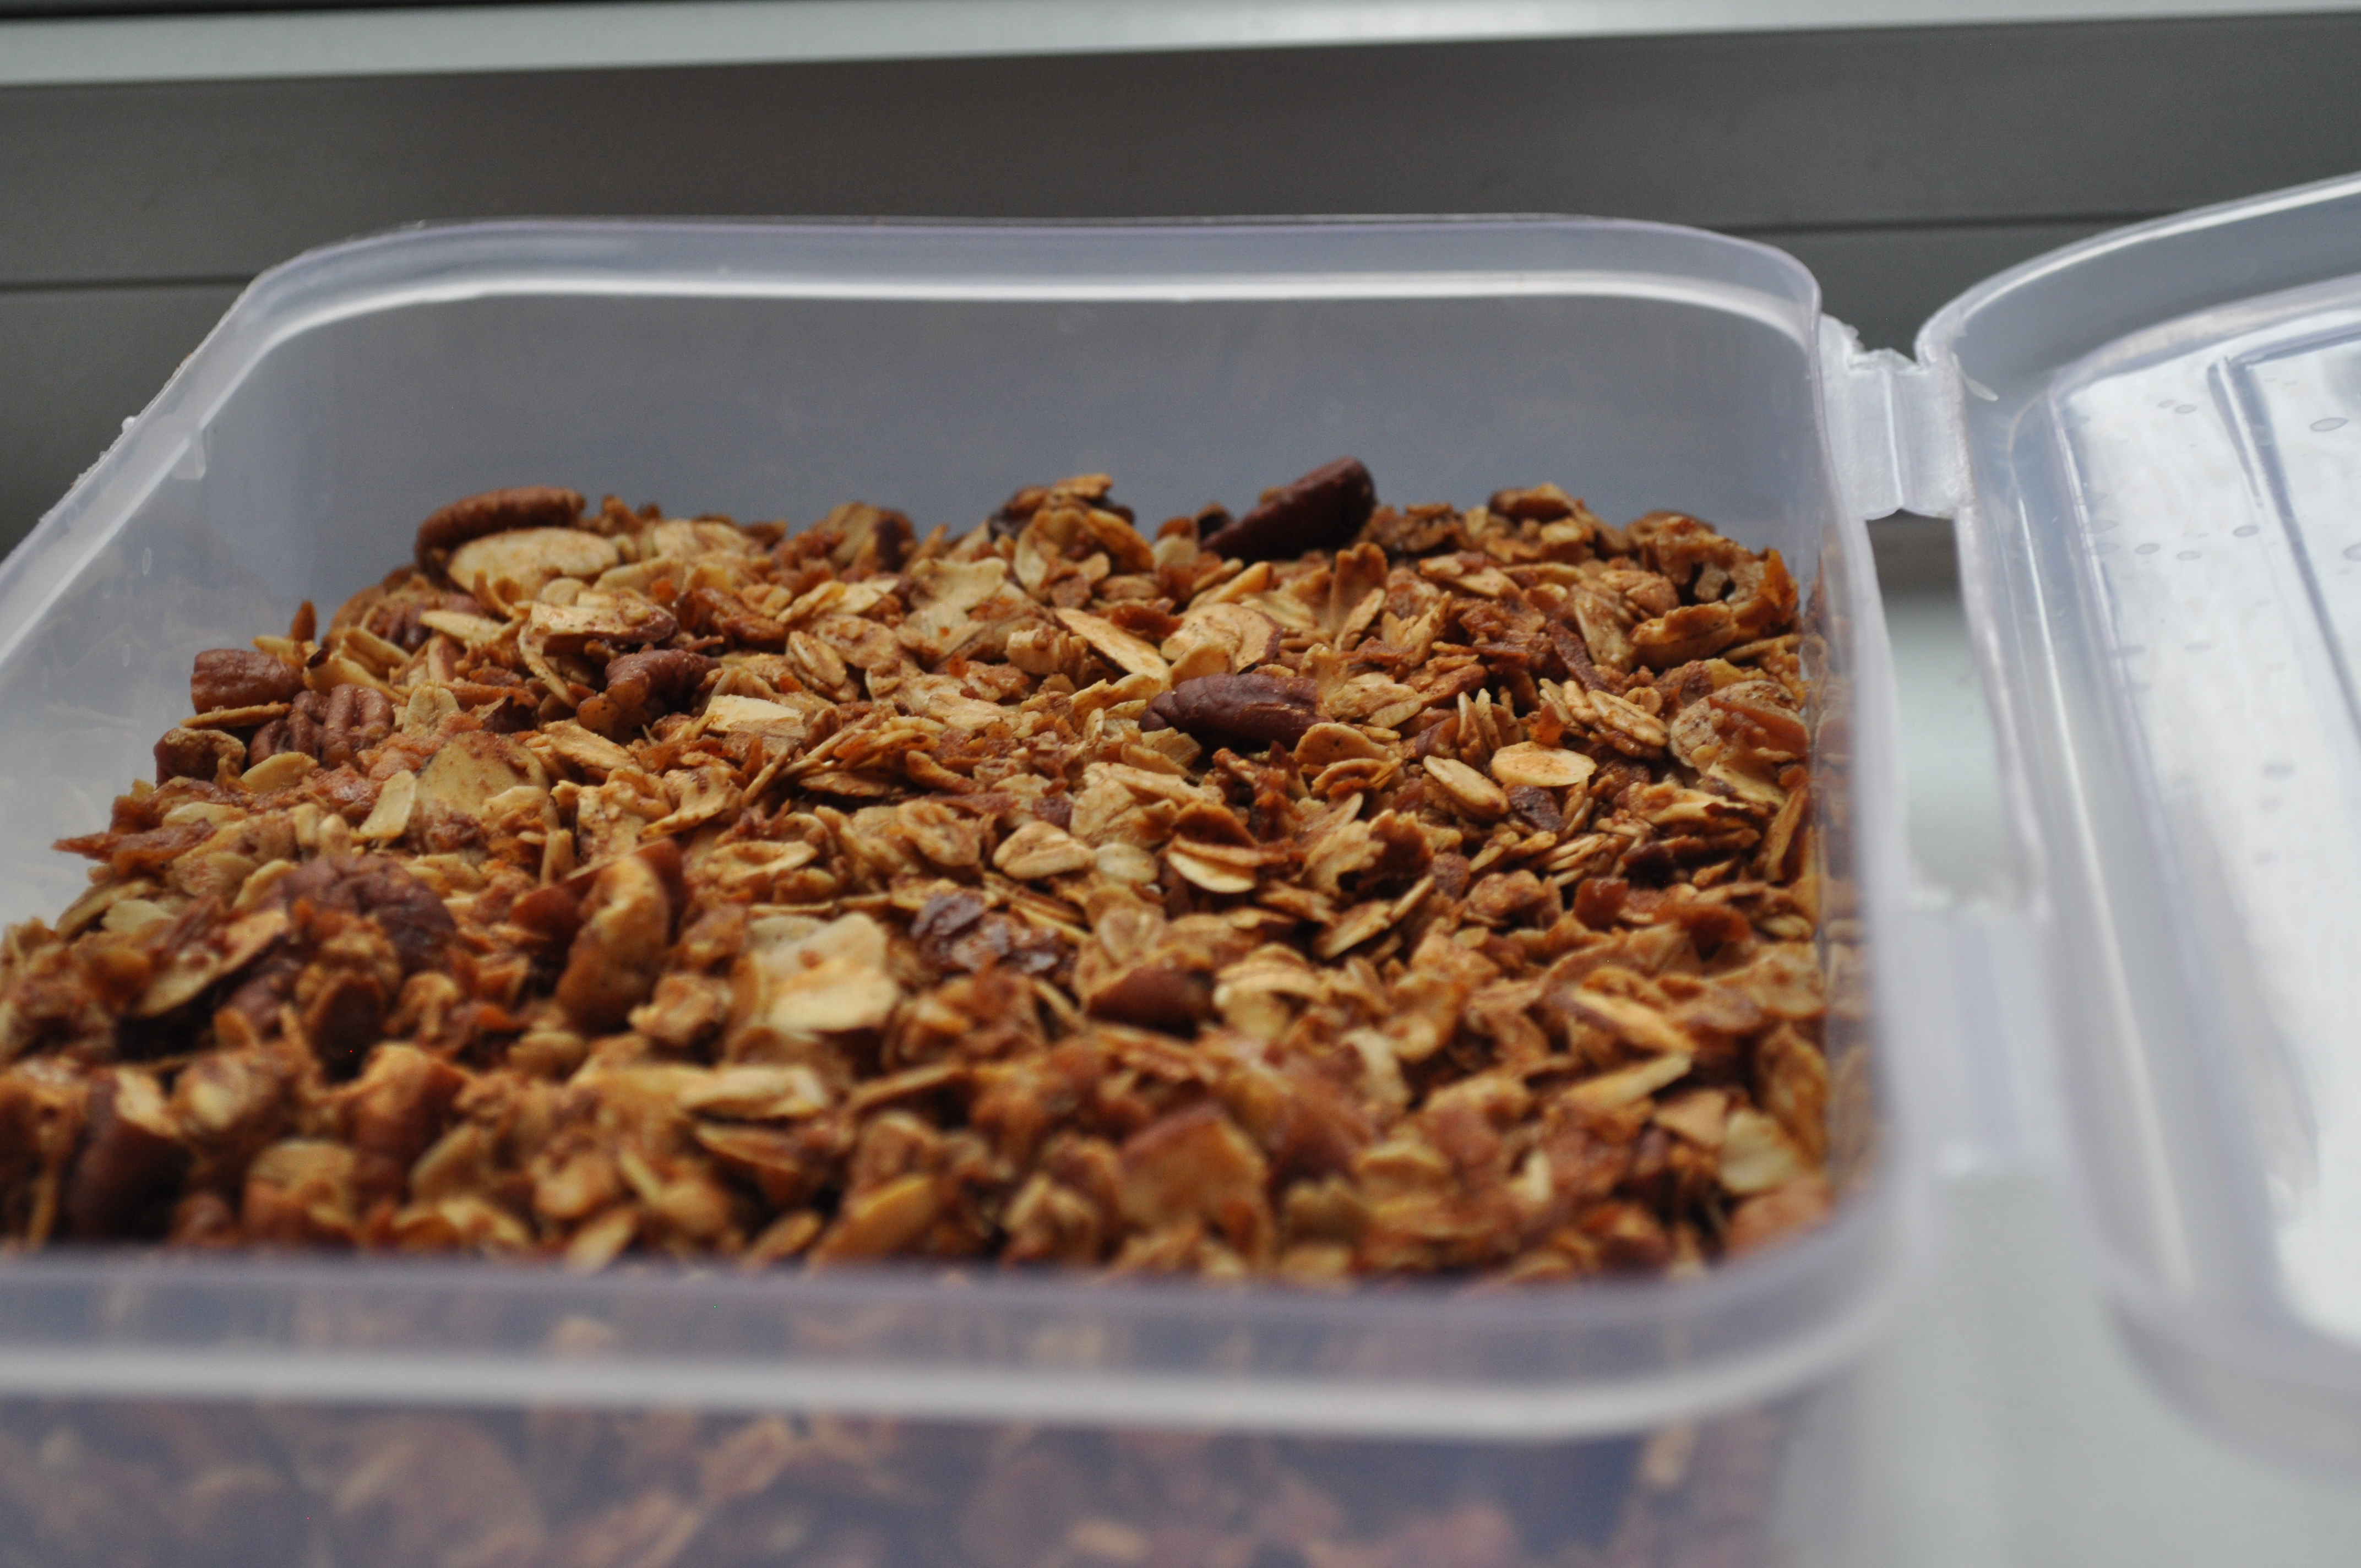
1 cup granola (I whipped up a half batch of this recipe)

1/2 cup low-fat milk

1 cup whole wheat flour (I substituted with the same amount of all purpose flour)

2 teaspoons baking powder

1/2 teaspoon baking soda

1/4 teaspoon salt

1/2 tsp. cinnamon

2 large or extra large eggs (you could do flax seed eggs if you felt like it)

1/4 cup mild honey, such as clover (I substituted with half cup brown sugar)

1/2 cup Greek yogurt

1/4 cup canola oil (I substituted with 1/4 cup melted butter)

1 teaspoon vanilla extract

Turbinado sugar, to sprinkle on top

Extra granola, to sprinkle on top

1. Preheat the oven to 375ºF with a rack in the middle. Spray 12 muffin cups with cooking spray. Combine the granola and milk in a bowl and let sit for 30 minutes.

2. Sift together whole wheat flour, baking powder, baking soda, and salt.

3. In medium bowl, beat together the eggs, honey, buttermilk or yogurt, canola oil and vanilla. Quickly whisk in the flour, then fold in the granola and raisins. Combine well

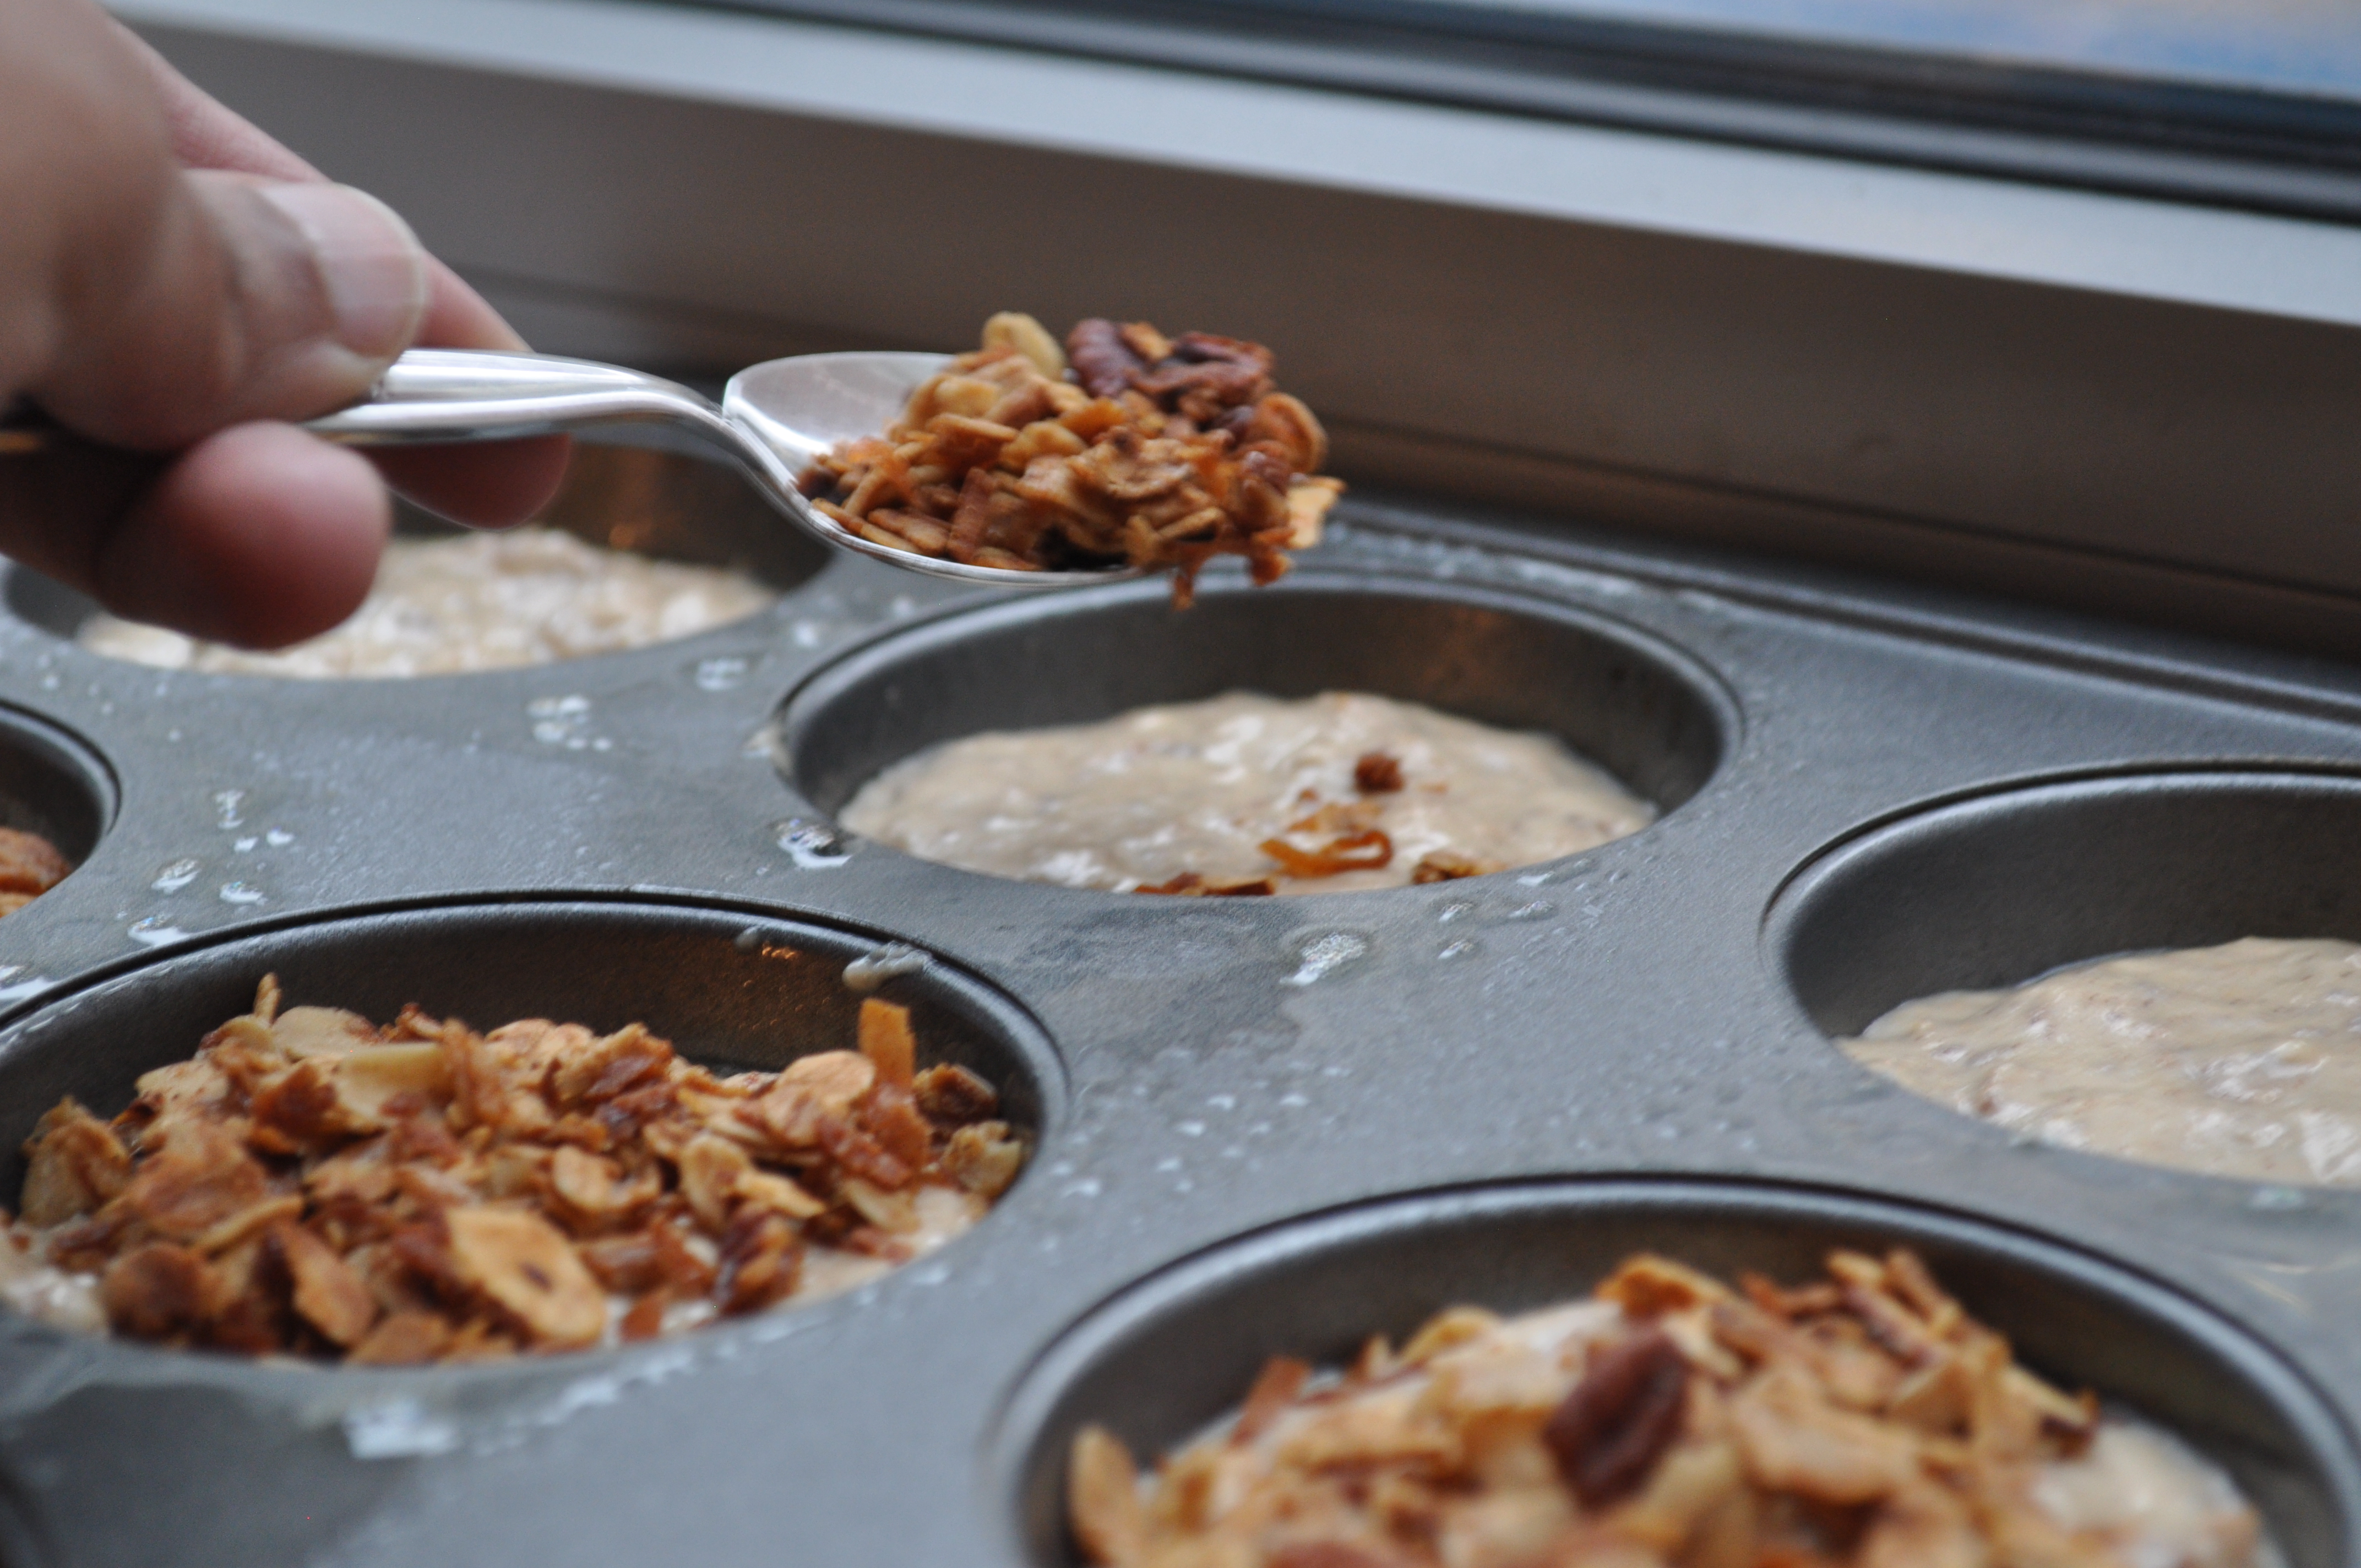
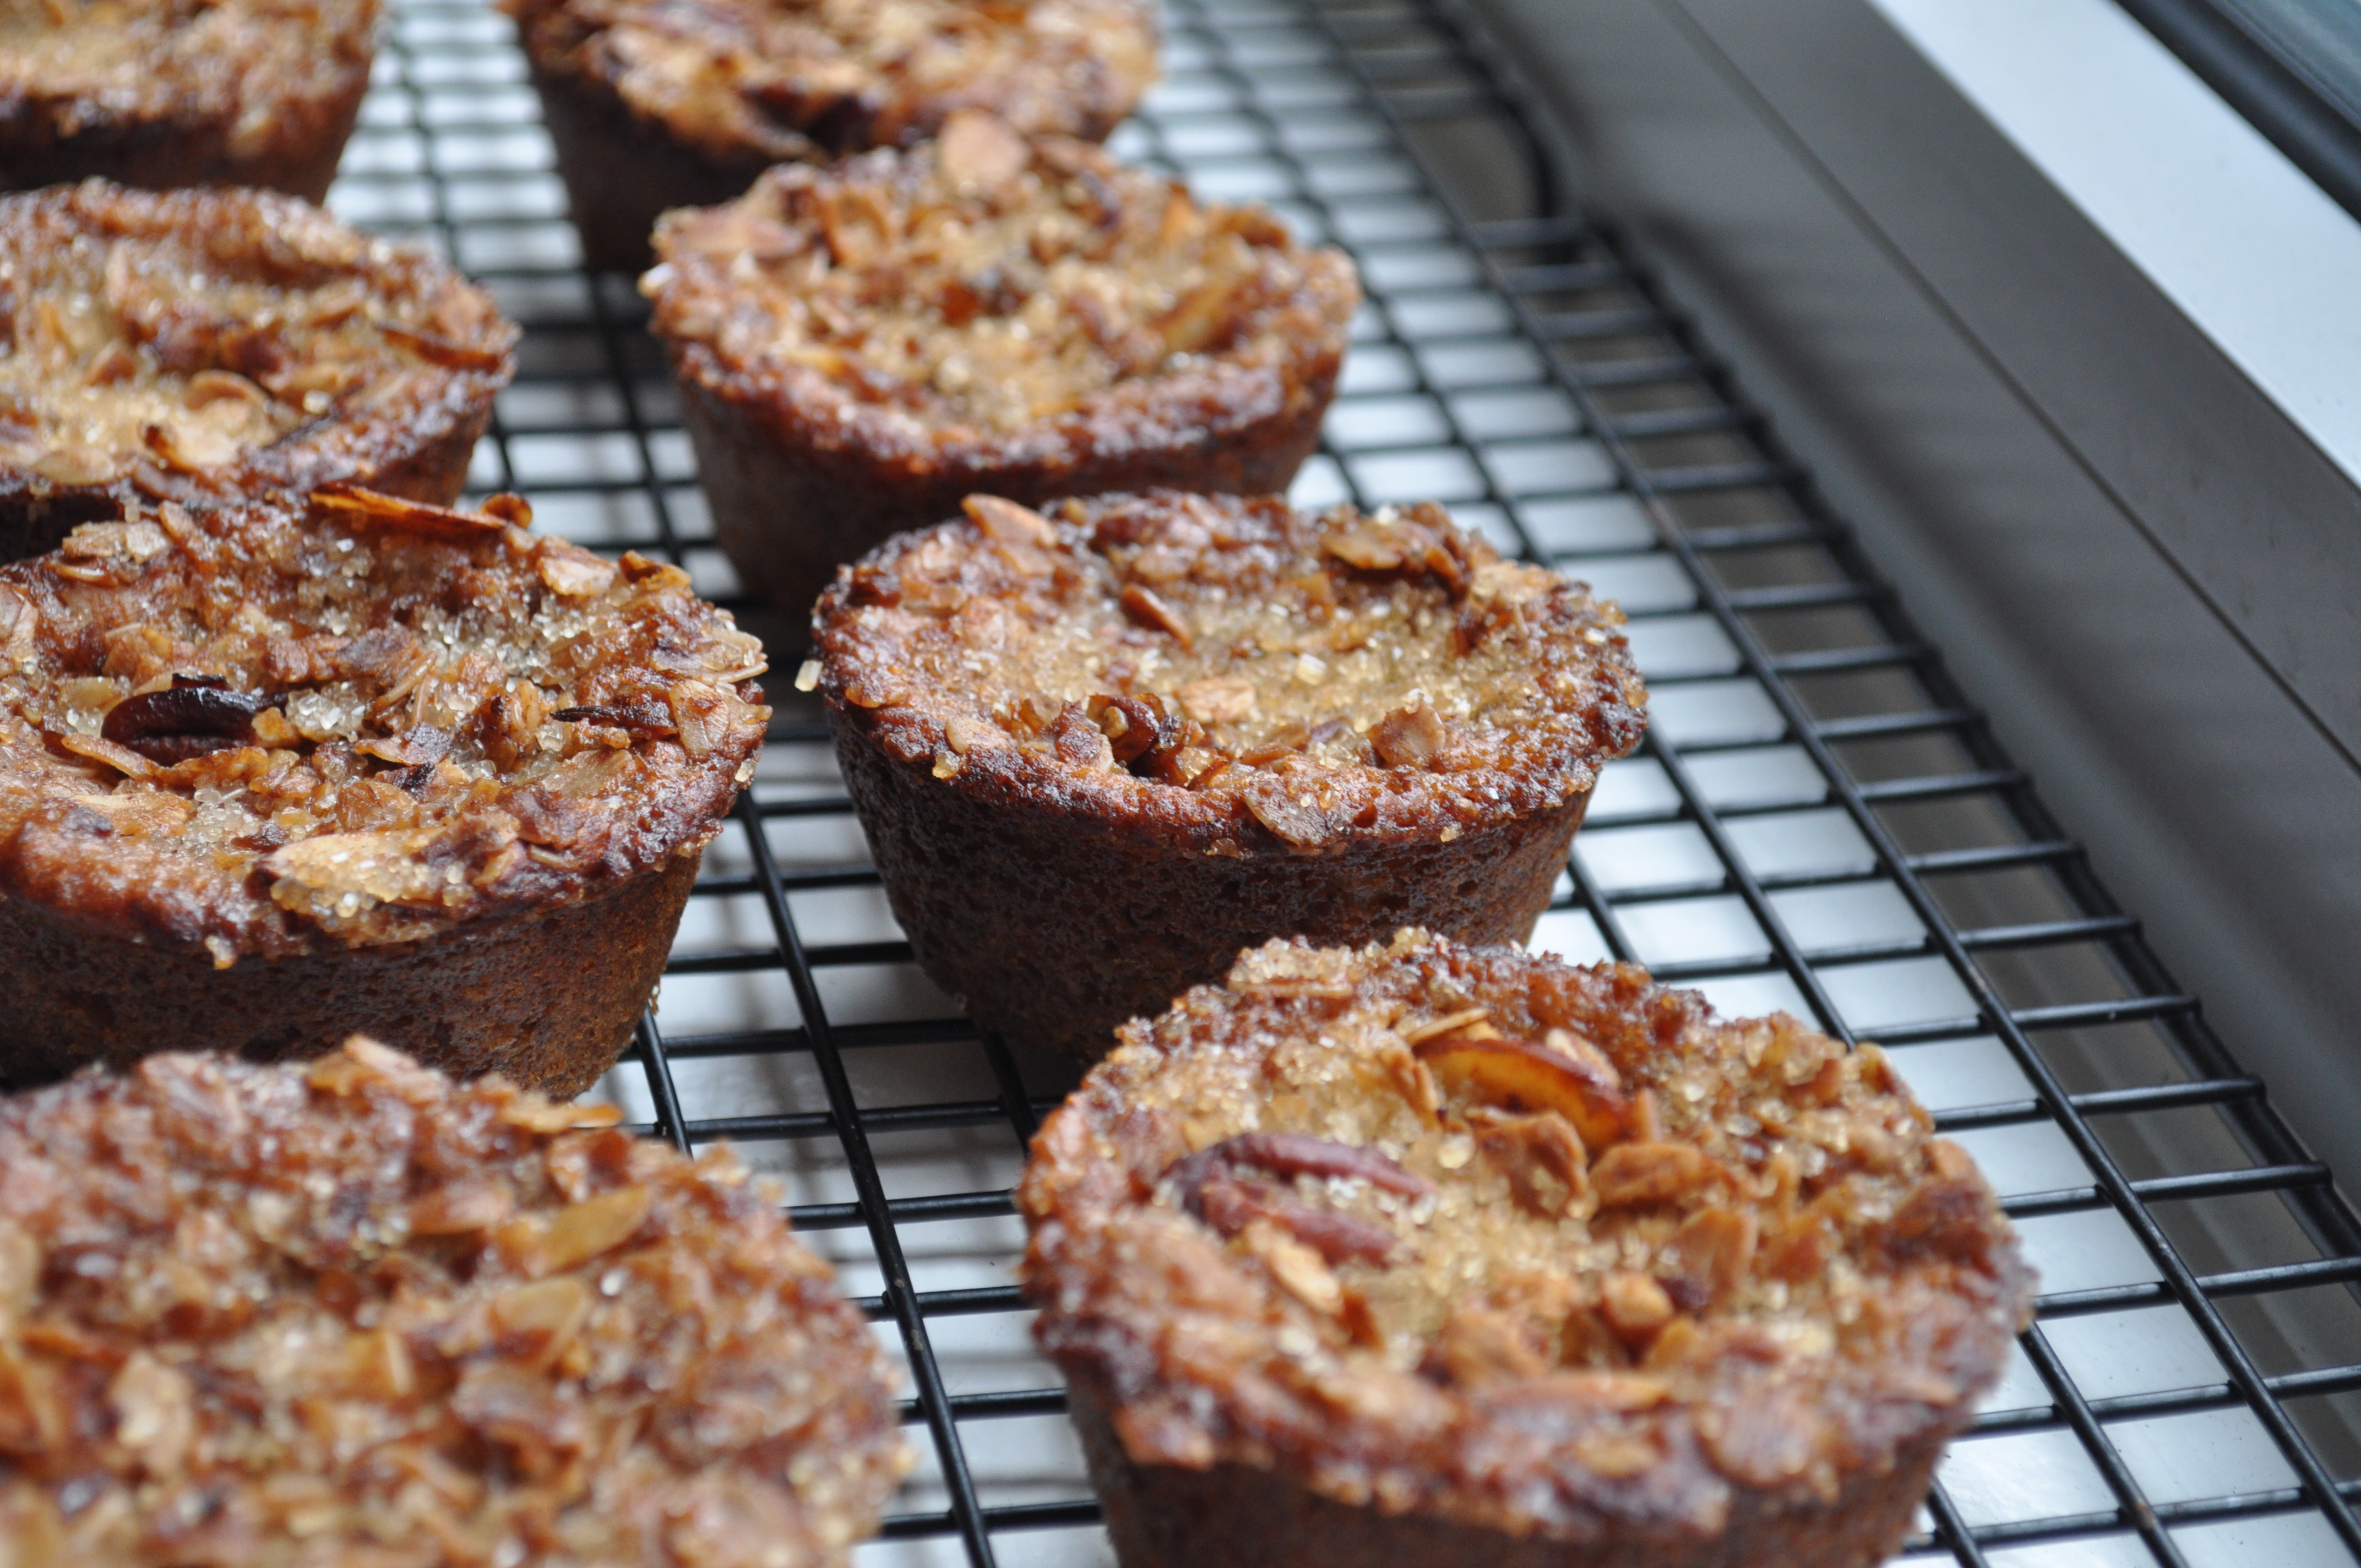
4. Spoon into muffin cups, filling each about 3/4 full. Sprinkle each muffin with extra granola and turbinado sugar.  Bake 23 to 25 minutes, until lightly browned. Cool in the tins for 10 minutes, then unmold and cool on a wire rack.  These muffins freeze really well.

Orange Black Pepper Pound Cake

February 28, 2013

DSC_2597

When I was young, my dad was always in charge of weekend breakfasts.  He never really cooked anything – just added his own little touches to store-bought specialties that we never ate on weekday (mom-made) breakfasts.  Mini chocolate-chocolate-chip  muffins with more chocolate chips melted on top!  Canned biscuits baked with an extra pad of butter!  I see now that he may have let us indulge a bit.  But without fail, every weekend morning, we would have a tall glass of orange juice waiting for us.  My dad’s twist?  He would always mix in a little salt, a little sugar, and a touch of black pepper.

DSC_2575

It was actually incredibly tasty!  It was this sweet and tangy and savory drink, with a spicy kick.  Which we all loved.  Because we are Indian, after all.  No matter what he found as his inspiration at the grocery store, the glass of OJ always made the cut for our weekend breakfasts.

DSC_2584

These days, the only citrus I get from my parents is a box of sweet, honeybell oranges every February.  When I do remind my dad about the things he used to make when we were younger, he gets a little pouty saying that those days are long gone, and we are too old and grown-up now.  He also reminds me that I can now very well mix my own spices.  What?!  As you may have guessed, this doesn’t sit well with me.  I want my juice, goshdarnit!  And I want my dad to make it for me!!

DSC_2586

I think that the fair conclusion is that my dad has overestimated my maturity.  But still, this cake is in honor of the juice I used to have.  And maybe a little nudge to my dad’s nostalgic side to make it again for me when I come home next.  Maybe?

DSC_2603

Orange Black Pepper Pound Cake (recipe adapted from Martha Stewart)

A couple things: the original recipe called for no black pepper, of course, but instead, a dark chocolate glaze on top.  I obviously love the orange chocolate combo and highly recommend it.  But this orange black pepper combo is quite nice and tasty.  And because it’s an olive oil cake, I think the black pepper adds a very lovely depth that you can’t get with the chocolate.  Also, I made this with a blood orange olive oil that was gifted to me, and it worked beautifully.  But the orange flavor is very pronounced even without the flavored olive oil – just make sure it is a good quality.  Lastly, I forgot to add the baking powder.  It didn’t even slip my mind – I kept thinking that it was so strange that this recipe didn’t call for baking powder.  And then continued to overlook it in the recipe.  But hey!  It didn’t really make a difference!  I would encourage you adding it, though.

For the cake:

  • two oranges, zested
  • 1 cup, sugar
  • juice of two oranges – about 3/4 cup juice
  • 1/2 cup plain yoghurt
  • 3 eggs
  • 2/3 cup extra virgin olive oil
  • 1 3/4 cup all purpose flour
  • 1 1/2 teaspoon baking powder
  • 1/4 teaspoon baking soda
  • 1/4 teaspoon salt
  • 1/2 tsp. coarse black pepper
For the glaze:
  • juice of 1 orange – 1/2 cup
  • 1/4 cup sugar
  • 1/2 tsp. salt
  • 1/2 tsp. coarse black pepper

Cooking Directions

  1. Preheat oven to 350 – Grease a standard size loaf pan.
  2. With a fork, mash the zest into the sugar until fragrant.
  3. Add the yogurt, juice, and olive oil.  Whisk to combine.
  4. Add the eggs, one at a a time, and the oil and whisk again until everything is combined.
  5. Fold in the dry ingredients until the mixture is smooth.
  6. Pour into the load tin and bake for an hour, or until golden brown on top, and cake springs back to the touch.
  7. While the cake is baking, mix together the juice, sugar, salt and black pepper for the glaze. Set aside until needed.
  8. When the cake is ready, take it out the oven but leave it in the pan. Let it cool slightly, about 10 mintues.  Make a few holes in the cake with a fork and pour over the glaze.  It will look like it’s not soaking in, but it will as it cools.
  9. Let the cake cool completely before slicing.

Macaroni and Cheese

February 23, 2013

DSC_2530

I once heard somewhere that the time we perceive it takes from when we are born to the age of 18, is the same amount of time that we think it will take from 18 to the rest of our lives.  Um, what?!  This is truly upsetting.  But, sigh, it must be true.  Because here we are, suddenly, out of the blue, at the end of February of 2013, and I truly have no idea how we got there.

DSC_2520

This is when I want comfort.  But no, this is really when I want to feel like a kid again.  Pretending that I am still in those first 18 years when time is measured by the next holiday break, or science test, rather than financial quarters.  And what is better to make you feel young again, with an incredibly high metabolism, than mac and cheese.

DSC_2523

To be perfectly honest, I never really crave this extremely typical comforting dish.  When I was little, my mom never reached for the blue box when things got a little busy around the house.  Nope.  She instead always grabbed the cans.  Spaghetti-o’s to be exact.  Mm.  But I digress.  Macaroni and cheese doesn’t have to bring up feelings of nostalgia when you eat it.  There’s just something about mac and cheese, right?  It’s cheesy, and gooey, and carby and wonderfully comforting, and of course undeniably delicious.  It’s also rustic and homey and accessible to pretty much anyone.  Blue box or not, this is so good that it will seem like time is standing still.

DSC_2529

Macaroni and Cheese (recipe from Barefoot Contessa)

1 pound elbow macaroni
1 quart milk
8 tablespoons unsalted butter, divided
1/2 cup all-purpose flour
12 ounces Gruyere, grated
8 ounces extra-sharp Cheddar, grated
1/2 teaspoon freshly ground black pepper
1/2 teaspoon ground nutmeg
1 1/2 cups fresh white bread crumbs (5 slices, crusts removed)

Preheat the oven to 375 degrees.

Pour the macaroni into a pot of boiling water and cook according to the directions on the package, 6 to 8 minutes. Drain well.

Meanwhile, heat the milk in a small pot, until simmering, but not boiling. Melt 6 tablespoons of butter in a large (4-quart) pot and add the flour. Cook over low heat for 2 minutes, stirring with a whisk. While whisking, add the hot milk and cook for a minute or two more, until thickened and smooth. Off the heat, add the cheeses, 1 tablespoon salt, pepper, and nutmeg. Add the cooked macaroni and stir well. Pour into a buttered, 3-quart baking dish.

Melt the remaining 2 tablespoons of butter, combine them with the fresh bread crumbs, and sprinkle on the top. Bake for 30 to 35 minutes, or until the sauce is bubbly and the macaroni is browned on the top.

Strawberry and Cream Macarons

February 14, 2013

DSC_2609

Are you guys tired of the hearts and the cupids and the chocolate yet?  Can you do without the “dessert for two” recipes, and the color red?  Are you ready to just move on and get on with it?

DSC_2582

Well, I’m not!  I love being festive, as I’ve told you before, and Valentine’s Day is no exception.  It is right around this time every year that I have a deep urge to take a shoebox, cut a hole at the top, decorate the whole thing, and wait for my classmates to drop in store-bought valentines.  With candy (!), if I’m lucky.  No people, this is not sad.  It is quite the opposite!  It is celebratory and fun and…fine, maybe a little sad.  But I still love it.

DSC_2584

I’ll spare all of you the decadence and the heart shape food.  But I will share what I love!  Because that’s what this holiday is about anyway, right?  My favorite dessert at the moment: French Macarons!  Bonus: They’re pink!

DSC_2590

I’ve told you that I have attempted to make these before without much success.  And these weren’t perfect by any means.  They didn’t rise the way they were supposed to, they were a bit too sweet, they were chewier than they are supposed to be, and they were all cracked on top.  But boy, am I in love.  This is the start of a lifelong relationship and it will just improve with time.

DSC_2604

Strawberry and Cream Macarons (recipe adapted from BraveTart)

There is a myth that making macarons is not for the faint of heart (pun full intended).  But this really could not be further from the truth.  There are no fancy stand mixers needed (in fact, I think that my batter was overmixed because of my stand mixer).  The recipe is quite straight-forward, not particularly labor or time intensive, and everything can be done by hand.  The one extra-ish tool that you will need, however, is a scale.  The proportions need to be exact.  I speak from experience.  I ended up with one giant sheet of macaron shell when I tried to “eye” the measurements.  It won’t work, people.  And then you will be sad.  And that’s the last thing I want on a day like today!

4 ounces (115g) almond flour, or ground up blanched almonds
8 ounces (230g) powdered sugar
5 ounces egg whites (144g), set out at room temperature overnight
2 1/2 ounce (72g) sugar
2 tsp vanilla extract, or the seeds from one vanilla bean, or 2 tsp. vanilla bean paste
1/2 tsp salt

3/4 oz. freeze dried strawberries, ground up

Preheat the oven to 300° and have ready a large pastry bag, fitted with a plain tip.  Or a freezer bag, and just cut off the tip when you are ready to use.  Also line two baking sheets with parchment paper.

This is where it gets a bit tedious.  Take a 1 to 1 1/2 inch cookie cutter and trace out circles on the parchment paper, about a 1/2 inch away from each other.  This is to guide you to size the macarons as you are piping them, to make sure they are all the same size.  Then after you are done, flip the parchment paper over on the baking sheet, ink side down.  You should will be able to see the circles from the other side.

Sift together the almond flour with the powdered sugar and freeze dried strawberries and set aside. If a significant portion won’t go through your sifter, however, you’ll need to grind them up until they do.

In the bowl of a stand mixer, or with a hand mixer, or by hand (!), combine the egg whites, sugar, vanilla bean (not the extract), and salt and turn the mixer to medium.  Beat for 3-5 minutes or until the egg whites just seem to be getting foamy.

Increase the speed to medium-high, and beat another 7-10 minutes, or until the egg whites are glossy and shiny and holds it shape.  You will end up with a very stiff and dry meringue and your arm will hurt if you are doing this by hand.

Now dump in the dry ingredients all at once and fold them in with a rubber spatula.  You will think that this is an impossible task, but it’s not!  Keep folding.  The meringue will lose some of its air, but that’s a good thing.  You want the end results to be like the consistency of say, pancake batter.

Pipe the batter into the pre-traced circles on the baking sheet. Stop piping just shy of the borders of the circle, as the batter will continue to spread just a bit.  If it doesn’t spread, your batter is still too thick, and you need to mix it some more.

After piping your macarons, take hold of the sheet pan and hit the baking sheet against your counter. Rotate the pan ninety degrees and rap two more times. This is to knock out any of the air bubbles.  Let the baking sheets sit at room temperature for about 30 minutes, or until the macarons are dry to the touch.

Bake for about 18 minutes, or until you can cleanly peel the parchment paper away from a macaron.  Let cool completely on the baking sheet and then transfer to a wire rack.  Pipe with white chocolate buttercream, recipe to follow, top with another macaron shell and enjoy!

White Chocolate Buttercream

6 ounces heavy cream
10 ounces good quality white chocolate (I found a bar with strawberry bits in it!), chopped
1 tsp. salt
1 tsp. vanilla bean paste
4 tbsp. unsalted butter, at room temperature

In a large, heat proof bowl, place the white chocolate, salt and vanilla bean paste.  In a small pot, bring the cream to a simmer, but make sure that it does not boil.  Pour the cream over the white chocolate and let it sit for a moment.  Sit everything together until the mixture is creamy and smooth.  Let it come to room temperature.  With a mixer, beat in the butter until the whole mixture is light and fluffy.  Fill the macaron shells and enjoy!  Store the extras in the refrigerator.

Hot Chocolate Cookies

February 9, 2013

DSC_2622

We made bets last night.  Cookies were at stake.  The bet was to guess how much snow the northeast would get, city by city.  I clearly did not have much faith in the strength of this storm named Nemo, because I lost.  By a lot.

DSC_2610

So I owe a lot of cookies to a lot of people.  Which is just fine because my informal poll shows that baking is one of the top snow day activities ever!  After playing in the snow, and coming back in to drink hot chocolate, that is.  But I’m about to say something controversial: hot chocolate is never all that satisfying.

DSC_2615

No, people, I don’t hate hot chocolate and childhood memories, really.  But, eh, hot chocolate?  Just to get a warm treat?  The concept is so pleasing and delicious sounding – a steaming mug of chocolate liquid topped with melty marshmallows.  But does it ever live up to that?  I mean, let’s think about this together – hot chocolate that comes out of the packets is usually too thin if you “just add water,” and is always too sweet.  And hot chocolate made from the fancier cocoas are usually too thick and makes you feel uncomfortably full.

DSC_2617

Hello?  Are you still there?  Sigh, I realize that I may be on my own in this.  But here I am giving you one better!  Warm, gooey, hot chocolate cookies (made with the aforementioned packets that will give you back your happy childhood memories…okay?) with an even warmer and gooier marshmallow on top.  Seriously, these warm, out-of-the-oven treats could beat out a warm cup of milk or water any day.  And we’re combining the two most beloved snow day activities (again, informal poll)!  Best snow day ever.

DSC_2623

Hot Chocolate Cookies (recipe from A Pastry Affair)

8 tablespoons (1 stick) butter
12 ounces (2 cups), a mix of dark and semi-sweet chocolate chips
1 cup dark brown sugar, packed
3 large eggs
2 teaspoons vanilla extract
1 1/2 cups all-purpose flour
2 packets hot cocoa mix
1 1/2 teaspoons baking powder
1/2 teaspoon salt
18 large marshmallows, cut in half
Chocolate shavings (optional)

In a small pot, melt together butter and chocolate chips over low heat. Stir until smooth and set aside.

In a large mixing bowl, beat together brown sugar and eggs, until light in color and double in volume. Add vanilla extract and stir. Slowly incorporate flour, hot cocoa mix, baking powder, and salt. Mix in melted chocolate. Refrigerate cookie dough for 1 hour to solidify.

Preheat oven to 325 degrees.

Scoop cookie dough by the tablespoon-full onto a baking sheet. Flatten each cooke dough ball slightly.  Bake for 12 minutes, or until cookie tops begin to crack. Pull cookies out from oven and press one marshmallow, cut-side down onto each cookie. Bake cookies for an additional 4-5 minutes, or until marshmallows are softened. Sprinkle chocolate shavings on top, if desired.

Serve warm or room temperature.  You should highly consider warming the cookie up in the microwave before eating, to get the warm, gooey, hot chocolatey taste.

Chili Jam

January 31, 2013

DSC_2572

Wait, did I tell you that I had the flu?  I’m not sure if I had mentioned…

DSC_2540

During the 12 Days of Flu, not to be confused with a more festive 12 days that comes around at the end of each year, I had little energy to do much else than, of course, watch cooking shows on TV.  I would lay there, on my couch, expressionless, lifeless, really, watching hours of my favorite peppy TV personalities, thinking about the first real food I would make and eat as soon as I got out of the flu black hole.

DSC_2547

I decided on this chili jam.  I kid you not – the very first day I felt like I could take more than the 4 steps from my sofa to my bed, I (very slowly) walked to the supermarket to get all of the ingredients, and (very gingerly) stayed on my feet to make sure that all of the peppers were chopped and the proper amount of stirring took place.

DSC_2549

But that’s not even what I want to tell you: this jam looked so incredibly tasty on television, and I wanted to have it so badly, that even after I failed in my first attempt in making it (shame), I went back to the store (even slower than the first time) to get more ingredients, and again stood on my feet to ensure that it would work this time around.  Then I collapsed.  But it was exactly how I imagined it would be: sweet with an unexpected kick, delicious on cheese (!) and so worth it.

DSC_2571

Chili Jam (adapted from the Cooking Channel)

This is where I discuss my first attempt failure: the recipe says to stir the jam for a full 40 minutes to reach proper thickness.  It looked pretty darn thick to me at 15 minutes, but as the follower of rules that I am, I kept going.  I ended up with chili jam rock candy, not many people’s candy of choice by any means, and a jar that ended up in the trash can.  So I amended that cooking time here.  I also cut the sugar in half.  Not that a kilo of sugar is a bad thing.  But it’s also not the best thing, is it?

8 oz., 250 grams red hot chili peppers, seeded and chopped

1.5 lbs., 750 grams, red bell peppers, cored, seeded and chopped

2 cups apple cider vinegar

2 – 2.5 cups sugar

In a pot, combine the chili peppers, red bell peppers, and apple cider vinegar. Cover the pot with a lid and cook for about 20 minutes or until the peppers have softened. In a colander, drain the pepper mixture and with the back of a wooden spoon, press on the peppers to extract any excess liquid.  The more you press, the better, and the more stained your colander will get.  Just letting you know.

Transfer the peppers to a blender or food processor and puree. Press the puree through a sieve to remove the pepper skin. Discard the skin. In a saucepot, over medium heat, add the pepper puree and add the sugar a little at a time and mix until the sugar has dissolved. Continue to cook the mixture for about 12-20 minutes, stirring occasionally, until the mixture looks almost jam-like, keeping in mind that the jam will thicken as it cools.  Allow to cool and transfer into jars.

Black Bottom Cupcakes

January 24, 2013

DSC_2496

I have been all talk this January.  Or the year of 2013, really.  I tell you that I have a healthy new year’s recipe for you, and then I use the flu as an excuse.  I tell you that I’m coming back strong from my sickness, and there is just dead air.  You have gotten one recipe from me this month!  I’m just playing with your emotions.  How can you ever trust me again?!

DSC_2474

Believe it or not, I have another excuse!  I knew you would be surprised.  No really, my sister got married!  In New Orleans!  And it was so much fun!  But there was so so so much to do.  In the ten days leading up to the wedding, I had one complete meal.  One!  C’mon people, you know how much I like my food, so you know this was serious.

DSC_2479

I thought that I’d make it up to you by posting something relevant: Wedding cookies!  Or iced cut-out sugar cookies of the newly married couple’s initials!  Or pecan pralines to celebrate New Orleans!  But now, post-wedding, I’m tired.  Really, really tired.  And all you get is this backlogged recipe of the black-bottom cupcake.  I’m such a tease.

DSC_2486

I know that I’m one backlogged recipe away from being deserted.  But don’t be let down in the least!  These were delicious and a hit…at a holiday party I took them to…in early December.  But that doesn’t mean they will be any less tasty for the Superbowl!  Did you see how I just made up for my absence?  I’m good like that.

DSC_2498

Black Bottom Cupcakes (recipe from Bake or Break)

I was under the impression that everyone knew what black bottom cupcakes are.  Not in that snobby foody kind of way.  But in that matter-of-fact, these are so delicious that how can you not know about them, kind of way.  If you don’t know what they are, black bottom cupcakes are a dense chocolate cake on bottom, with a chocolate chip cheesecake filling.  There.  That’s all I needed to say.  I know you’ll always remember from now on.

  • 8 ounces cream cheese, softened
  • 1 large egg, at room temperature
  • 1/3 cup plus 1 cup granulated sugar
  • 1 cup miniature chocolate chips
  • 1 & 1/2 cups all-purpose flour
  • 1/4 cup unsweetened cocoa powder
  • 1 teaspoon baking soda
  • 1/2 teaspoon salt
  • 1 cup warm water
  • 1/3 cup vegetable oil
  • 1 tablespoon apple cider vinegar
  • 1 teaspoon vanilla extract

Preheat oven to 350°. Line 2 12-cup muffin tins with cupcake liners, or spray with cooking spray.

Beat cream cheese, egg, and 1/3 cup sugar with a mixer, on medium speed, until light and fluffy – about 2 minutes. Stir in the chocolate chips, and set aside.

In another large bowl, combine flour, remaining 1 cup of sugar, cocoa powder, baking soda, and salt.  In the dry ingredients, make a well in the center, and add water, oil, vinegar, and vanilla. Stir with a wooden spoon until just combined.

Fill each muffin cup one-third full with the chocolate batter. Top with a spoonful of cream cheese mixture, until cups are about two-thirds full. Bake for about 23-25 minutes, or until the tops spring back lightly when touched, and the cream cheese mixture seems set.

Cool in pans for 10 minutes. Remove to wire racks to cool completely.

Honey Almond Butter Mousse Tart

January 8, 2013

DSC_2518

Friends!  No, I didn’t forget about you.  I didn’t forget to post a new year’s eve recipe, or even a new year’s resolution dish.  It was all in my head.  And I had every intention to share these themed recipes, I did!

DSC_2499

And then I got the flu.

DSC_2508

It really takes a lot of out of you, the flu.  I didn’t know this!  So here I am, wishing I could have a slice of this delicious honey almond butter mousse tart (honey signifies new beginnings, right?!  and, I’m using honey instead of sugar – there’s your new year’s resolution recipe!), but instead am sipping on my tea, planning on when to get my flu shot to make sure that this never happens again.

DSC_2512

So a belated happy new year!  I will be back in action in no time.

DSC_2519

Honey Almond Butter Mousse Tart (recipe from Joy the Baker)

1½ cups all-purpose flour

½ cup powdered sugar

1/8 teaspoon salt

½ cup (1 stick) unsalted butter, cold and cut into cubes

1 large egg, beaten

1 cup heavy cream

8 ounces cream cheese, softened

½ cup almond butter

½ cup honey

1/4 teaspoon salt

2 teaspoons vanilla bean paste, or vanilla extract

4 ounces dark chocolate, finely chopped

1/3 cup heavy cream

Pinch of salt

1 teaspoon pure vanilla extract

2 tablespoons toasted, sliced almonds for sprinkling

For the crust: In a medium bowl, whisk together flour, powdered sugar, and salt. Add cold butter and quickly rub the butter into the dry ingredients with your fingers or a pastry cutting tool until well incorporated.  Add the beaten egg and use a fork to bring the mixture together.

Pour the dough into a 9-inch round, removable bottom tart pan (or similar, like a rectangular pan approximately sized 14x 4.5 x1). Use your fingers to press the dough across the bottom of the tart pan and up the sides. Press the dough evenly throughout the tart pan.  Use the tines of a fork to pierce the dough several times and place tart pan on a baking sheet, and in the freezer for at least 1 hour.

Place a rack in the upper third of the oven and preheat oven to 350 degrees F. Grease one side of a piece of foil with butter.  Remove the tart shell from the freezer and press the foil into the tart shell, butter side down.

Bake the tart for 18-20 minutes.  Remove the foil and bake for another 10 to 12 minutes.  The crust may not turn a golden brown color, but it will be done after 12 minutes, and remove from oven.

Remove from the oven and allow tart shell to cool completely before filling.

For the filling: In a medium bowl, whip heavy cream until soft peaks form.  Set aside.

In another bowl, beat together cream cheese, almond butter, and honey.  Beat until smooth and creamy, ensuring that all of the ingredients are well incorporated, about 5 minutes. Beat in salt and vanilla extract.

Remove bowl from the mixer.  Use a spatula to stir in one third of the whipped cream until it is thoroughly incorporated.  Add the remaining whipped cream and fold together.  Filling will be the texture of a fluffy mousse.  Store in the refrigerator until ready and the tart shell is cool enough for filling.

For the chocolate: Place finely chopped chocolate in a small bowl.  Set aside.

Heat heavy cream on the stovetop until hot and steaming, but not boiling. Pour the cream over the chopped chocolate and let stand for 30 seconds. Slowly stir the chocolate and cream mixture until chocolate is melted and mixture is glossy. Add salt and vanilla extract and stir to combine.

Smooth filling into the bottom of the cooled tart shell creating an evenly smooth top. Pour ganache over the top and smooth to the edges. Sprinkle with toasted, sliced almonds and place in the refrigerator for at least 2 hours before serving.

Coconut Pecan Chocolate Chip Cookies

December 24, 2012

DSC_2516

There are some recipes that I’m a bit hesitant to share.  I know it seems greedy, but there is always something about those recipes that make them over the top, or very unique, or are just plain delicious.  And I don’t want to give that away!  Clearly, this post has unwillingly become about my selfishness.

DSC_2499

But let me tell you this: I almost kept this cookie recipe from you.  Yep, they are that good.  Think: butter pecan ice cream mixed with coconut cream pie all tucked into a chocolate chip cookie.  They are not only over the top, and unique, but they are beyond delicious.  And I wanted to keep them all to myself.

DSC_2505

In the spirit of the season of giving, here you are.  It’s not too late to add one more cookie to that gift basket, or dessert table or especially to leave for Santa tonight – trust me, they will work.

DSC_2513

Coconut Pecan Chocolate Chip Cookies (adapted from Cookie Madness)

Toasted Pecan/Coconut Mixture
  • 1 cup whole pecans
  • 2 tablespoons unsalted butter
  • 1/2 tsp. salt
  • 1 cup, sweetened flaked coconut
Cookie Dough
  • 2 sticks unsalted butter, at room temperature
  • 1.5 cups lightly packed light brown sugar
  • 1/2 cup granulated sugar
  • 2 large eggs
  • 2 teaspoon vanilla bean paste, use vanilla extract as substitution
  • 3 cups all-purpose flour
  • 2 teaspoons baking powder
  • 1.5 teaspoon baking soda
  • 1 teaspoon salt
  • 1 cup dark chocolate chips
  1. Preheat oven to 350 degrees F. Line a rimmed baking sheet with foil.
  2. In a frying pan, melt butter over medium low heat until bubbly and brown.  Add pecans and stir to toast for about 8-10 minutes, until fragrant.
  3. Add coconut and continue to stir until the coconut has toasted, and is fragrant, another 5 minutes.  Turn off the heat and let cool.
  4. In large bowl, using an electric mixer, beat the butter for about 30 seconds until creamy.  Add brown sugar and granulated sugar until smooth and creamed. Beat in the eggs and vanilla until they are combined.
  5. In a separate bowl, mix together the flour, baking powder, baking soda and salt.
  6. Slowly mix in the flour mixture.
  7. Stir in the chocolate chips, toasted pecans and coconut into the dough.
  8. Using a heaping tablespoon measurement, scoop out dough onto baking sheet and bake for about 14 to 15 minutes, until golden brown.
  9. Transfer to a wire rack to cool completely.

Peanut Butter Pretzel Truffles

December 13, 2012

DSC_2460

The original recipe for these was called “Chubby Hubby Truffles.”

DSC_2447

DSC_2448

You know, like the Ben and Jerry’s ice cream flavor.


DSC_2452


DSC_2470

Oh, sorry!  I didn’t think I needed to say any more.


Peanut Butter Pretzel Truffles (recipe from Culinary Concoctions of Peabody)

2 cups pretzel sticks, not packed in
1 cup creamy peanut butter
1 tbsp. unsalted butter, at room temperature
2 tbsp. golden syrup (light corn or maple syrup will also work)
¼ cup malted milk powder
½ tsp. vanilla bean paste (or extract)
3 tbsp. powdered sugar

For Coating
1 cup semisweet chocolate chips
1 tbsp. vegetable oil

For topping:
pretzel stick pieces
½ cup peanut butter chips

Using a food processor pulse together the pretzel sticks, peanut butter, butter, golden syrup, malted milk, vanilla bean paste, and powdered sugar until it all comes together and forms a thick paste.  If it seems too crumbly or dry, add a tablespoon or two of milk.

Using a tablespoon measurement, scoop and roll into balls.  Place on a baking sheet lined with waxed paper and place in refrigerator for about 30 minutes.

To make coating, place chocolate chips and oil in a bowl and microwave in 30 second intervals until melted and smooth, making sure to stir between each interval.  Using a fork, dip each peanut butter ball into the chocolate, rolling around to ensure that it is evenly and thoroughly coated.  Place each truffle back onto the wax paper lined baking sheet, and back in the refrigerator for 30 minutes.

In another bowl, melt the peanut butter chips the same way as the chocolate chips.  Place in a ziplock bag or piping bag, cut off a tip, and pipe a dollop of melted peanut butter chips onto each truffle.  Top with a pretzel piece.